For years I’ve used Godox flashlights and triggers for my work. While the products are generally reliable, the firmware update process for Godox can be a bit tricky especially for Mac users. Certain models only have the official Godox Launcher (firmware installer) available for Windows, while some of the models must be connected to Mac through the USB-A cable in order for the Godox Launcher to recognize the Godox device. Yea, I took quite awhile to figure out the firmware update procedures for different Godox devices due to such inconsistent behaviours, and I believe this post shall help some of you as well.
Disclaimer
- This post isn’t an official procedure nor is it associated with Godox;
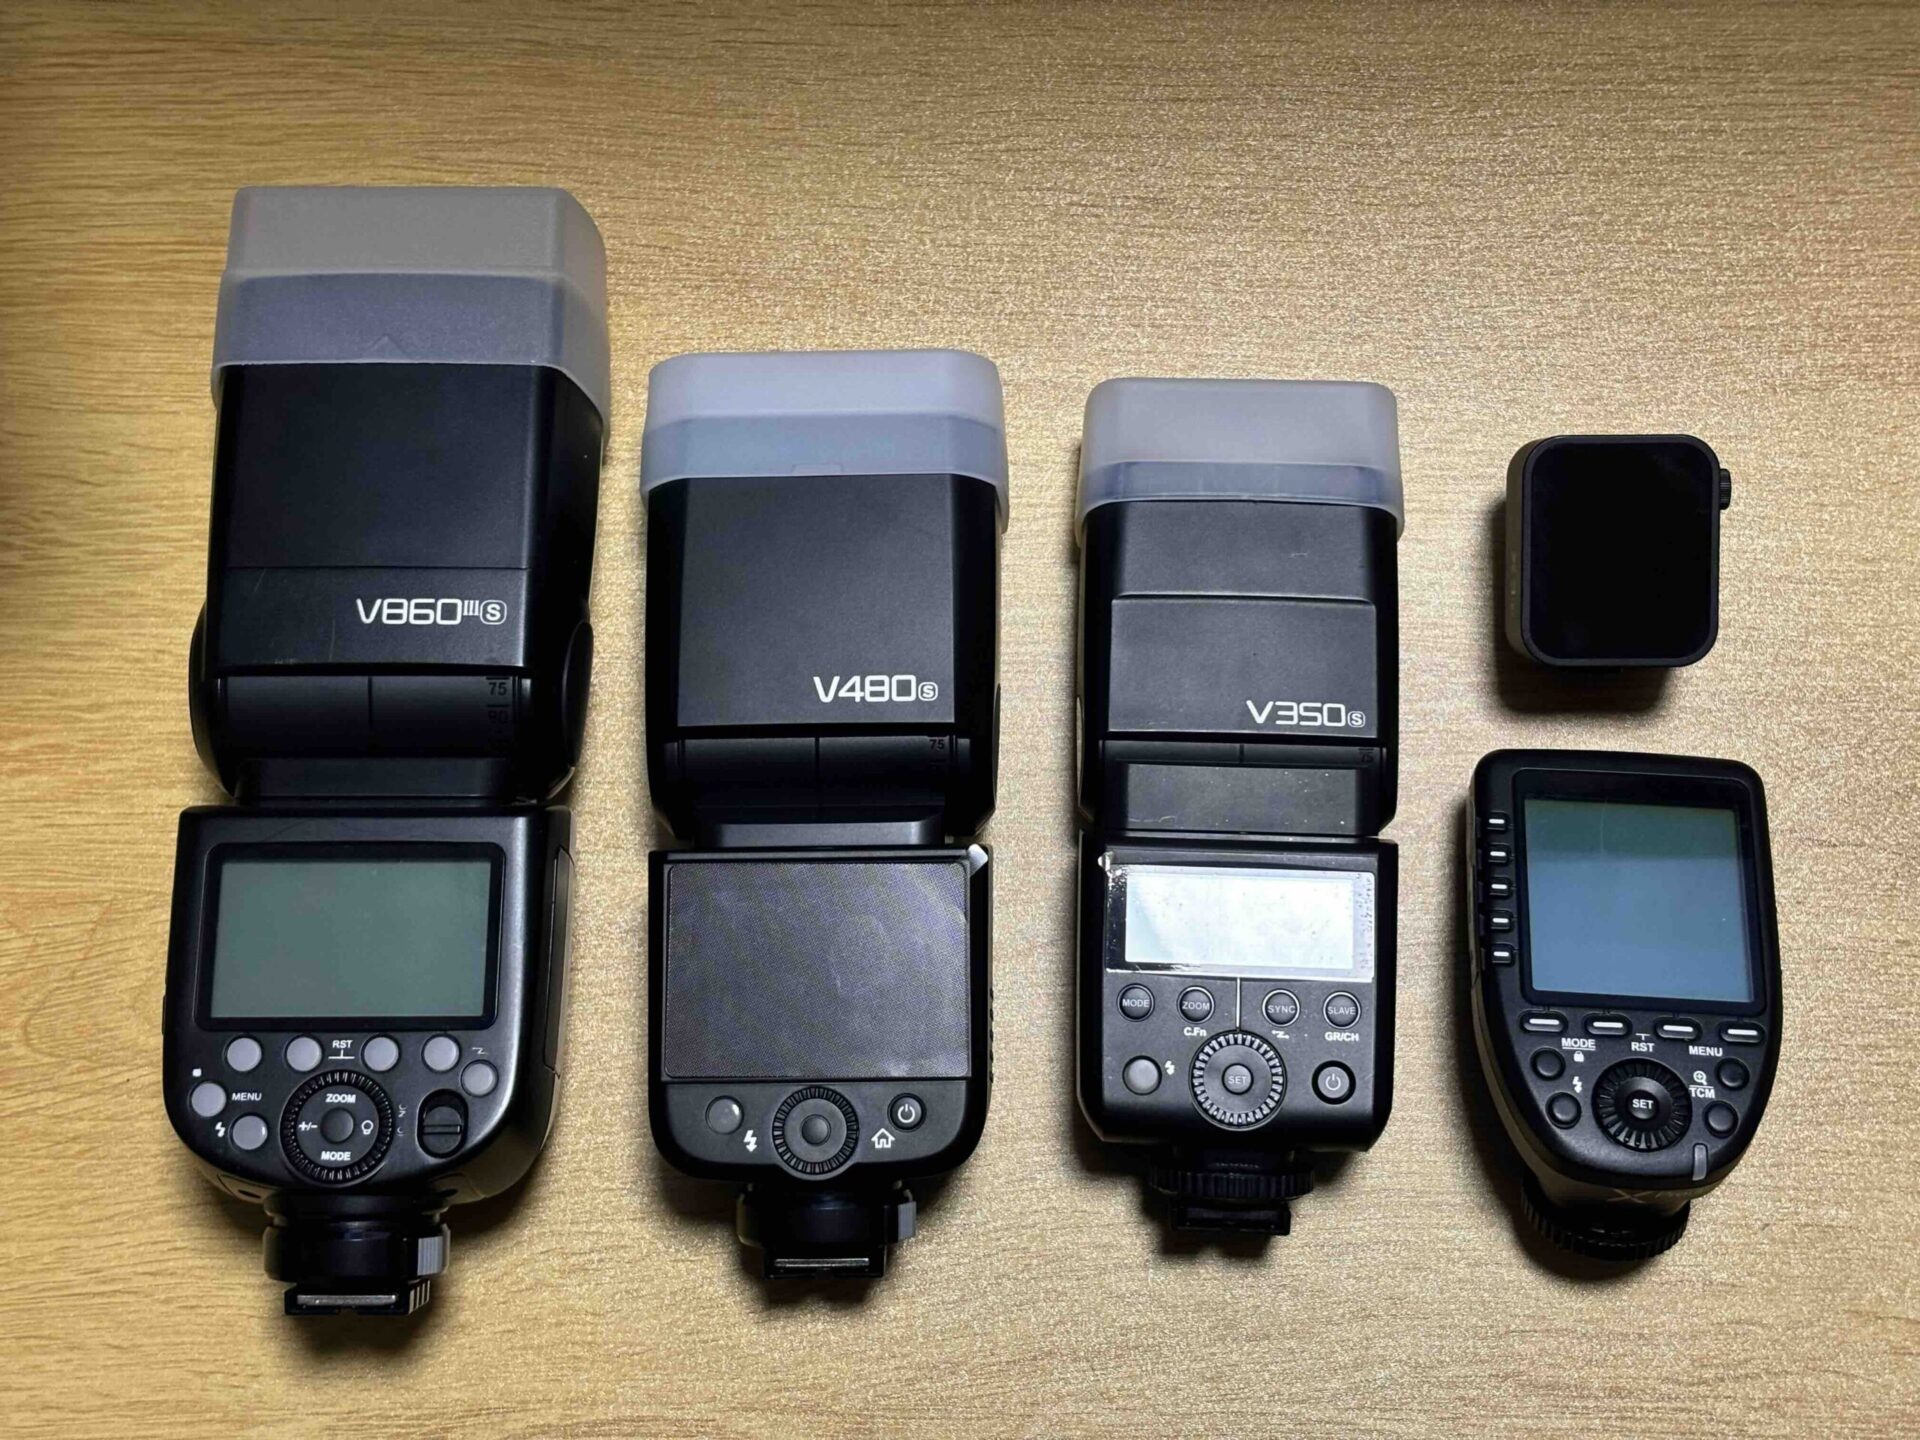
- The firmware update procedures in this post have only been tested on my own Godox devices (V350S, XproS, V480S, V860IIIS, X3S) and may not guarantee to work for different models;
- Please proceed the firmware update with caution and at your own risk;
- Please always refer to Godox official site for the latest firmware version and instructions.
Prerequisites
- You have to be comfortable to use the Mac’s Terminal to install third-party tools (homebrew, unar, dfu-util);
- Know your Godox product model in order to download the applicable firmware;
- Identify the Godox Launcher version (G1, G2, or G3) to be used:
- The downloaded firmware shall have a PDF instruction to indicate the Godox Launcher version;
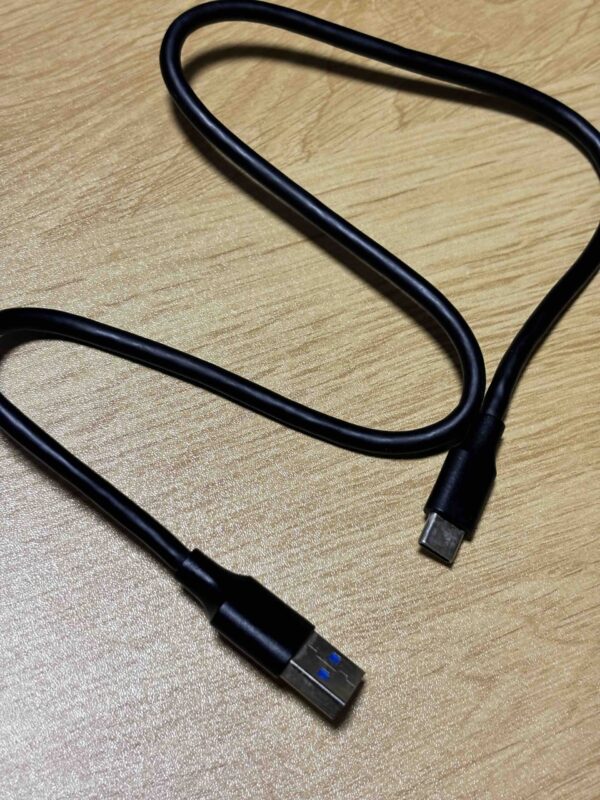
- The compatible USB cable (usually comes with the Godox device);
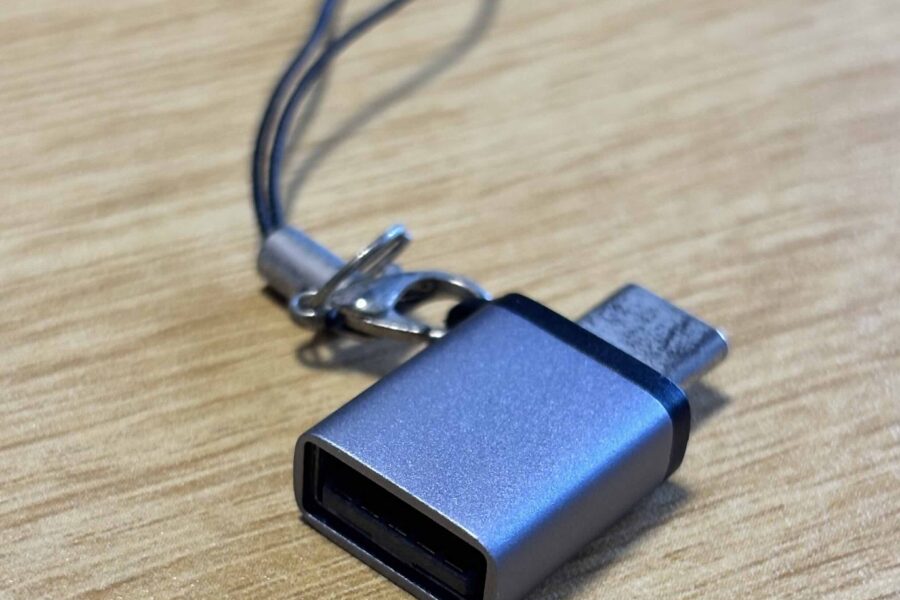
- USB-C to USB-A adapter or USB hub, if your Mac only has USB-C port available.
What Is Covered In This Post?
- Summarized Preparation;
- G2 firmware update procedures on Mac:
- Tested with V350S, XproS;
- Godox G2 Launcher only available in Windows thus we need to use the Mac’s Terminal to install third-party tools to update the firmware.
- G3 firmware update procedures on Mac:
- Tested with V480S, V860IIIS, X3S;
- Godox G3 v2.0 Launcher is available for both Mac and Windows.
- Why is G1 firmware update procedures not covered? Because I don’t have the relevant Godox device to test and verify the firmware update.
Firmware Update Summary
If you’re familiar with the Mac’s Terminal and tools like homebrew and dfu-util, then you may skip the subsequent step-by-step firmware update procedures and just simply referring to the table below to prep your Godox devices for the firmware update.
| Model | Connection via USB-A | Power On/Off | Godox Launcher Version |
|---|---|---|---|
| V350S, XproS | Compulsory | Off | G2, only available in Windows. Install VM and Windows or use dfu-util for firmware update in Mac. |
| V480S, V860IIIS | Compulsory | Off | G3 v2.0. Available for both Windows and Mac. |
| X3S | Optional | On | G3 v2.0. Available for both Windows and Mac. |
“Connection via USB-A” – the cable must have the USB-A end to connect your Godox device to your Mac. If your Mac only has USB-C ports available, please use a USB-C to USB-A adapter or a USB hub as the middleman connector.
The Godox X3 trigger is recognisable regardless of the USB cable type (including USB-C to USB-C cable).
“Power On/Off” – whether you must turn off your Godox device before connect it to your Mac, in order for the Godox device to be recognized for firmware upgrade.
You may take the battery out if the Godox device is still not recognizable after power off (except for X3 which requires to be powered on to be recognizable.)
“Godox Launcher Version” – The Godox firmware update installer, the downloaded firmware update instruction PDF shall indicate the Launcher version specifically (G1, G2, or G3).
For your convenience, I extract the compatible Godox devices from the Godox firmware launcher site as the following:
- G1 Launcher – V860II series, TT685 series, X1T (C,N,S only), X1R series (C,N,S only), AD360II, AD600, AD600M;
- G2 Launcher – AD600Pro, AD200, X1T (F,O only), TT350 series, V350 series, Xpro series;
- G3 Launcher – not specifically listed on Godox site. It should be applicable to most of the latest models like V480, V860III, V1, V100, X3, etc.
- Series suffix:
- C – Canon, N – Nikon, S – Sony, F – Fuji, O – Olympus;
- For exmaple, V860IIC mean V860 mark II for Canon.
- Please always refer to the downloaded firmware update instruction PDF for the Launcher version (G1, G2, or G3), in case Godox makes any changes.
Godox G2 Product Firmware Update
For Godox device that requires Godox G2 launcher to update the firmware, such launcher is only available on Windows. For Mac users, you can either install VM and Windows or simply use the dfu-util tool through Mac’s Terminal to update the Godox firmware.
1. Install Homebrew
Homebrew is an open source package manager for Mac and Linux. Please kindly refer to Homebrew official site. According to Homebrew site, you may use one of the following methods to instal the Homebrew:
- Use the .pkg installer
- Open the Mac’s Terminal and enter the command below:
/bin/bash -c "$(curl -fsSL https://raw.githubusercontent.com/Homebrew/install/HEAD/install.sh)”2. Install the unarchiving tool
You may skip this step if your Mac has installed similar tool to handle “.rar” archival.
Enter the command below through the Mac’s Terminal to install the unarchiving tool:
brew install unarthe “unrar” is no longer available in Homebrew, thus we use “unar” instead.
3. Install the firmware update tool
Install the firmware update tool (dfu-util) through the Mac’s Terminal:
brew install dfu-util4. Uncompressed your downloaded firmware
Enter the following command to uncompressed your downloaded firmware:
unar [firmware.rar]You may drag your downloaded firmware into the Mac’s Terminal after the command “unar ” (there is a space after unar), it will automatically populate the correct path in the Terminal.
You shall see the following details in the Terminal once the extraction is completed.

The extracted firmware and instruction PDF are located at your user root directory by default, e.g., “/Users/You/Firmware_Folder”. Yes, you may specify a dedicated directory with the following command:
unar -o [output_directory] [firmware.rar]5. Connect your Godox Device to your Mac
Use the dedicated USB cable which comes with your Godox device to connect your Godox device to the Mac. Verify the device connection by entering the following command in the Mac’s Terminal:
dfu-util -lYou should see the connected device info like the following (look for the “Found DFU……”):

Pay attention to the “alt=0”, the “alt” value will be used in the next step.
6. Install the extracted firmware
Enter the following command in the Mac’s Terminal,
dfu-util --alt 0 --download [firmware.dfu]Verify your device info “alt=0” from step 5 above, enter the value x “–alt x” accordingly as the alt value might be different for your devices. You may drag the “.dfu” firmware directly to the Terminal, it will automatically populate the correct path accordingly.
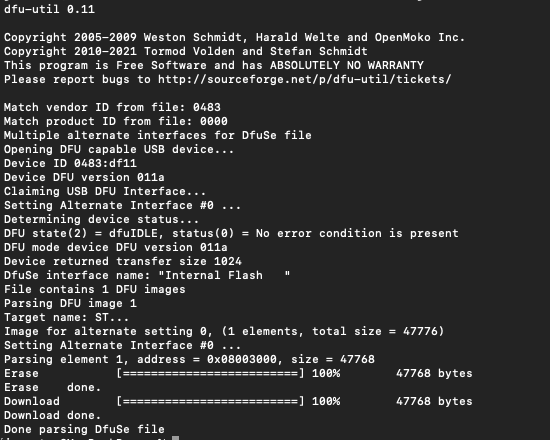
7. Update Successfully
The firmware update shall be successful with the following information in the Terminal.
Godox G3 Product Firmware Update
Godox G3 launcher is more straightforward to deal with. We just have to enable the Mac’s security settings and prep the Godox device according to the summarized table as listed earlier.
1. Launch The Godox G3 Launcher
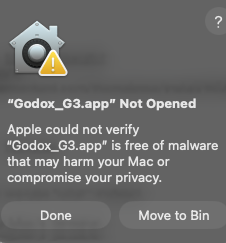
Download and open the G3 Launcher. The Mac likely will block the G3 Launcher, click “Done” instead of “Move to Bin”.
2. Unblock The Godox G3 Launcher
Go to your Mac’s Settings > Privacy & Security.
Scroll to the bottom and you should see the blocked “Godox v2.0.app”, click “Open Anyway”.
If you see “Godox_G3.app” then it means you have downloaded the older version, please download the latest G3 launcher.

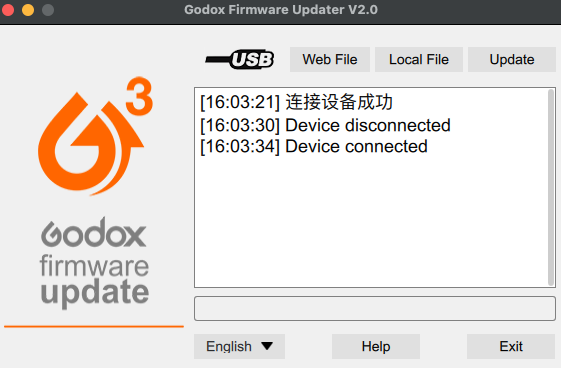
3. Connect Godox Device to Mac
Power off your Godox device (or power on for Godox X3 trigger), and connect it to Mac with the USB cable comes with the Godox device. The G3 Launcher should show “Device Connected”.
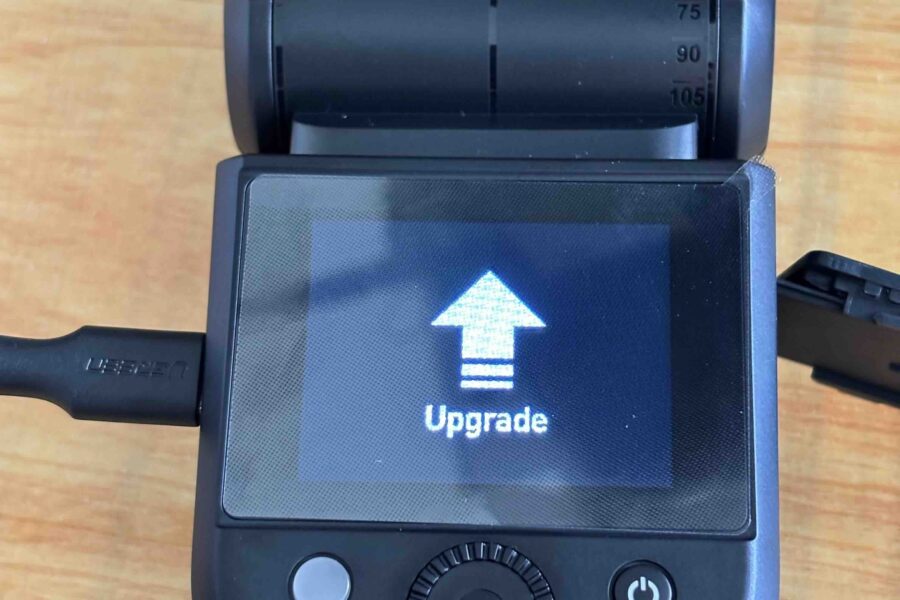
For touchscreen devices like V480 and X3 trigger, the device shall show “Upgrade”.
4. Load The Downloaded Firmware
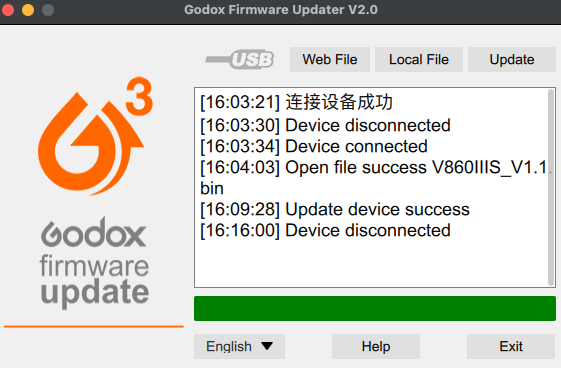
Click “Local File” and browse the downloaded firmware, it should show “Open file success Godox_Device_Model_Version.bin”.

5. Update The Firmware
Click “Update”, you should see the green progress bar moving at the bottom.
When the firmware upgrade is completed, the G3 Launcher shall show “Update device success”:
- For touchscreen devices like V480 and X3 trigger, the device will only show “Upgrade” on its screen even after the upgrade is completed;
- You may safely remove the Godox device, the G3 Launcher shall show “Device disconnected”
Final Thoughts
Godox has produced many amazing products at an attractive price, but seems to at the cost of sacrificing the firmware update experience. It might be costly to enhance the hardware/software implementation like making the Godox device recognizable regardless of the USB types (like the X3 trigger), but it should be little to no cost to write more detailed firmware update procedures – indicate the necessarity of using USB-A cable, power off the device before the connection, etc.
Luckily, Godox devices don’t require frequent firmware update, and we have a helpful community that always provide workaround solutions. Hope this post has helped you in updating your Godox device ‘s firmware 😉

Leave a Reply