
The Sony A7 II is hot stuff since Sony introduced the Sony A7 II in December 2014. I did a brief hands-on review of the Sony A7II, covering some hands-on impressions of the Sony A7 II. If you have not heard about the Sony A7 II or want to know more about it, this is the full review.
Introduction
The Sony A7 II is the first full-frame interchangeable-lens camera with 5-axis in-body image stabilizer. It is the most desired feature that we have seen on the Olympus OM-D E-M5, and Sony has managed to get this technology into its camera. The main difference between the Olympus EM-D 5 and the Sony A7 II is their image sensor size. The Olympus OM-D E-M5 is a micro 4/3 camera, while the Sony A7II is a full-frame camera.

The Sony A7 II uses a 24.3 MP full-frame “Exmor” CMOS sensor. It features the same BIONZ X™ image processing engine as the first generation A7, which delivers stunning details and low noise output. The lens mount is the same E-mount that we had seen on Sony’s mirrorless camera series, but it is more sturdy for better handling of larger/heavier lenses.
Pros & Cons
- Full alloy-magnesium built body
- Better ergonomic, larger, and more comfortable grip
- More intuitive and natural position for the shutter release button
- Up to 12 customizable buttons
- Powerful and smart 5-axis in-body image stabilizer
- Wired and wireless remote control
- 100% coverage and excellent quality of EVF
- Dust and moisture resistance
- NFC and Wifi capability
- Heavier (compared to first-generation A7 series)
- More power consumption (230-280 shots per fully-charged battery, with mix-usage of EVF and LCD)
Look & Feel
The first impression of the Sony A7 II is…. rock solid.
The Sony A7 II body is fully built by alloy magnesium, and it is dust and moisture resistant compared to A7 plastic-mixture body. The lens mount also has a much better-built quality to handle larger/heavier lenses.

The various buttons on the camera are built as solid as the camera body, the battery cover, memory card cover, and the ports cover are still made of plastic. Still, the quality has been improved as well.
The Sony A7 II gives a high-end professional look and feels by the first touch, and it seems built to last.
Body and Design
The body had been redesigned, Sony had enlarged the grip and shifted the shutter button onto the grip. The new design gives a better and more natural feel for shooting.

There are two customizable buttons, c1 and c2, one mode dial, one exposure compensation dial on the top of the body.
The front and rear dials are well built. They are accessible by a single hand during shooting.
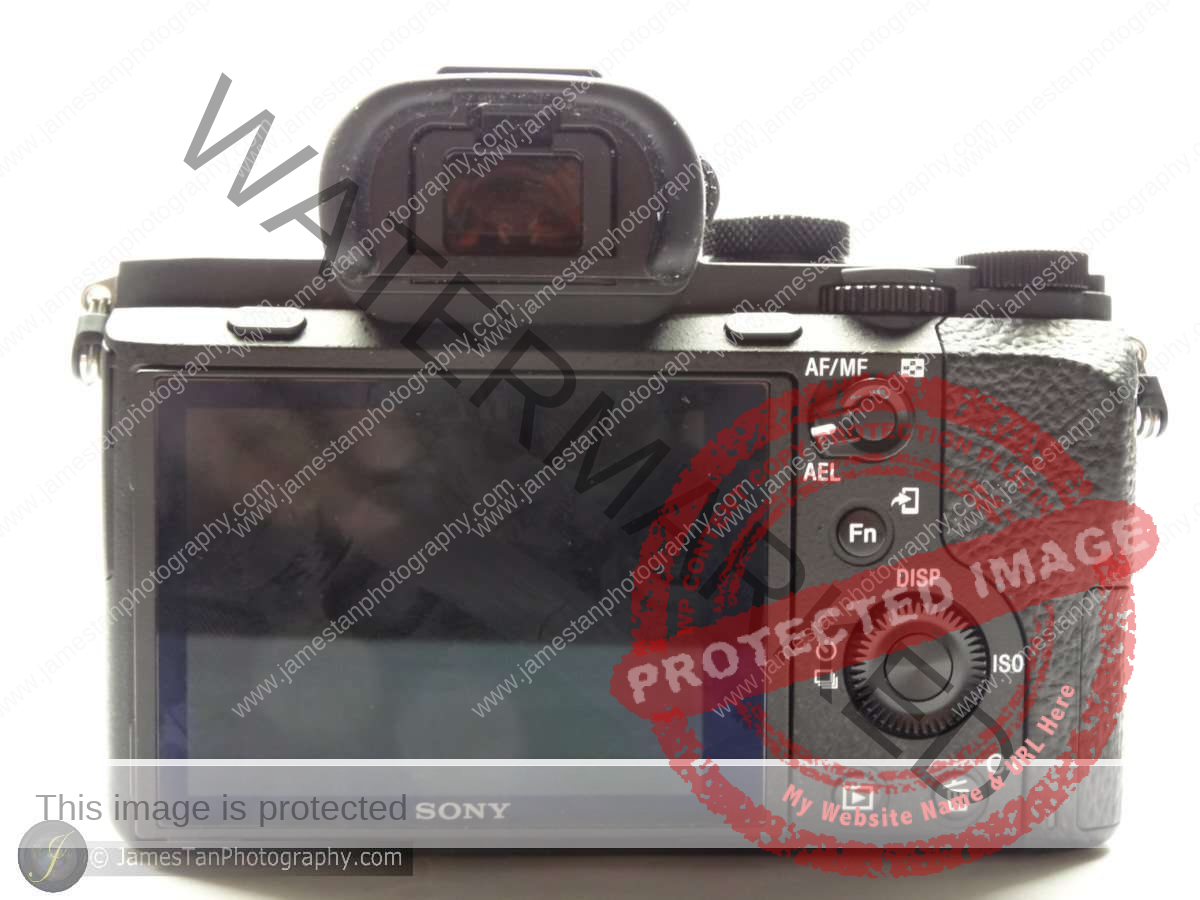
Behind the camera body has a bunch of buttons. The menu button and the C3 button are located on the left and right of EVF, respectively.
Compared to first generation Sony A7, the control wheel does not change the ISO directly. However, you can still assign your preferred functionality to the control wheel as you like.
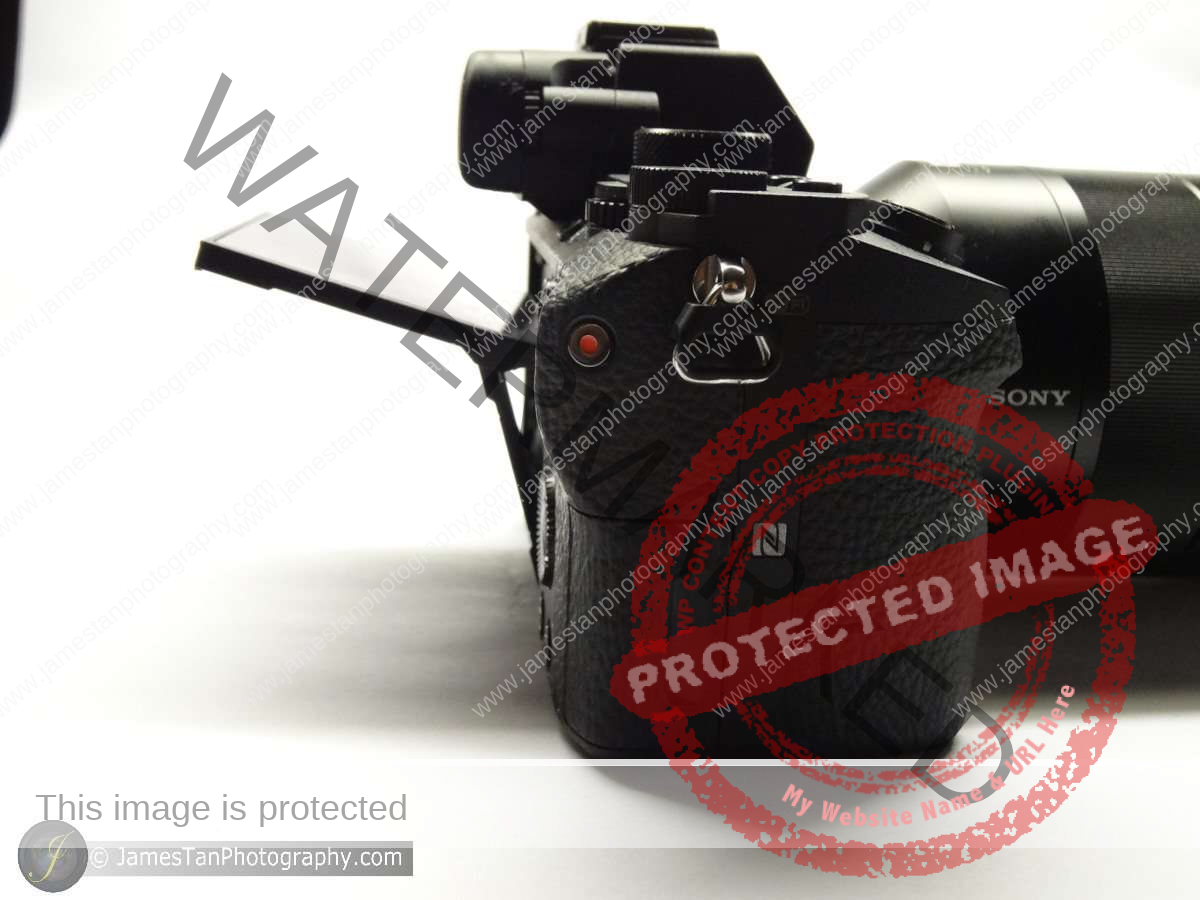

You can tilt the LCD screen upward about 107 degrees and downward about 41 degrees. The movie recording button is located at the right-hand side of the camera body to prevent accidental touch. Still, it causes little inconvenience if you do the movie recording frequently.

The EVF eyecup will block the LCD screen when it is tilted upward. The Sony A7 II allows you to pull it out a bit to avoid the blockage.

The micro HDMI port, micro USB port, and minijack ports are all located at the top-left side of the body.

The battery slot remains at the bottom of the body.

The memory card slot is located at the bottom-right side of the body.
Menu
The menu is similar to the first-generation A7 series. The organization of settings is…. not perfect but acceptable.


The settings are categorized into six main categories. Some contain up to 9 pages of settings, while others have only 1 page of settings. However, browsing through the menu is pretty straightforward, and the terms used by the settings are unambiguous.
Features
Shake? Shake!
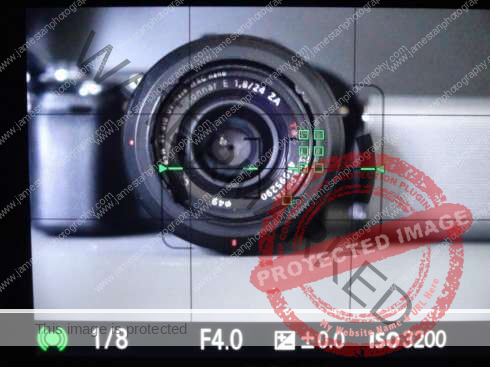
The most important feature/sell point of the Sony A7 II is the 5-axis image stabilizer. Sony claims that it provides 4.5 stops of efficiency when attaching the Sony A7 II with the SEL55F18Z.
How true is it? Let’s see the testing comparison below.
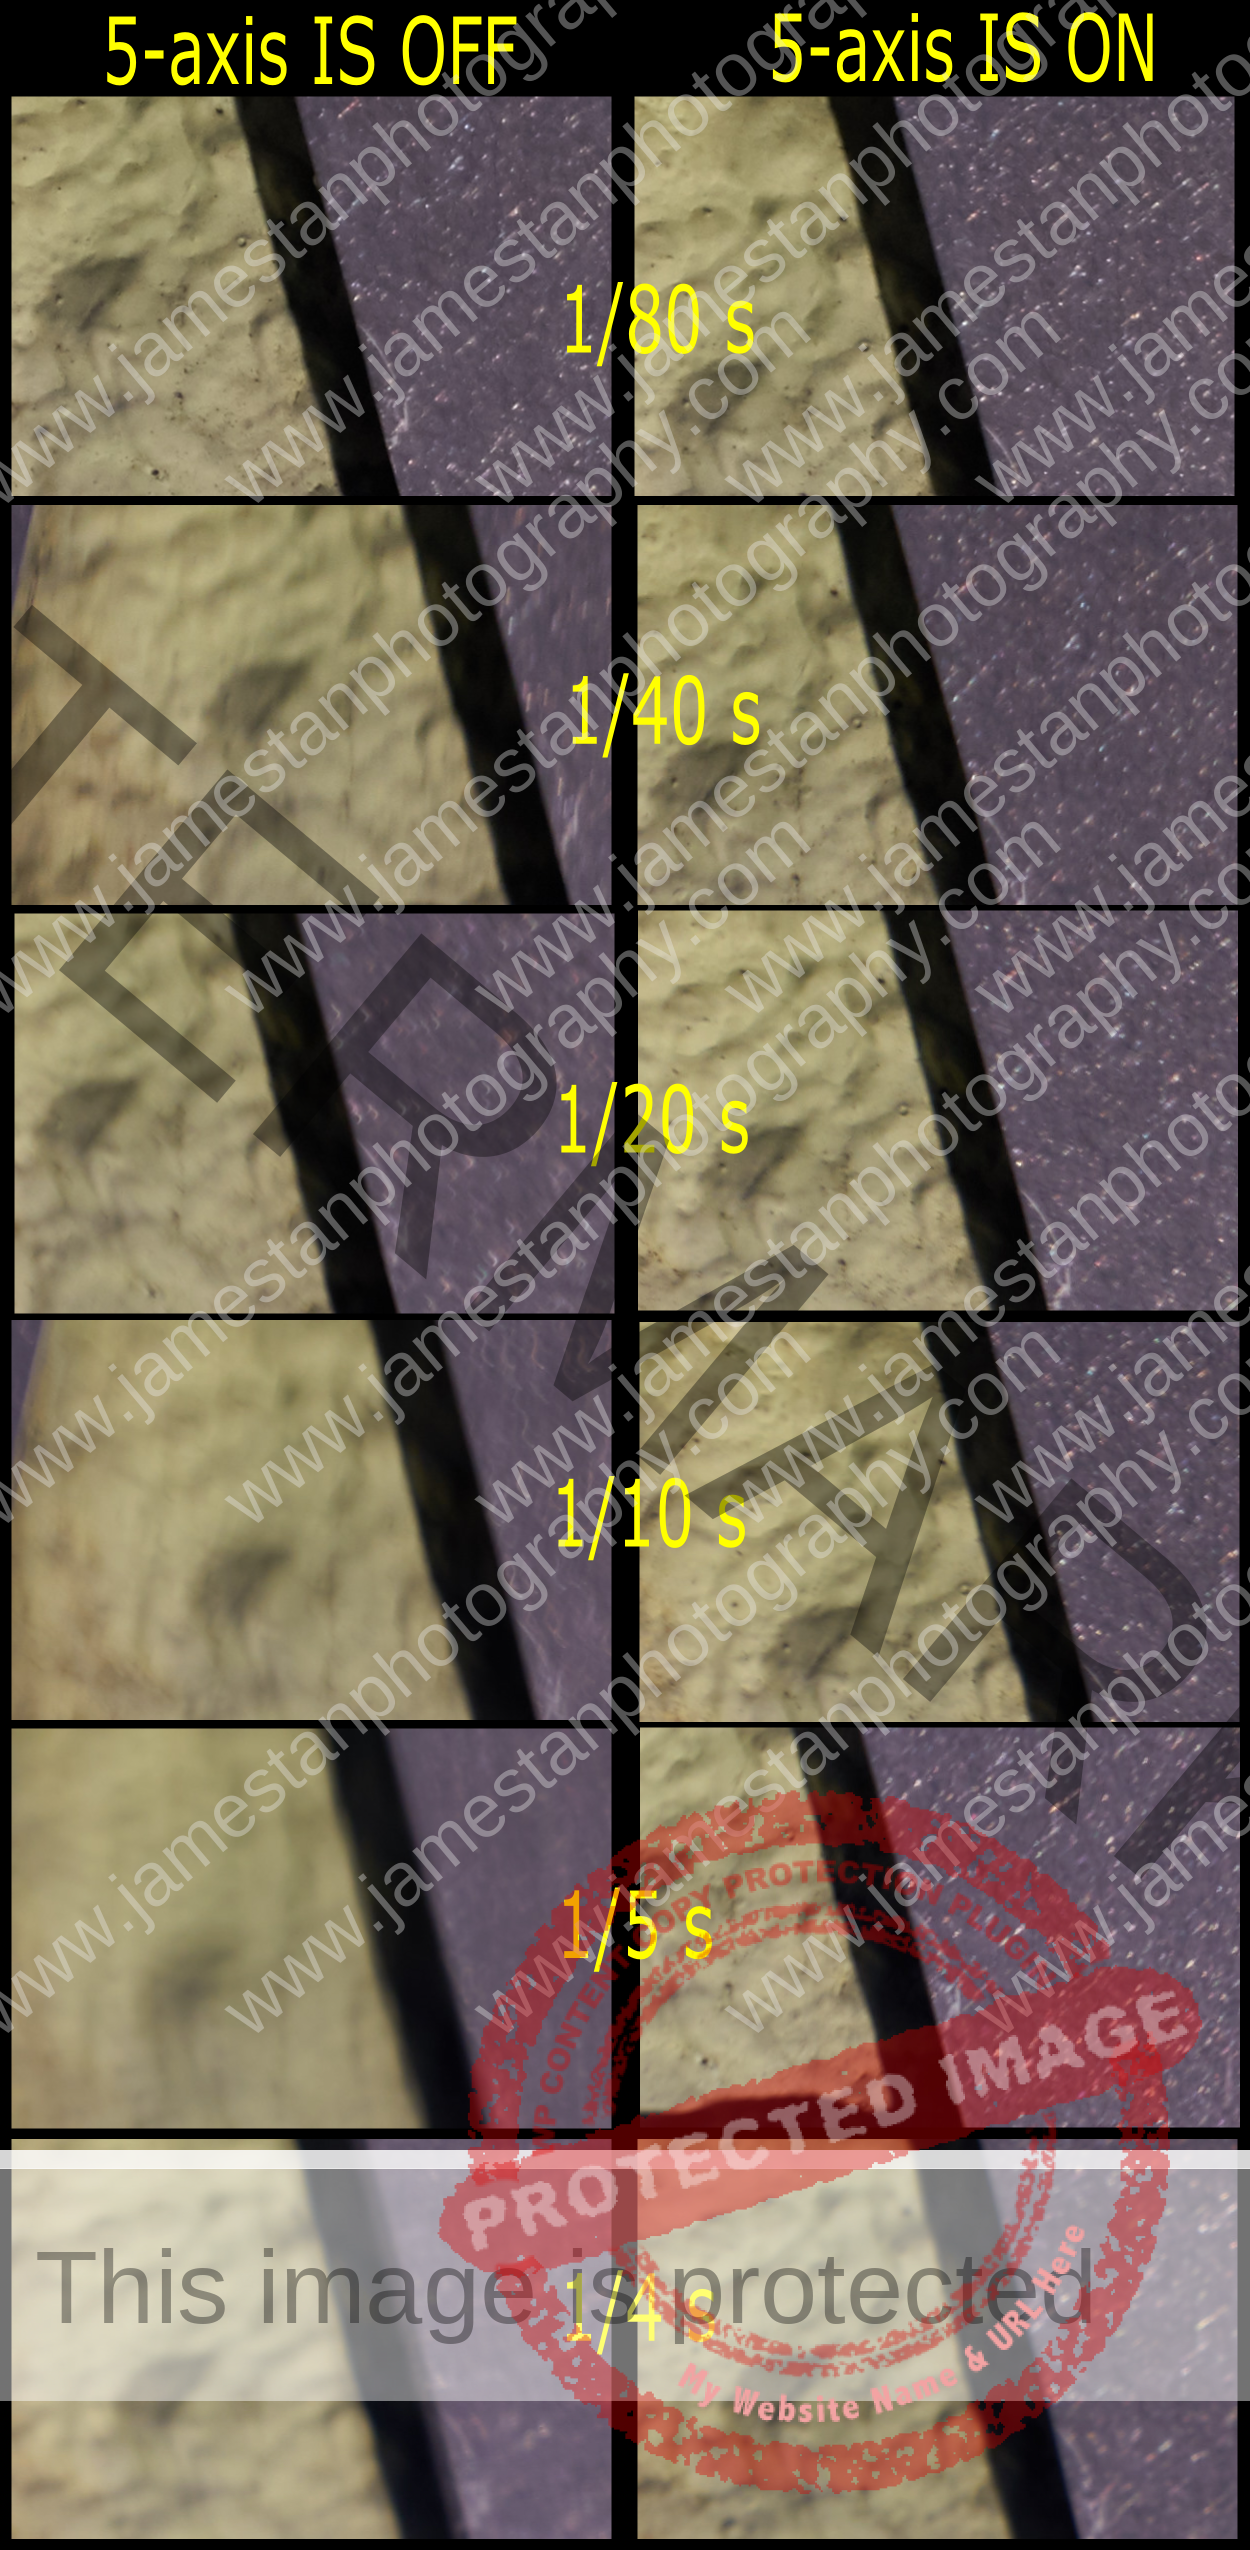
I tested the Sony A7 II’s 5-axis image stabilizer with the SEL2470Z at 70 mm hand-held. From the comparison shots above, the Sony A7II’s proved that its 5-axis image stabilizer is very effective up to 4.5 stops. However, taking a blur-free image slower than 1/10s (3 stops slower) requires very stable holding and a still object.

Besides, Sony implements the 5 axis image stabilizer “smartly”. Why do I say so? The first reason is that the 5 axis image stabilizer is compatible with Sony’s native lenses, including Sony’s Optical Steady Shot (OSS, an in-lens image stabilizer). If you intend to use any non-native lens on the Sony A7 II, you can still enjoy the Sony A7 II’s 5-axis image stabilizer by manually inputting the focal length of the lens you are using. You can set the focal length from 8mm to 1000mm!


The second reason is, you do not have to turn off the 5 axis image stabilizer when using the Sony A7 II on a tripod. Yes, the Sony A7 II’s 5 axis image stabilizer will not cause any blurry effect when used on a tripod. You may see the comparison shots above.
Everything is Within Your Control
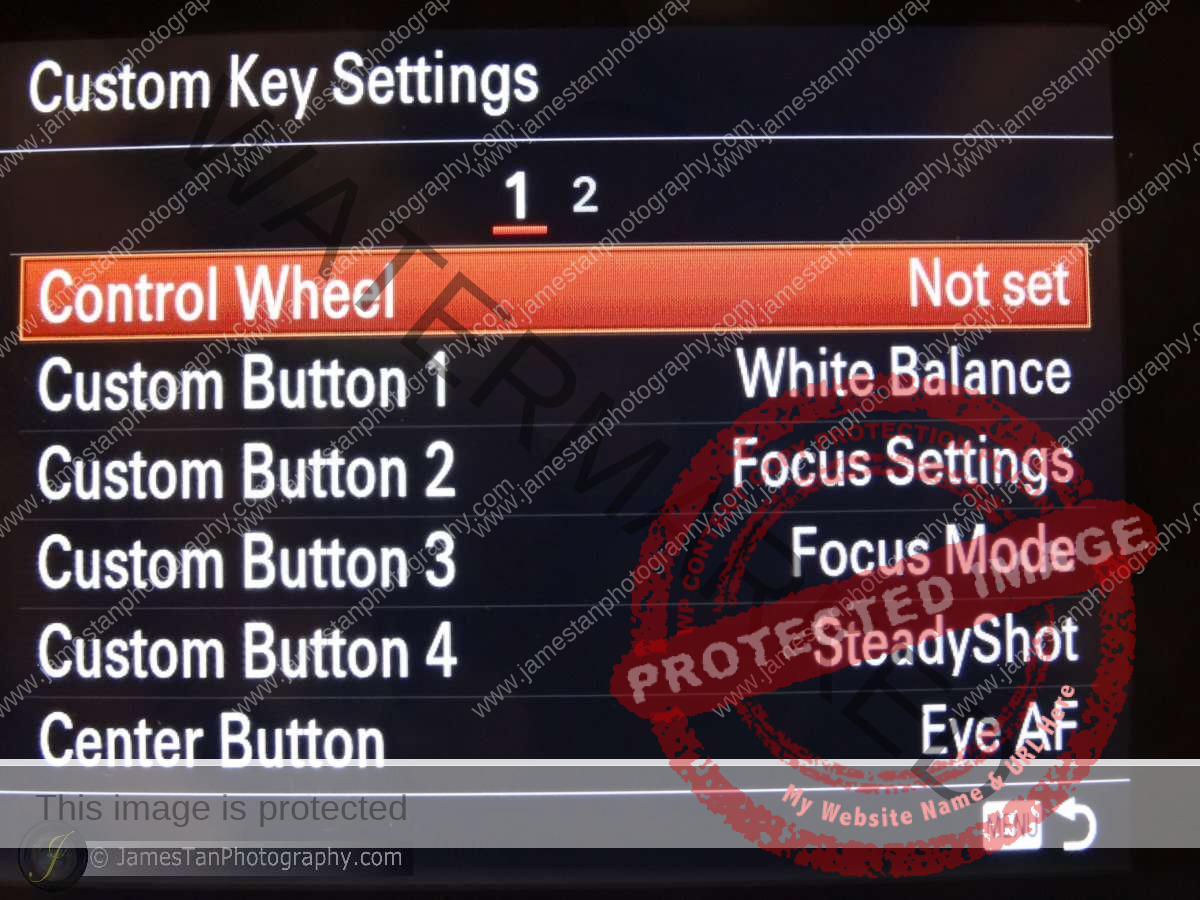
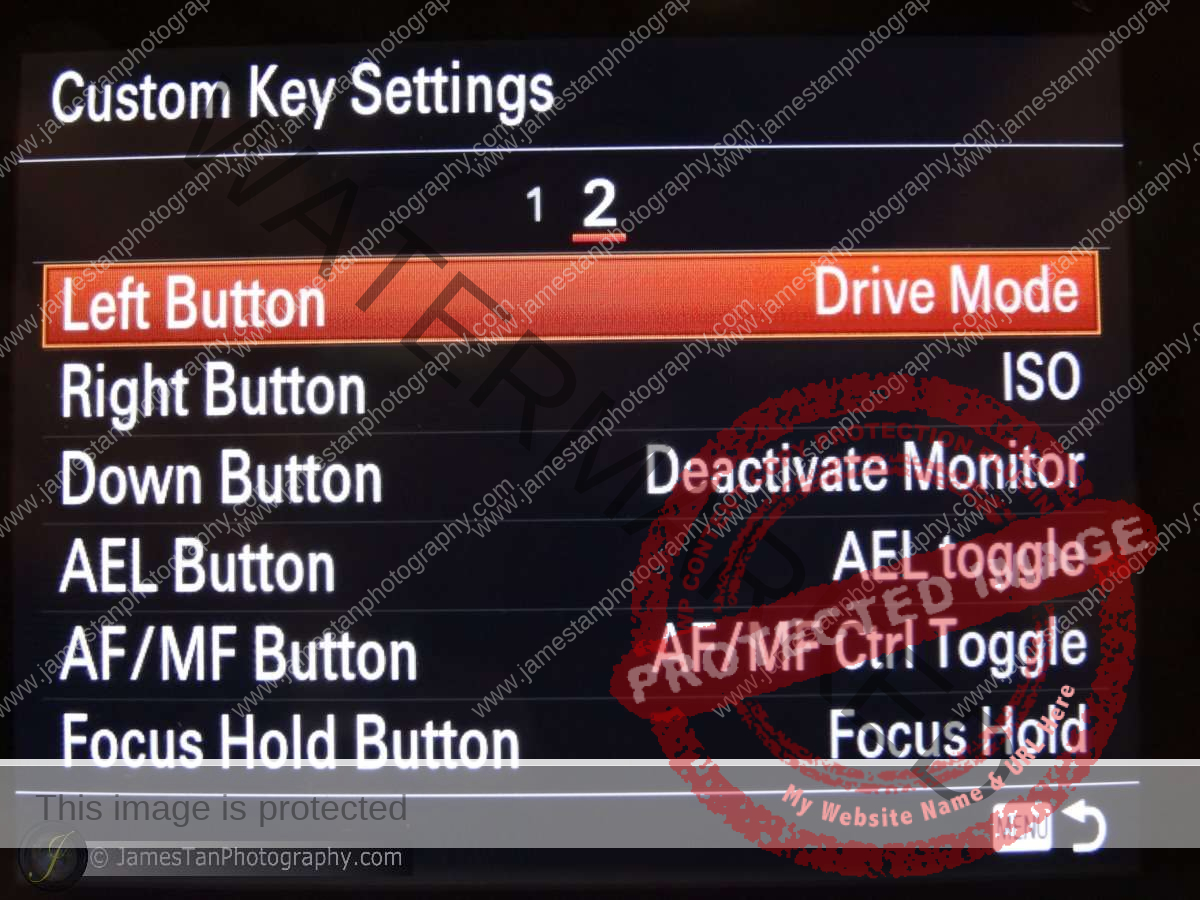
You can customize almost every button on the Sony A7 II, but you can only assign specific functions to certain buttons. There is a function I like pretty much – the “Deactivate Monitor”. It turns off the live view but still shows the aperture, shutter speed, and ISO settings on the LCD screen. It is a neat feature that allows you to shoot in some dark scenes without distracting others (you can turn on only the EVF, but it consumes much more battery!), and it preserves your battery for more shoots.
Need More Controls?

If the physical buttons are still not enough for your customization, you can setup up to 10 custom functions to a virtual quick adjustment panel and trigger it by the Fn button.
Remote Control
You may control your Sony A7 II either by USB wired remote control or by wireless remote control.
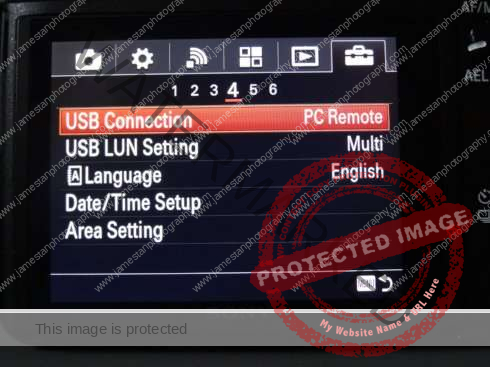
In order to use the USB remote control, you have to set the “USB Connection” to “PC Remote”.

The “Remote Ctrl” function in the menu is referring to the wireless remote control. If you are one of the old Sony NEX users, you will notice that the remote control function is taken out from the drive mode. It was located together with other shooting modes in the older NEX series. It is good news because you can finally use the wireless remote control to trigger the continuous bracket shoot and other shooting modes.
Professional Video Recording

The Sony A7 II is capable of recording movies in full HD XAVC-S format. It uses the advanced S-log2 gamma to capture a wide dynamic range, which provides a more flexible tone adjustment in your video. You need a minimum of Class 10 SDXC memory card to do the recording in XAVC-S format.
Camera Performance
Focus System
As standard in Sony’s interchangeable lens camera, there are four focusing modes, AF-S (single autofocus), AF-C (continuous autofocus), DMF (direct manual focus), and MF (manual focus) in Sony A7 II. In fact, the DMF is autofocus, but it allows you to autofocus on your subject first and then manually adjust the focusing for fine-tuning (that’s why it is called the direct manual focus).

The Sony A7 II implements the improved auto-focusing algorithm from the Sony a6000. However, the Sony A7 II only has 117 phase-detection points compared to Sony a6000’s 179 points (the phase-detection area only covers the center of the frame instead of fully covered). Therefore, do not expect it as fast as the blazing fast AF on the a6000.
When using the AF-C mode (Continuous Auto-Focus), you will see some green squares blinking and changing dynamically. The initial AF lock-on is not guaranteed 100% accurate, but the AF tracing is very fast and accurate once it has locked on the subject properly.

I tested the Sony A7 II’s AF-C performance by taking a series of burst shots of a driving car, and the result is excellent. From the burst shots above, you can see that the AF system focused the car’s lamp properly in every shot. As I mentioned earlier, it needs some time to lock on your targeted subject initially. So, it might let you down if you hope it can instantly lock your subject properly when you use it as a snap-and-shot.
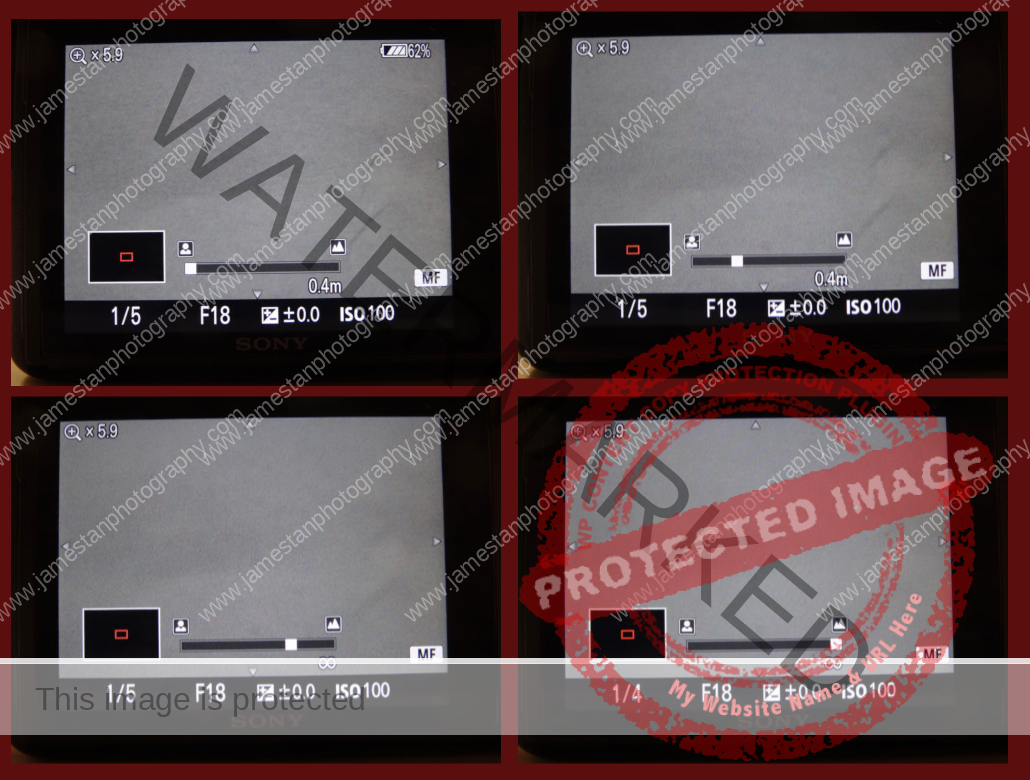
Focus Distance Indicator
Most of the native E-mount lenses use electronic-wired focusing. Sometimes, it causes some issues when manual-focusing in the dark as you cannot tell where it is focusing. The Sony A7 II provides an on-screen focusing indicator to overcome for the problems, but it also has some imperfections. The indicator has some “range” when focusing at minimum/infinite distance. It is annoying because the “range” focuses differently, although the focus distance is the same. Therefore, using the peaking level and MF magnifying is recommended to ensure that you get your subject properly in focus.
Using the AF-C mode gave a higher accuracy and higher rate of keeping the subject sharply focused than using the AF-S and DMF mode. If you need a fast response or do not have a chance to reshoot your scene (such as street/event photography), switch to the AF-C mode, and you are ready to go 😉
ISO Performance
RAW vs JPEG
The ISO performance of the Sony A7 II is good but not as excellent as the A7S. It provides ISO sensitivity as low as ISO 50 and up to ISO 25600, and you are allowed to step up 1/3 stop every time in manual ISO mode.
The center of the shot above is cropped for ISO comparison as below. We will see how well the Sony A7 II controls the noise level while retaining the details (look at the pattern in the alphabets) in high ISO.
The RAW does not have any noise reduction, while I apply the default noise reduction settings in Capture One Pro 8 in the JPEG. You may click the image below for 100% cropped view.

In the RAW comparison, the Sony A7 II introduces very subtle noise in the ISO 1600 and ISO 3200. There is slightly more noise in ISO 6400, and the noise level is boosted a lot but retains a reasonable amount of details (look at the pattern in the alphabets) in ISO 12800 and ISO 25600.
In the JPEG comparison, the image has very little noise and retains great details up to ISO 3200. The details are lost significantly from ISO 6400 (look at the pattern within the alphabets) onward, but the noise level is still acceptable even in ISO 12800 after the noise reduction.
Auto ISO Mode
If you do not know how to/do not want to deal with the ISO settings, you can use an Auto ISO mode.

Note that there is a little confusion in the settings, the “Auto ISO” (as shown above) icon is multi-frame noise reduction, while the “Auto” icon is the actual Auto ISO (as shown below).

In Auto ISO mode, it provides the ISO sensitivity range from 100 to 25600 to set the minimum and maximum ISO. You are only allowed to set up full stop ISO, e.g., 100, 200, 400, 800, 1600, etc., while the camera system can choose the 1/3 stops ISO, e.g., 125, 160, 250, etc., within your indicated ISO range.
The ISO performance by Sony A7 II is great but not as impressive as the mighty Sony A7S. I prefer to set ISO 6400 as the maximum ISO in Auto ISO mode, and it is the highest ISO I could recommend for the Sony A7 II. The Sony A7 II sets 1/60s as the default minimum shutter speed before raising the ISO. Once the necessary light is beyond the maximum ISO and 1/60s combination, it will slow down the shutter speed.
Battery Life
The battery life is always the major issue for a mirrorless camera, same here for the Sony A7 II. A fully-charged battery can only last for 230 – 280 shots with mix-usage of EVF and LCD screen. The good news is, it uses the same battery model (NP-FW50) as other E-mount series cameras. Therefore, you may already own a few extra batteries as a backup.
Sample Shots
I took the following shots with the Sony A7II, and post-processed using the Capture One Pro 8 with minor adjustments.


Bottom Line
I love the built quality and the image quality produced by the Sony A7 II. Although the 5 axis in-body image stabilizer is as efficient as Sony’s claim, it cannot help much if you shoot at a moving subject. You still need the minimum shutter speed according to the moving subject to get blur-free results.
The full alloy-magnesium body results in 130 g heavier, and the difference becomes more noticeable when you are holding it to shoot for a whole day. The shutter sounds more “gentle” now. There is an e-front curtain shutter function available but not the silent shutter we had seen in the A7S. The improved auto-focusing algorithm does not boost the Sony A7 II to the same level as the Sony a6000, but it is still fast enough and accurate for daily usage.
Overall, the Sony A7 II is a top and solid camera in both built quality and image quality. It is smaller, lighter, and much cheaper than other company’s full-frame options. You might be holding back by the limited native E-mount FF lenses, but more high-end Zeiss/G lenses are available soon. Besides, you can also use an adapter for your legacy manual lenses and enjoy the 5-axis image stabilizer of the Sony A7 II. So whether the Sony A7 II fit your need, it is all on your call 😉
That’s all for the Sony A7II review. I hope you enjoy it and happy shooting. Cheers!
Leave a Reply