
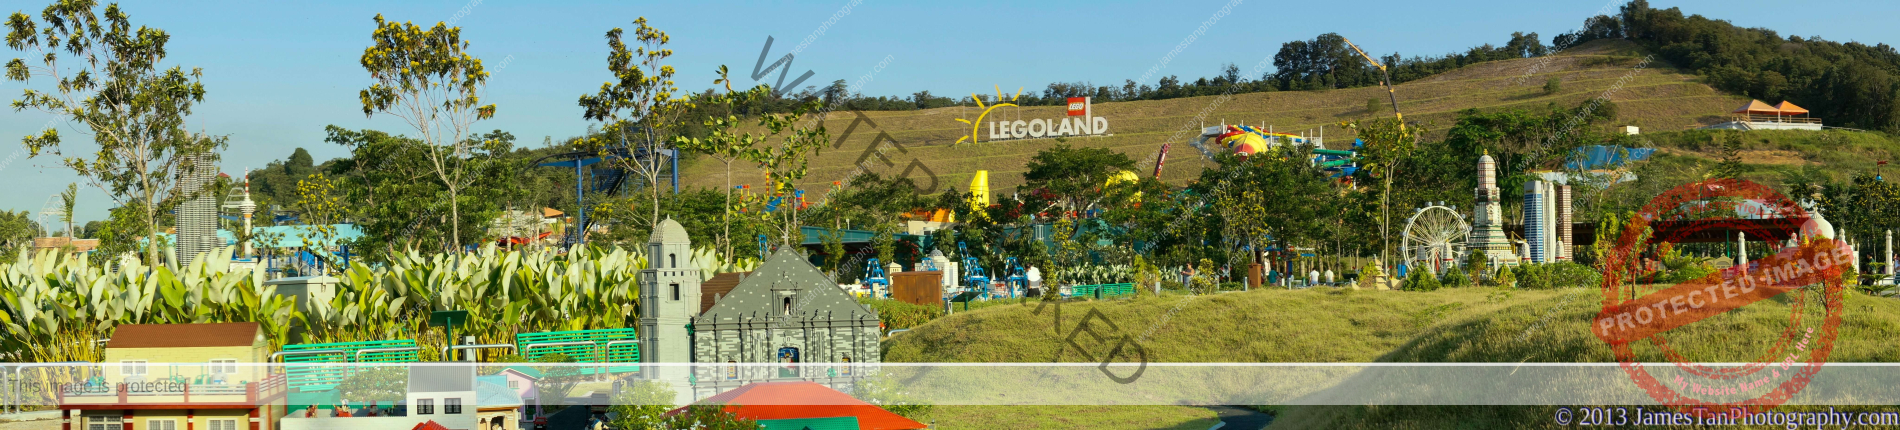
Introduction
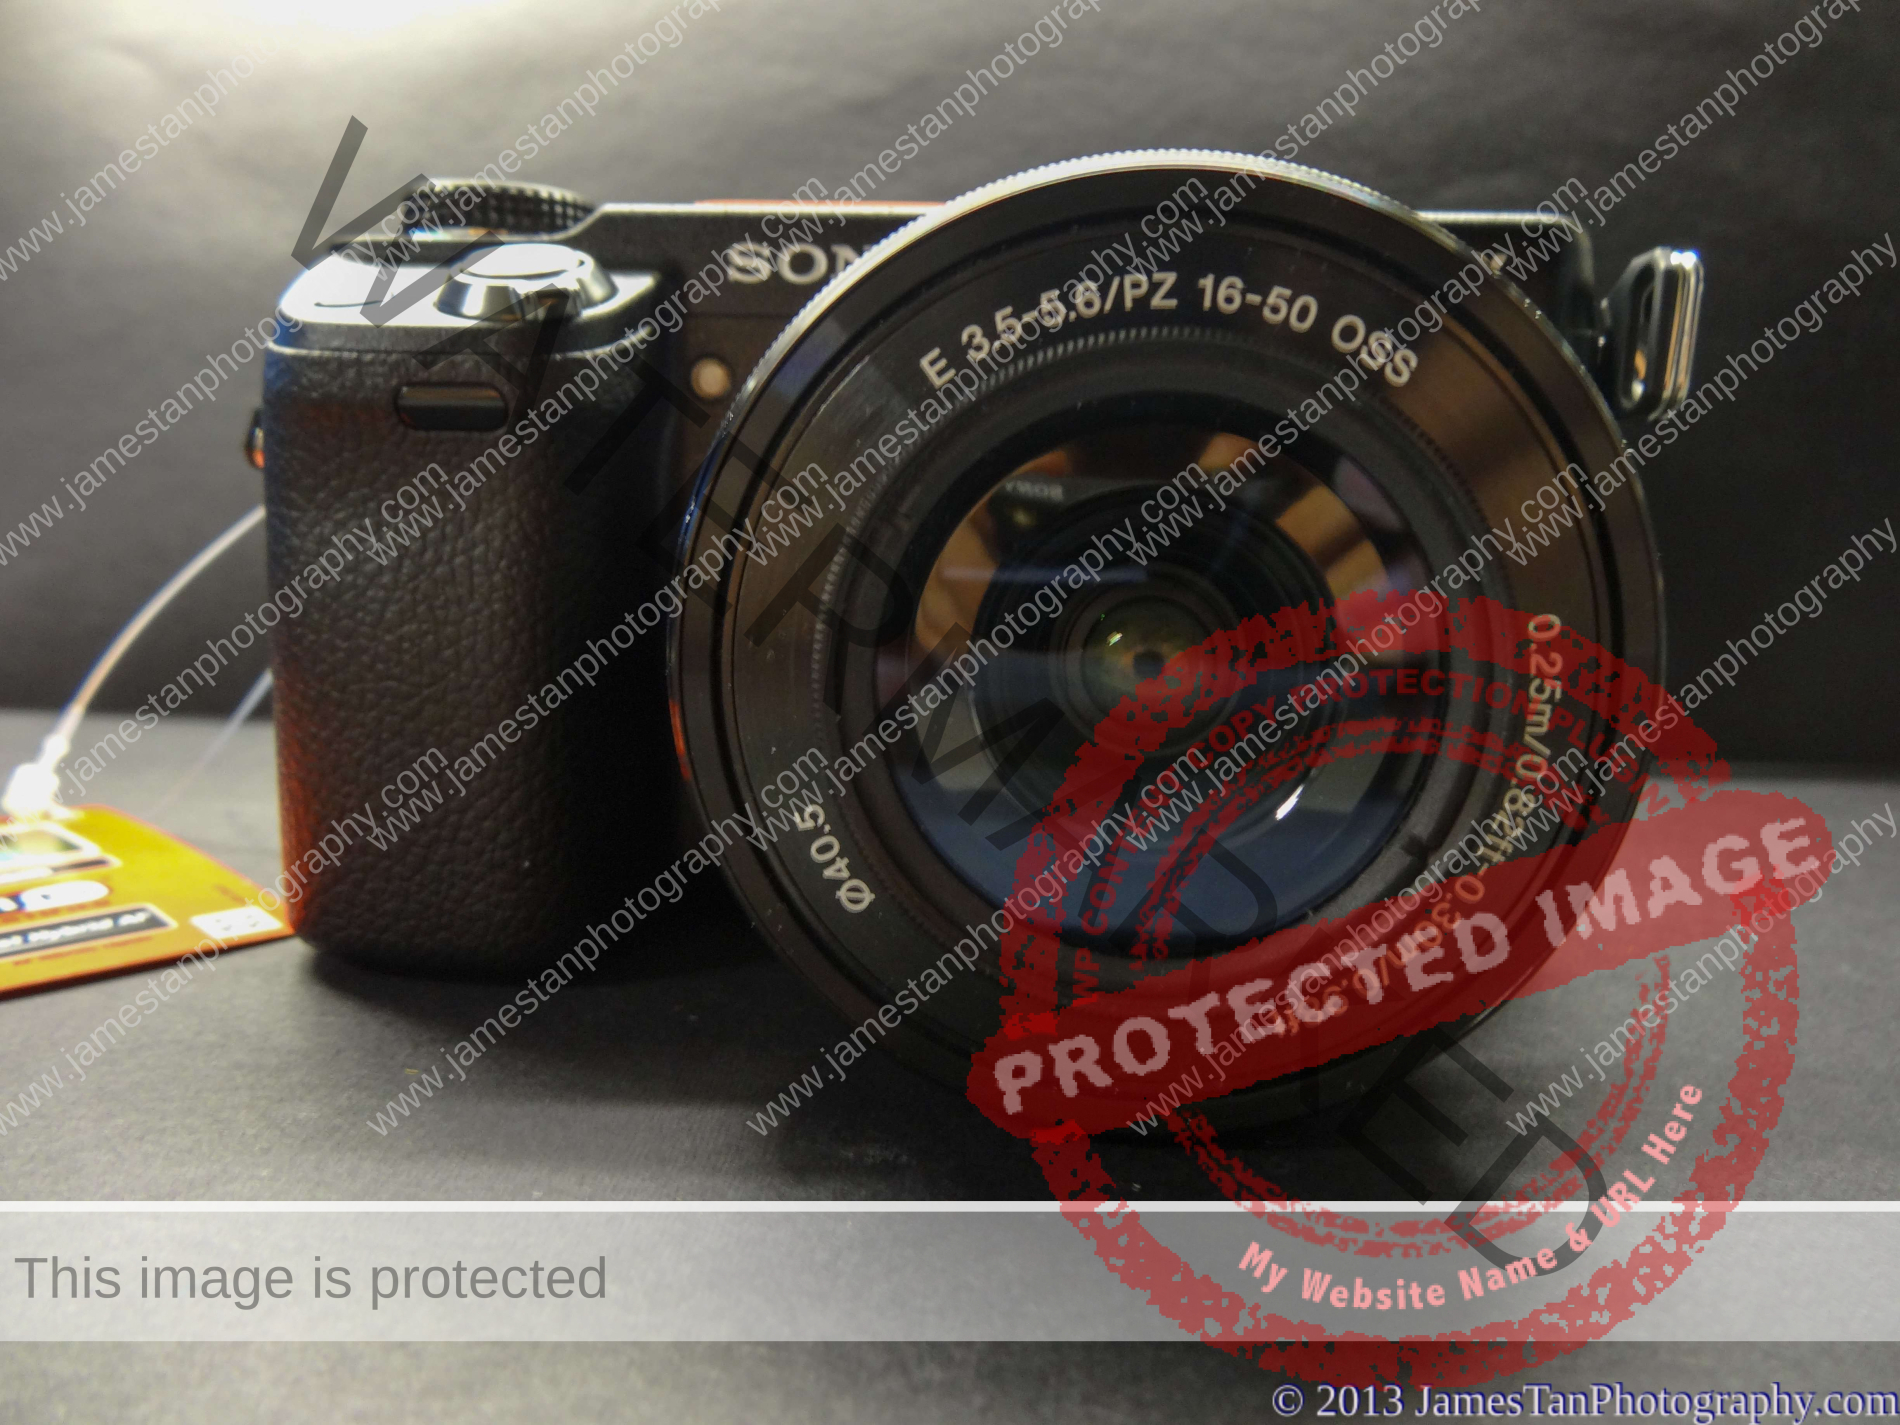
Sony introduced the Alpha NEX-6 in November 2012. It comes with a price tag fit in between the flagship NEX-7 and the mid-range NEX-5R. The NEX-6 has the excellent XGA OLED viewfinder as the NEX-7 and the fast hybrid focus system, and wireless as the NEX-5R. So is it worth the extra SGD 250 than the NEX-5R without the 180 degrees flip-able LCD touchscreen? Or pay SGD 500 more to get the more convenient Tri-Navi design, solid metal-built body, and the higher 24 mp resolution NEX-7?
Pros & Cons
- 16.1 MP APS-C CMOS sensor
- Great XGA OLED viewfinder
- Solid-body build, comfortable hand grip design
- Lightweight (approx. 345g including battery and memory card, without a lens attached)
- Wireless accessible
- Tilt-able 3 inches LCD screen (upwards 90 degrees and downwards 45 degrees)
- Hybrid focus system(phase-detection & contrast detection) for faster and more accurate AF
- Convenience control dial design (not as good as the Sony NEX-7 Tri-Navi design, but still great)
- Quick graphical navigation menu display
- Low battery life (approx 340~380 images with LCD screen; reduce to 230~ 280 if mix with EVF and some camera settings tweaking)
- No way to turn off the wireless
- Not 180 degrees tilt-able
- Need the Sony Entertainment Network account to install the free-apps
- No memorable self settings function is available
- The text-based menu design is not so intuitive; it is not that bad but could be better
Look & Feels
Although the Sony NEX-6 body does not have a metal build body like the Sony NEX-7, you would not feel it cheap. When I first looked at it, I thought it would sound like a cheap plastic body when I knocked at it? But at the time I tried it, wow! It is a solid build, lightweight, and would not feel cheap at all (maybe some of you do). The improved design of the handgrip makes it comfortable to hold in hand for a whole day trip.
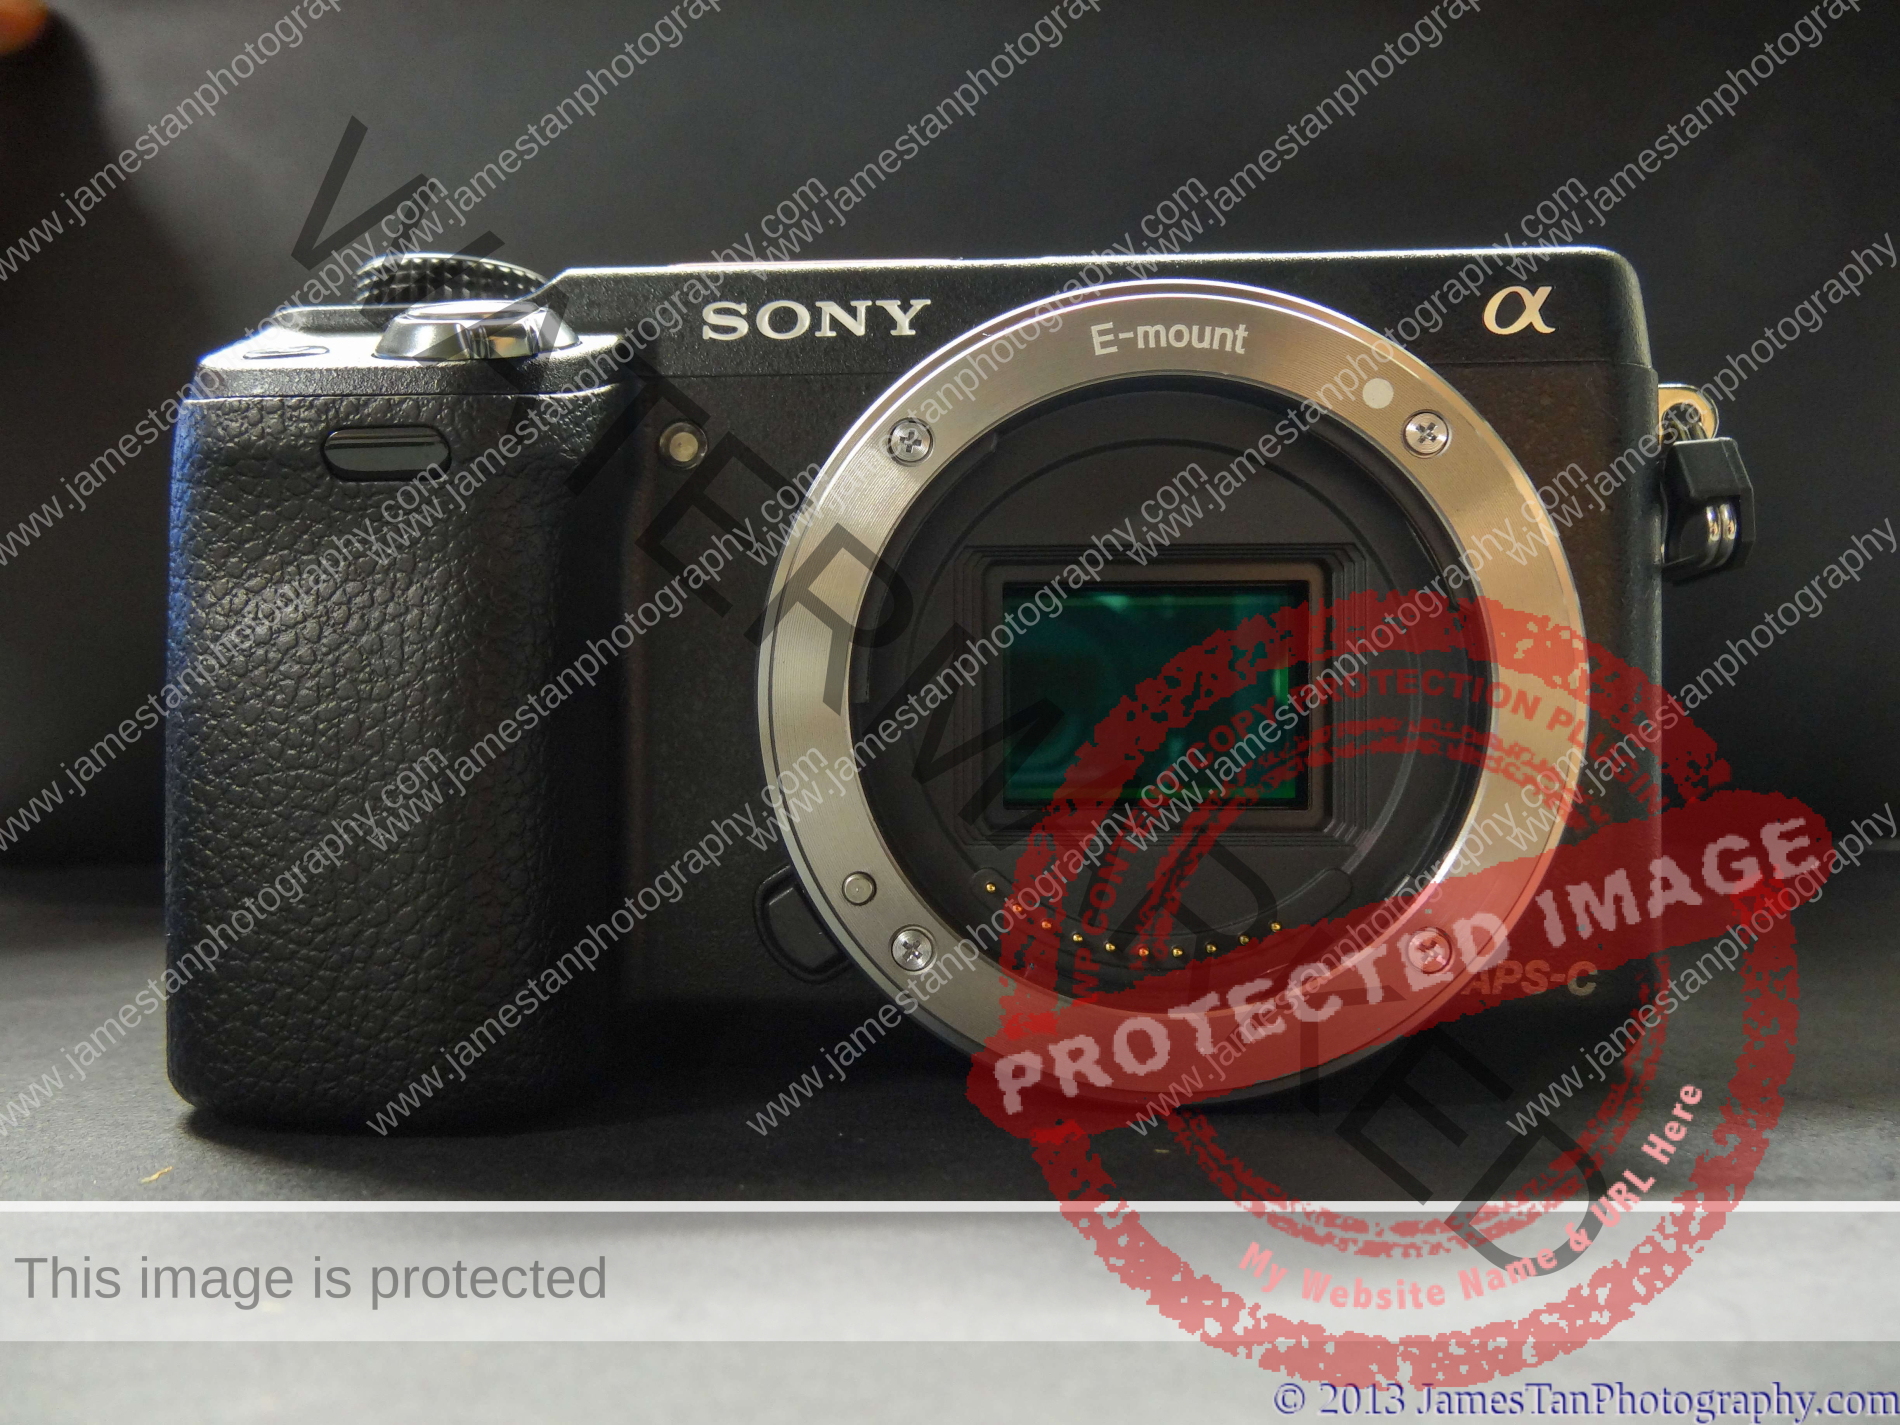
Body and Design
EVF
The Sony NEX-6 has an EVF which is the same as the one on NEX-7. This 2.3 million dot resolution XGA OLED viewfinder provides vivid color and good contrast of view. It has three different brightness settings for the EVF, the dimmest, medium, and the brightest. Medium brightness is sufficient for most outdoor shooting, while the dimmest setting is not usable on a sunny day.
The EVF and the LCD are switched automatically. We can manually choose to use either the EVF or the LCD under Setup –> FINDER/LCD Setting.

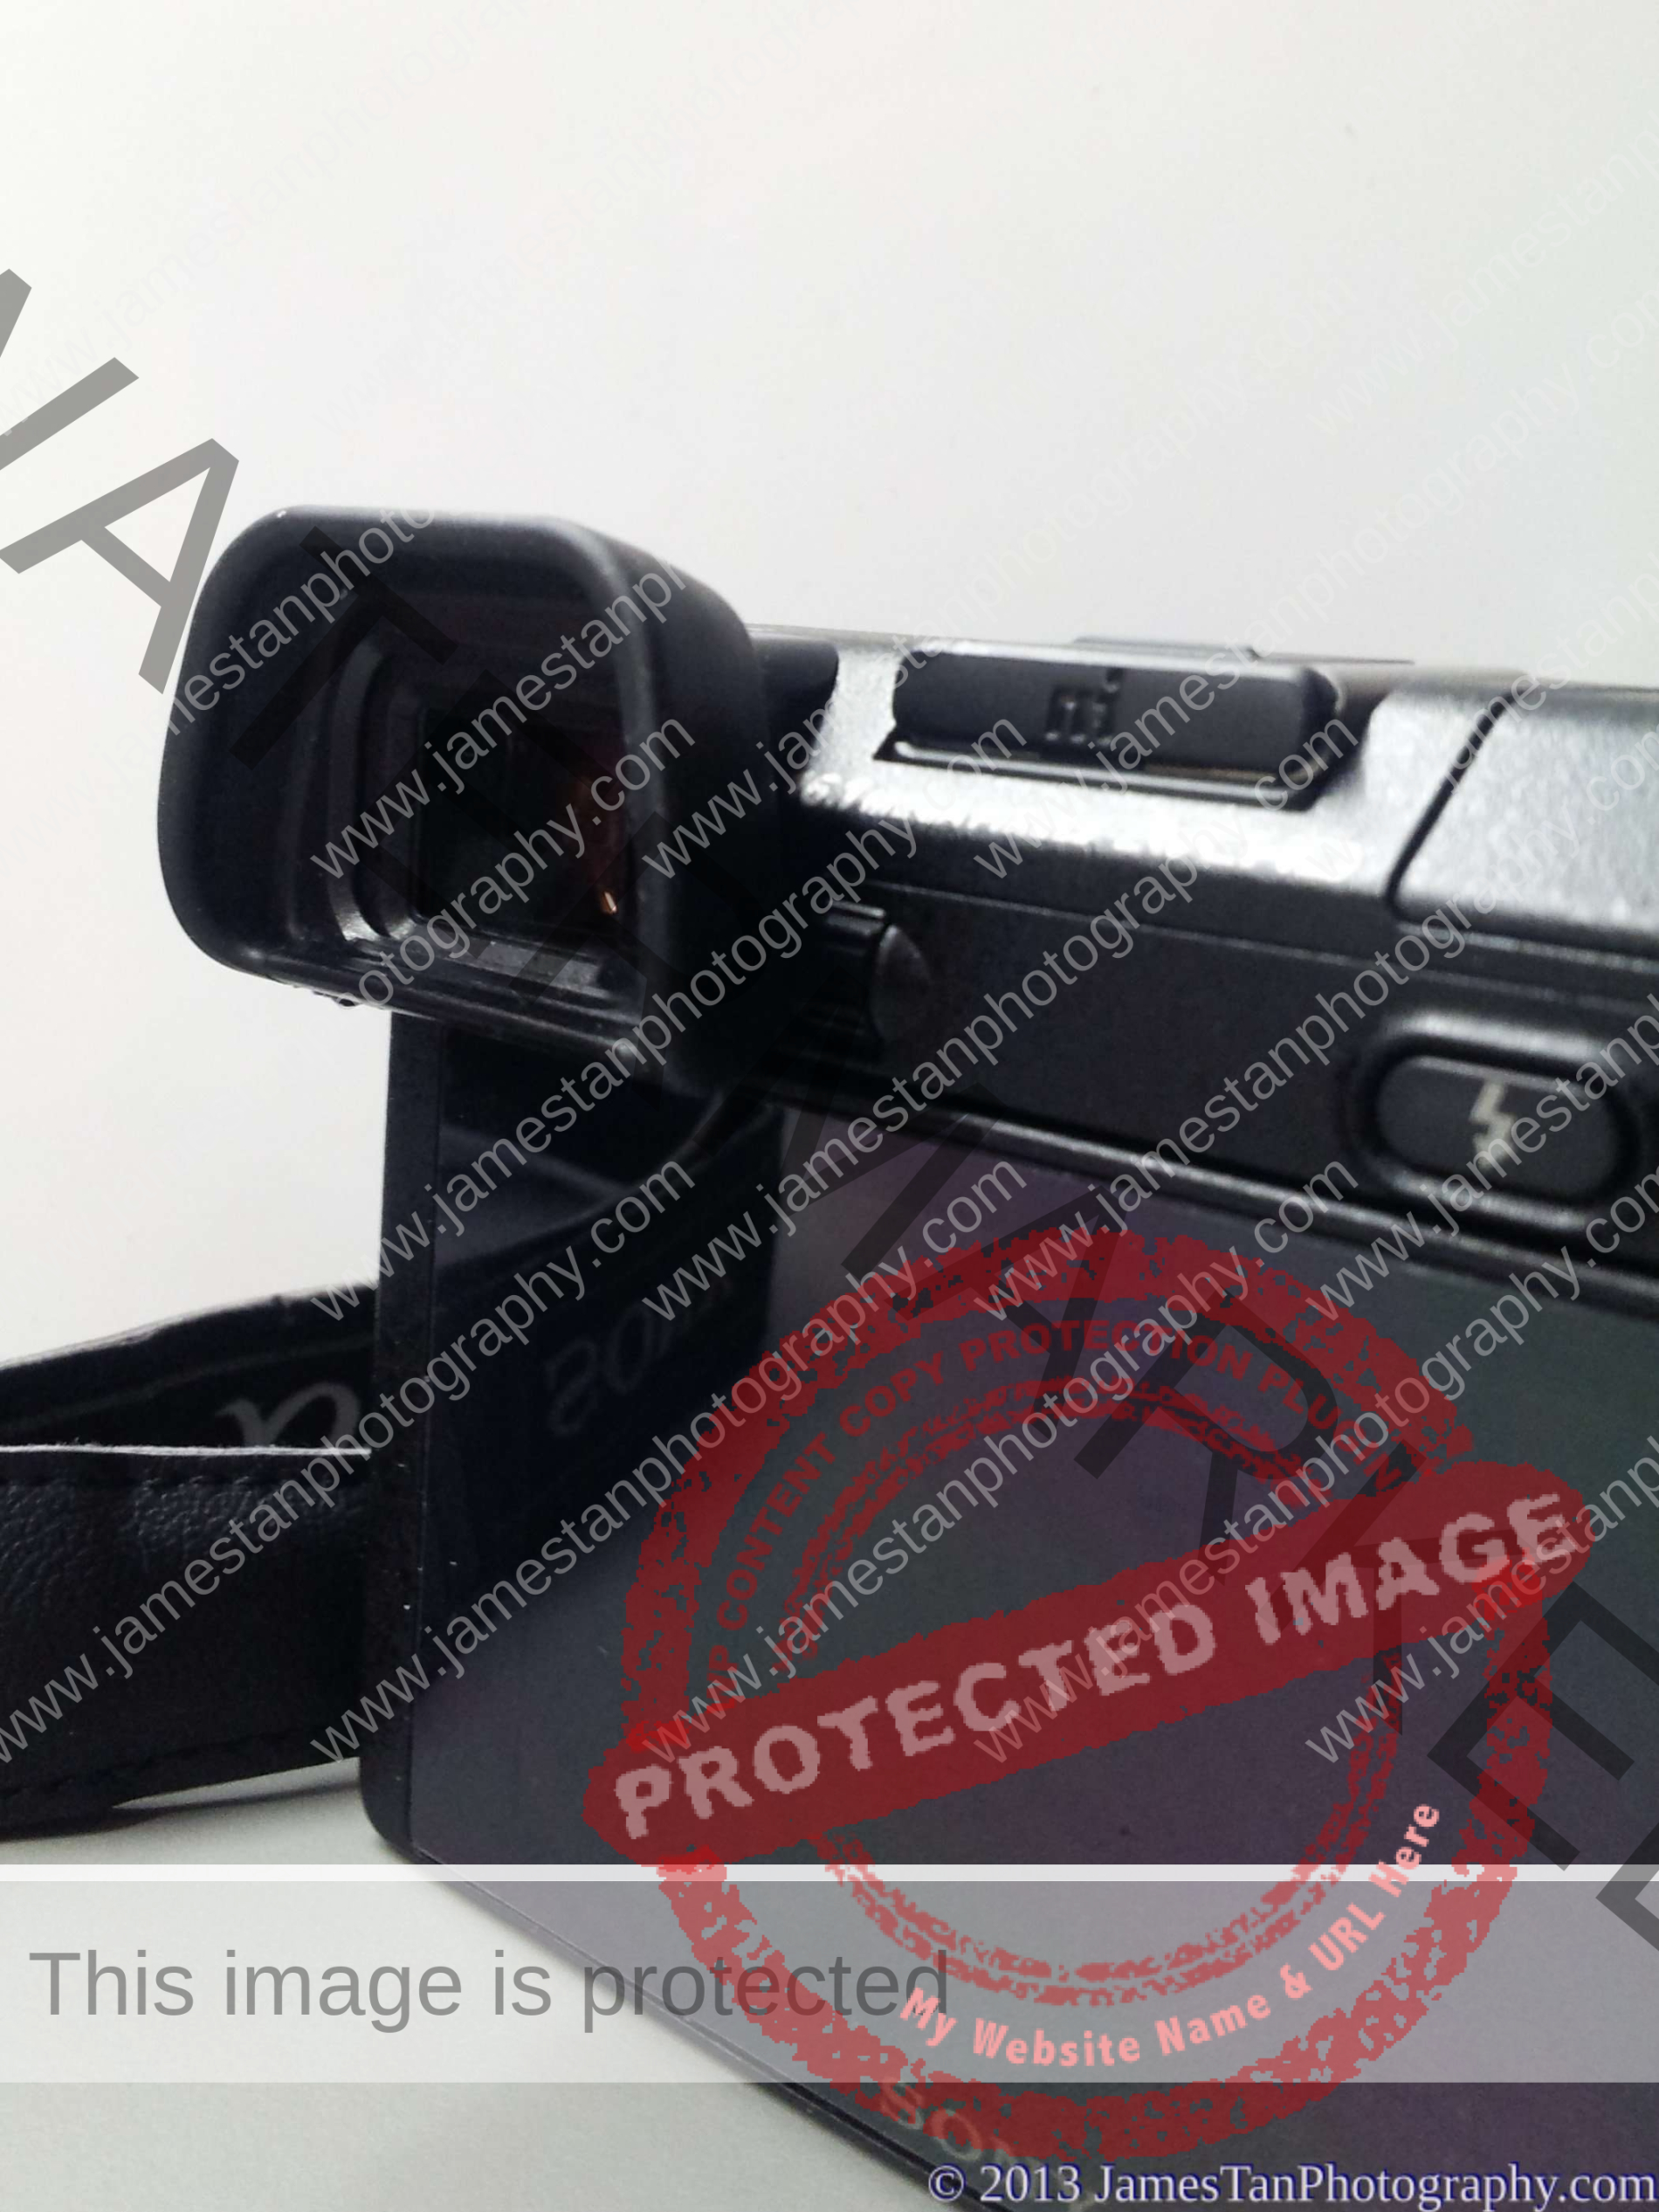
A diopter correction dial sits on the right side of the EVF. It is a bit hard to use it when the rubber eyecup is attached. However, the rubber eyecup makes us more comfortable using the EVF.
Tilt-able 3″ LCD
The tilt-able 3 inches non-touchscreen LCD screen provides 921k dots of view. The image on the screen is so clear and sharp, and the colour is vivid. It can be tilted upwards to approx 90 degrees and tilted downwards to approximately 45 degrees. Sadly, it is not 180 degrees flip-able for a self-portrait shooting like what the NEX-5R offers.


The EVF on the top might be the reason to restrict the LCD to flip 180 degrees upwards, but why not make it flip over 180 degrees from the left-hand side or even from the bottom? Most of us will be happier and appreciate it if Sony NEX-6 could include this function. Despite this, the non 180 degrees flip-able LCD screen would not significantly affect the greatness of this camera. If you shoot more self-portraits, you might consider the Sony NEX-5R sacrificing the excellent EVF.
Control Dials/Wheel
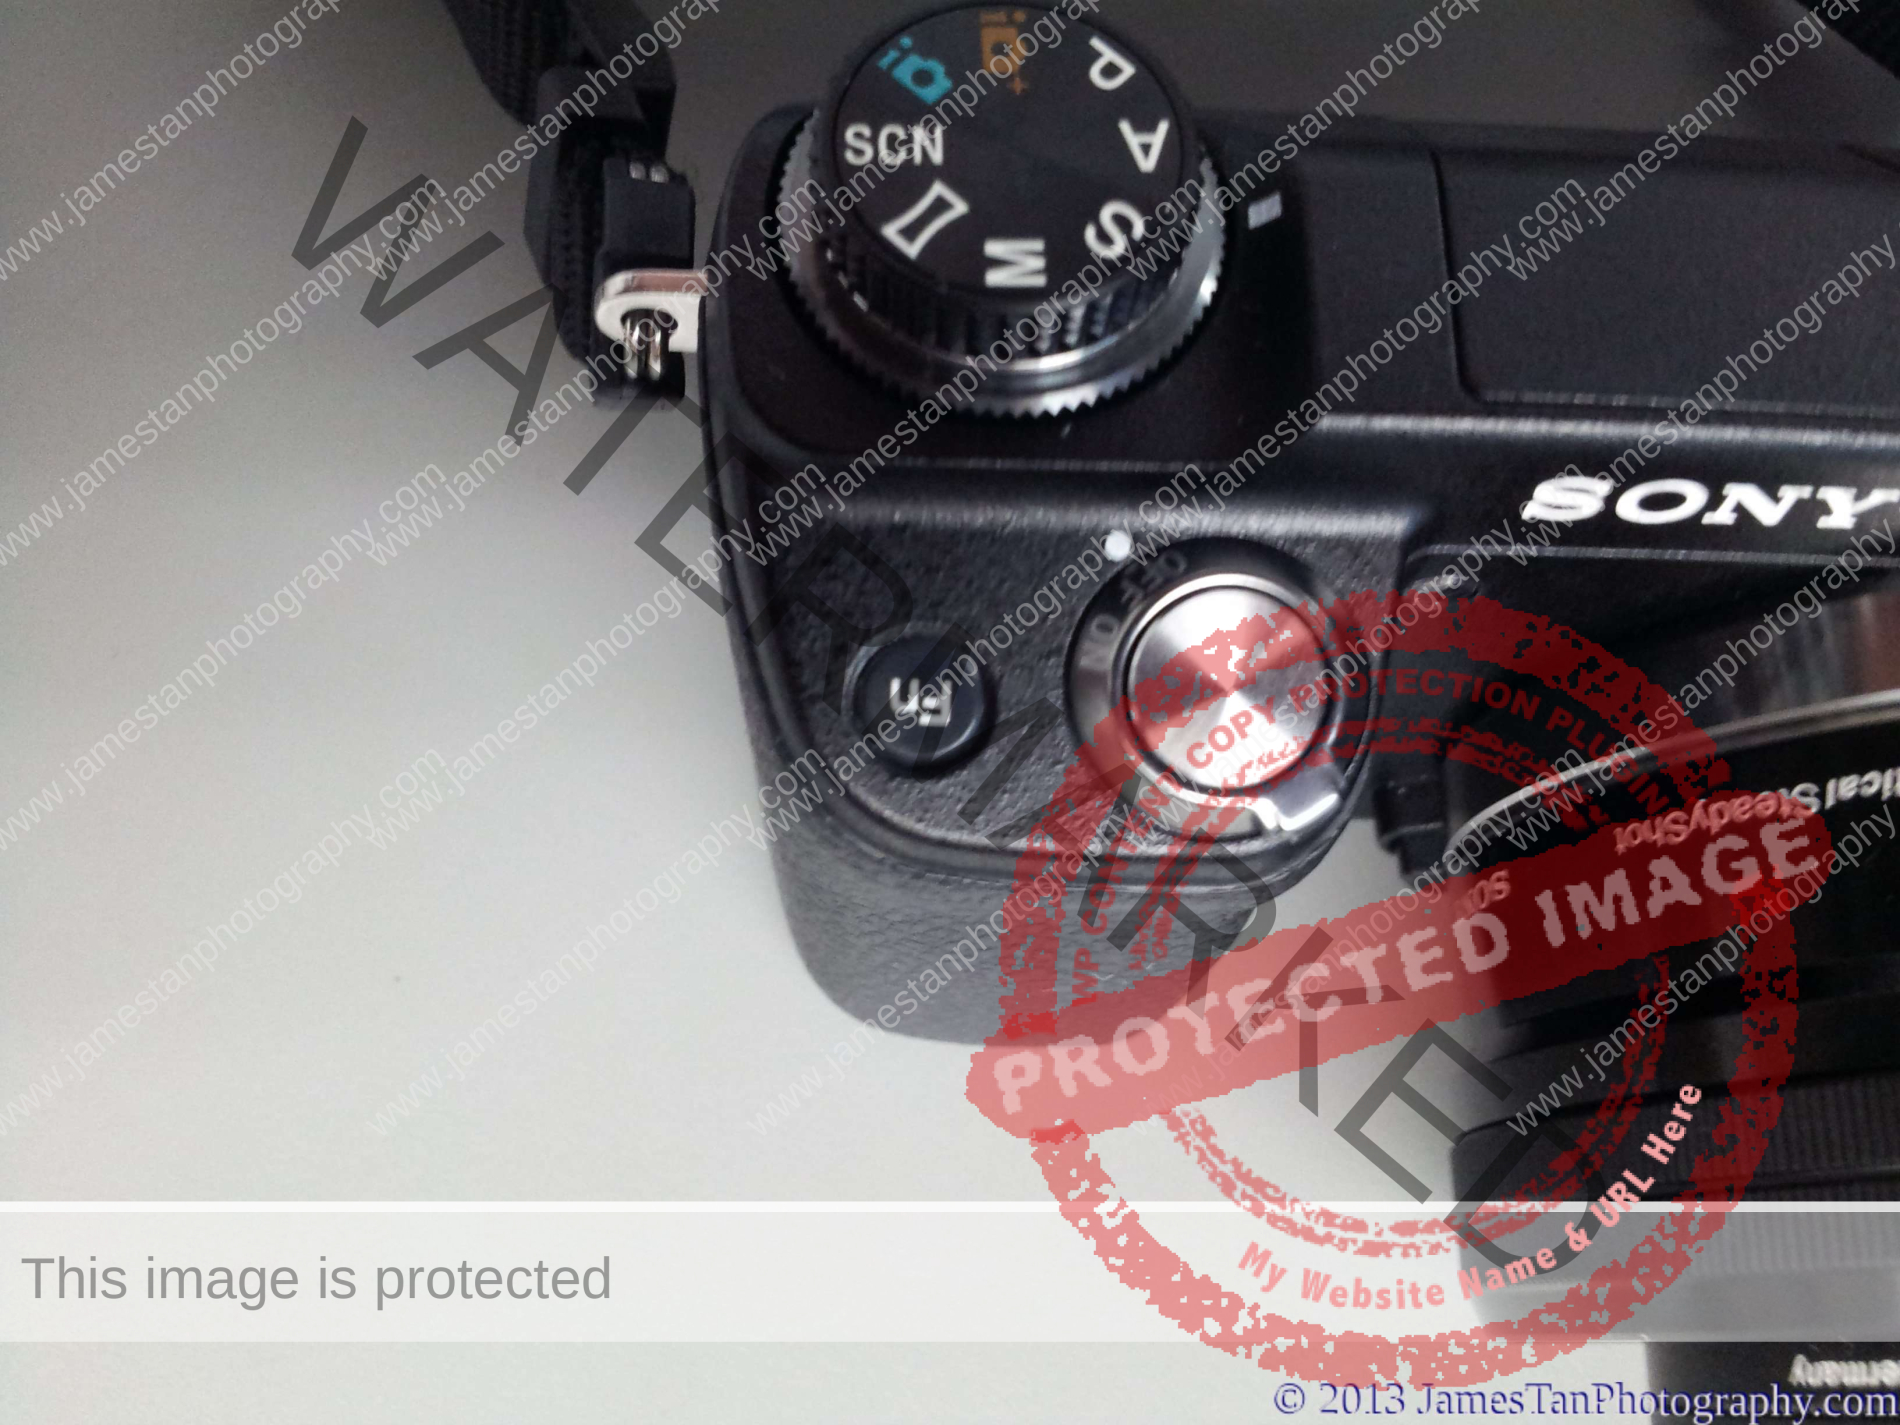
There is one Mode dial and one control dial on the top-right of the NEX-6. The Mode dial provides a quick and convenient way to switch between P/A/S/M, Panorama, Scene, and the Sony Superior Auto and Intelligent Auto Mode. When shooting in A/S mode, we can use the larger control dial beneath the Mode dial to control the aperture/shutter. This control dial controls the aperture, while the rear control wheel controls the shutter speed when shooting in M mode.

The rear control wheel provides accessibility to the Display mode, ISO, Exposure, and Drive mode. In the Display mode, we can choose Graphical, All info, Big font, No info, Histogram, Level, and For viewfinder. We can use the control wheel to adjust the value and view the ISO and Exposure effect live. The Drive mode allows single shoot, remote shutter, bracket shooting, speed priority continuous shoot, continuous shoot, and self-timer.

Both the control dial and the control wheel are smooth to rotate by a single thumb. The Mode dial is a bit stiff, which needs a second finger to aid to turn it. They offer fantastic accessibility and controls than other NEXs but are not as convenience as the Tri-Navi on the NEX-7.
Flash
The NEX-6 provides a built-in flash (GN6) which is missing from the NEX-5R. We have to press the button on the back to trigger the flash before we can use it. The spring of the flash has a powerful bouncing and makes me worry about the durability of the flash bouncing mechanism. The NEX-6 provides few flash modes such as Auto Fill, Slow Sync, Rear-Sync, Fill Flash, and Flash Off.
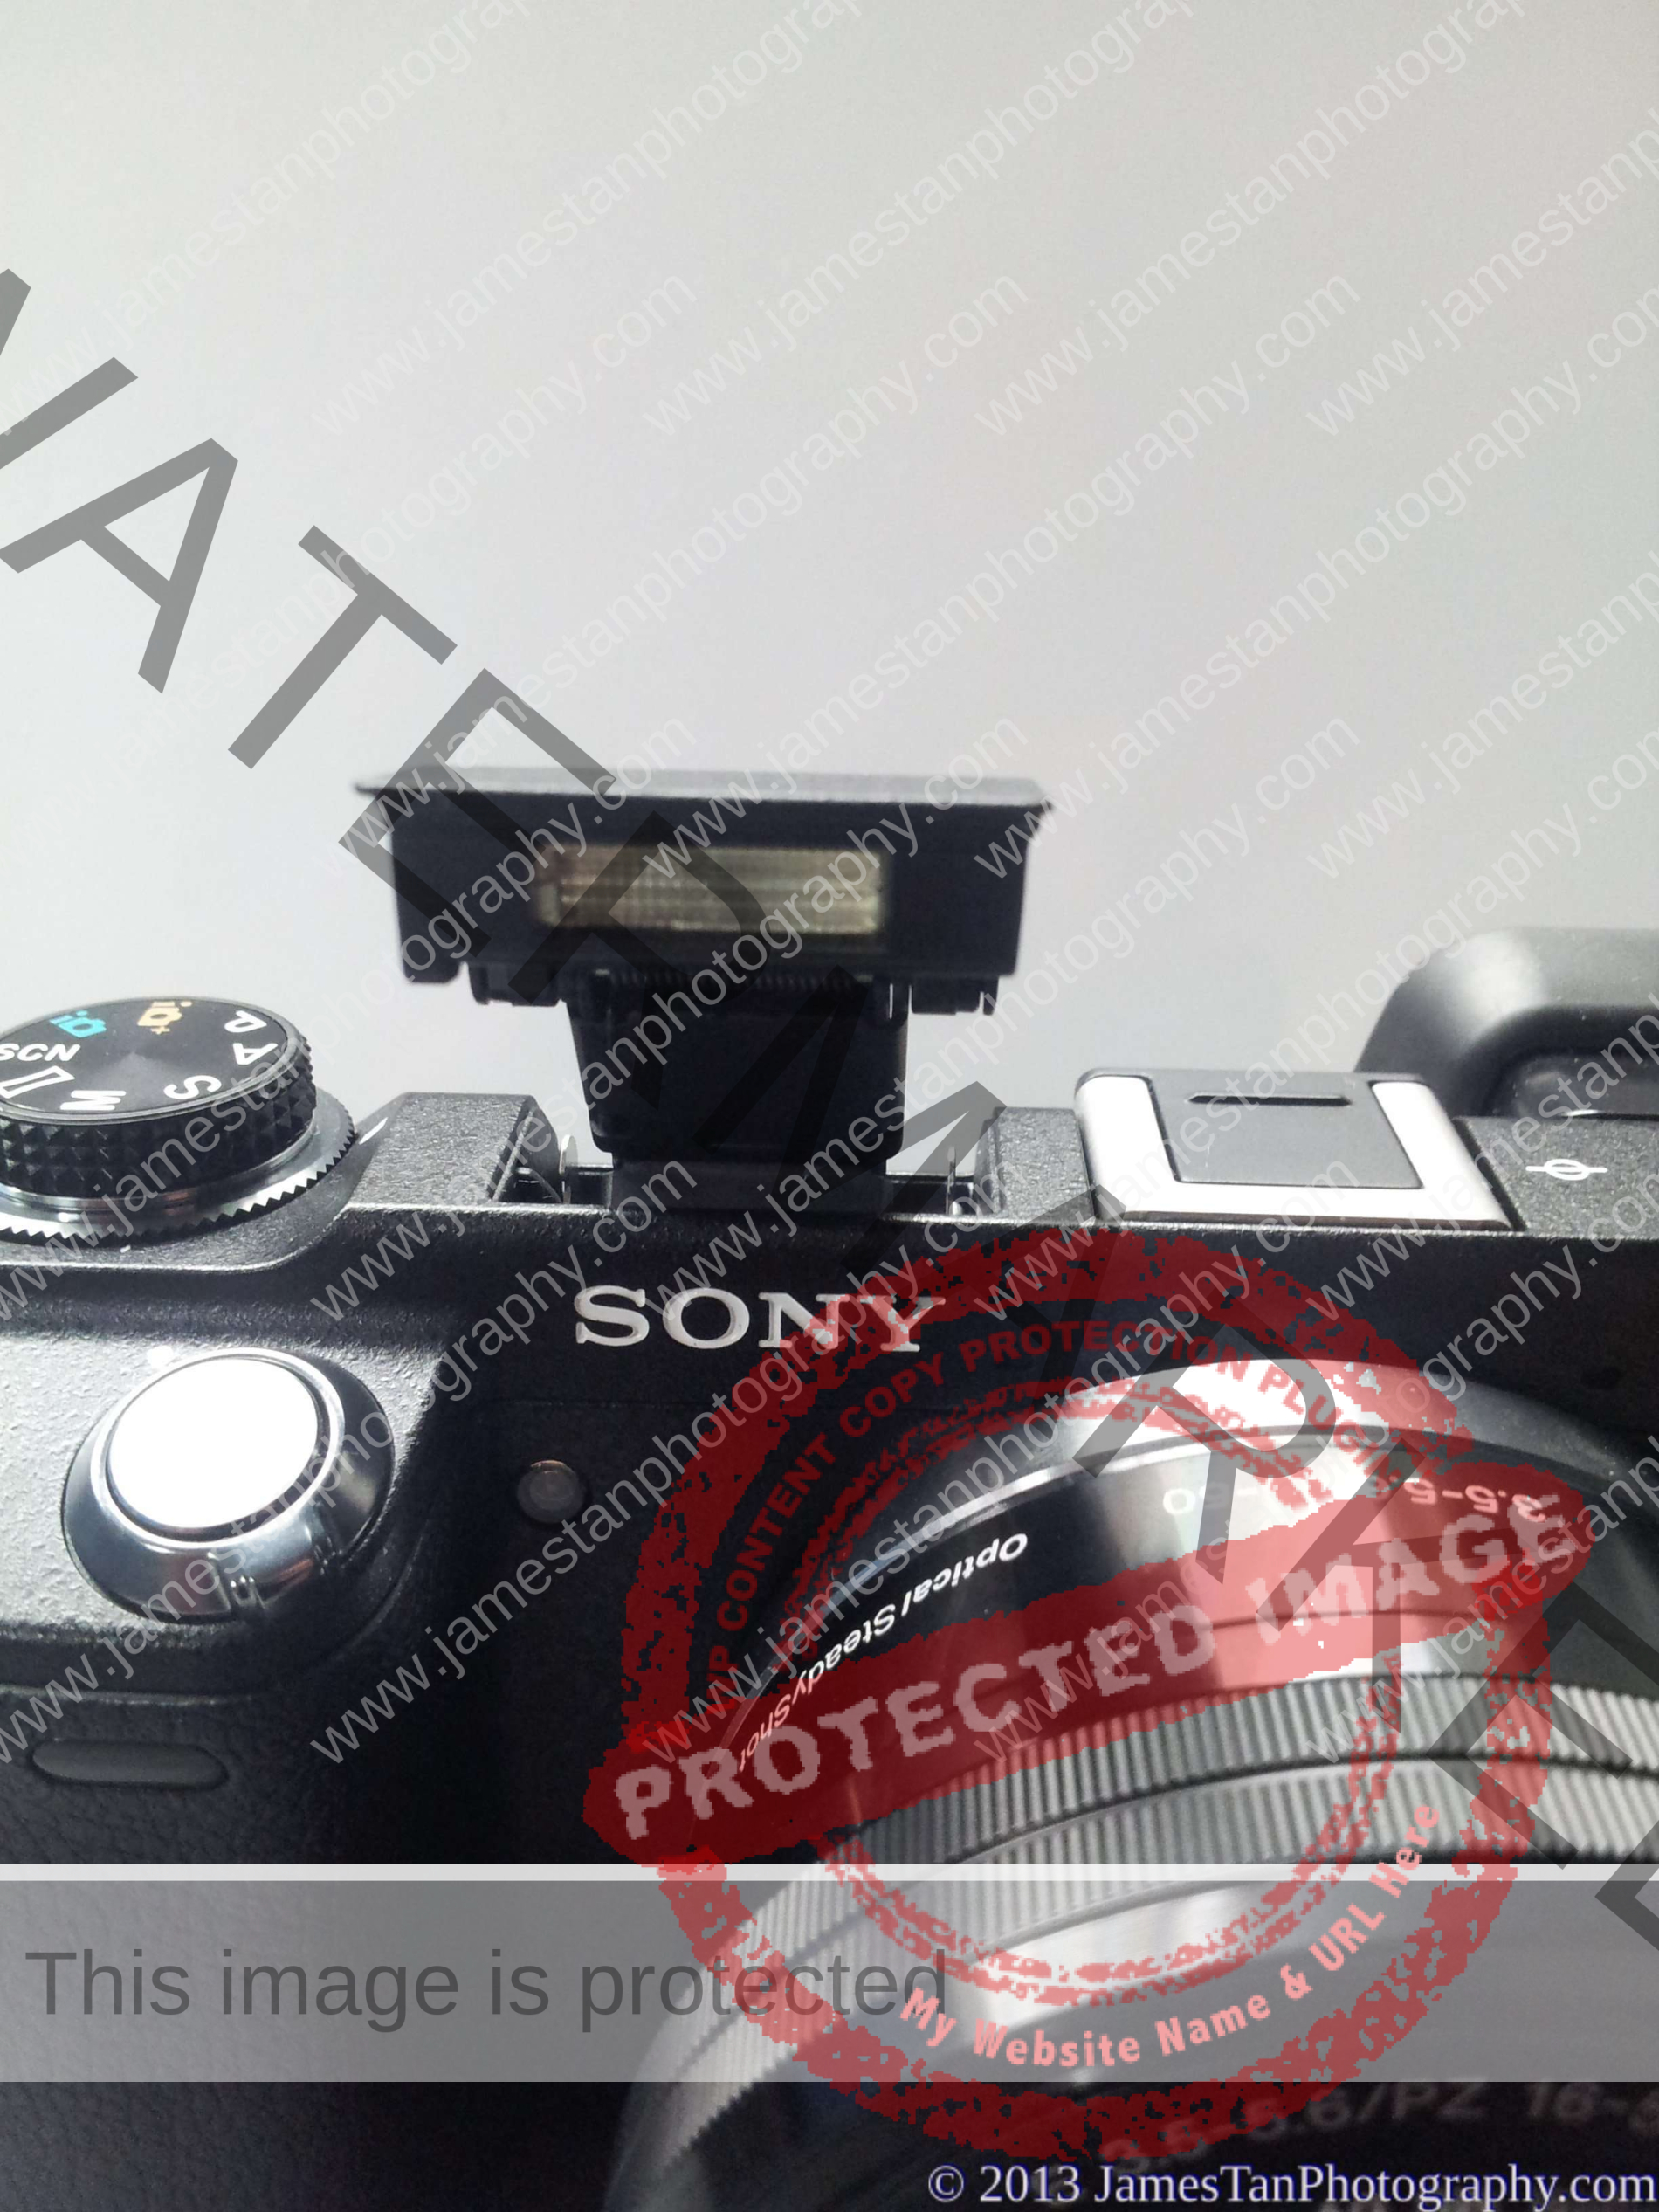
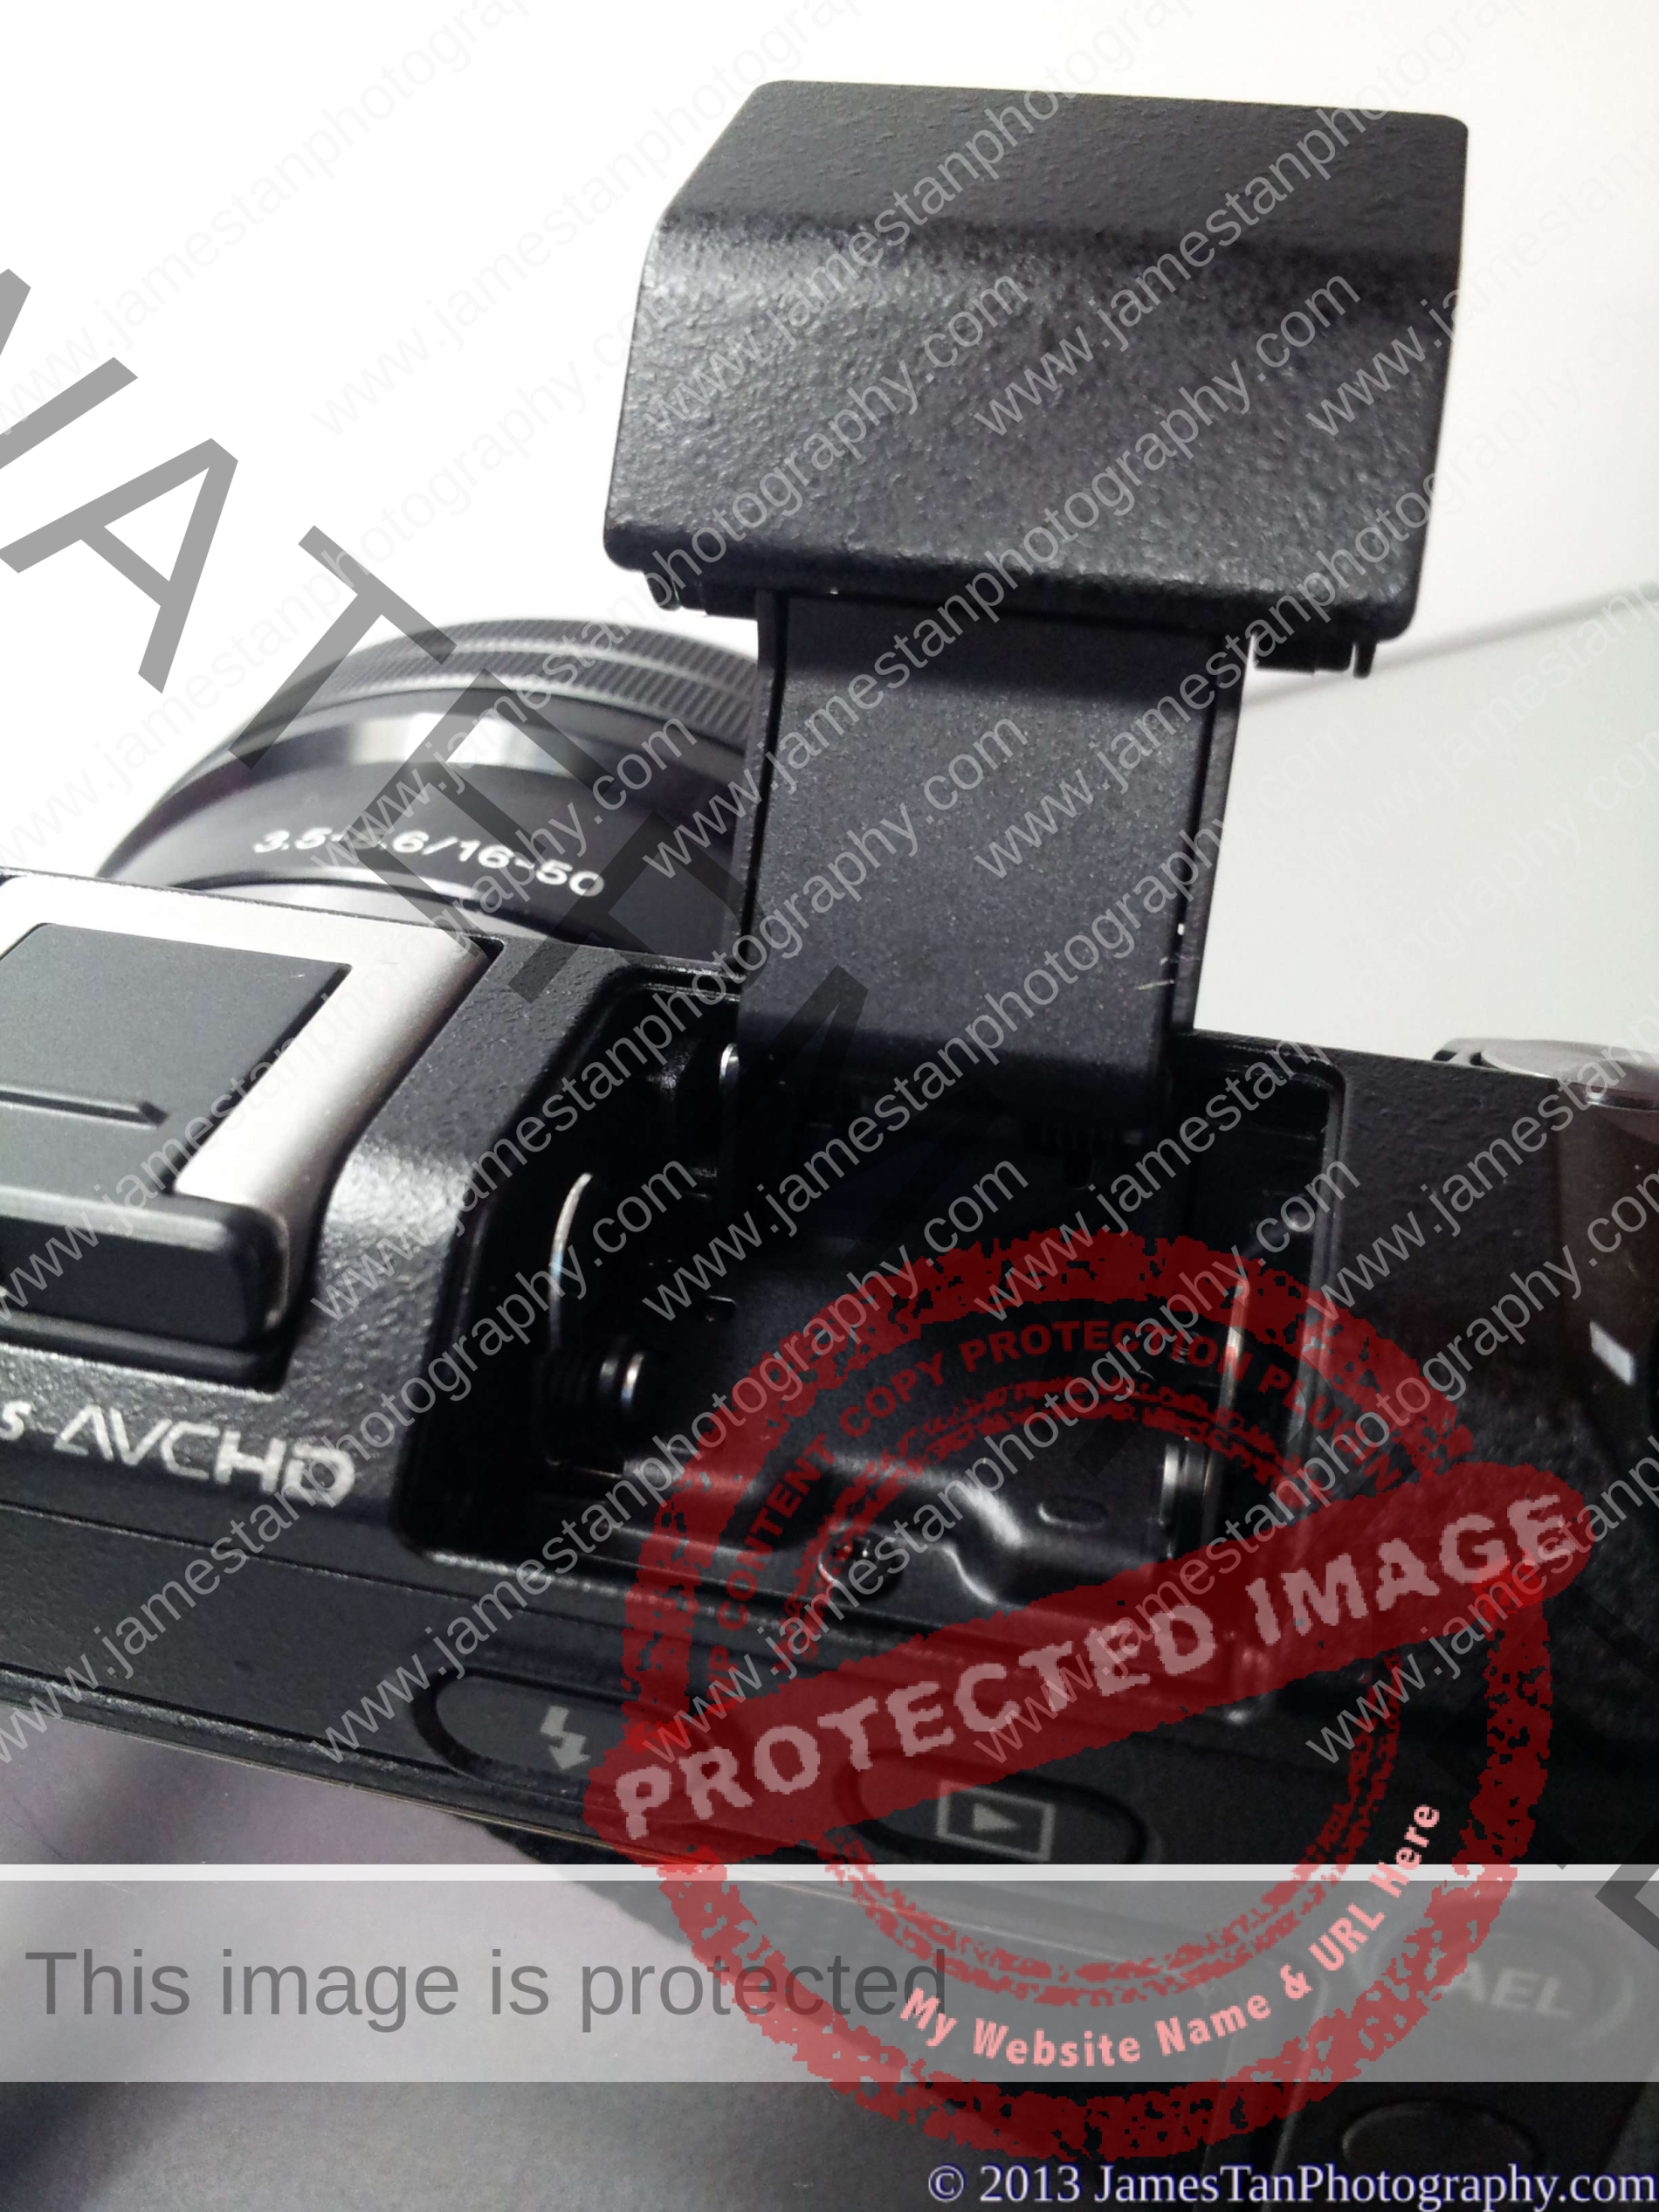
We could “tilt” the flash upwards instead of straight fire the lighting to our object. However, the flash will cause some shadow when using the super-zoom lens like the SEL18200. The flash recycle time is approximately 4 sec.
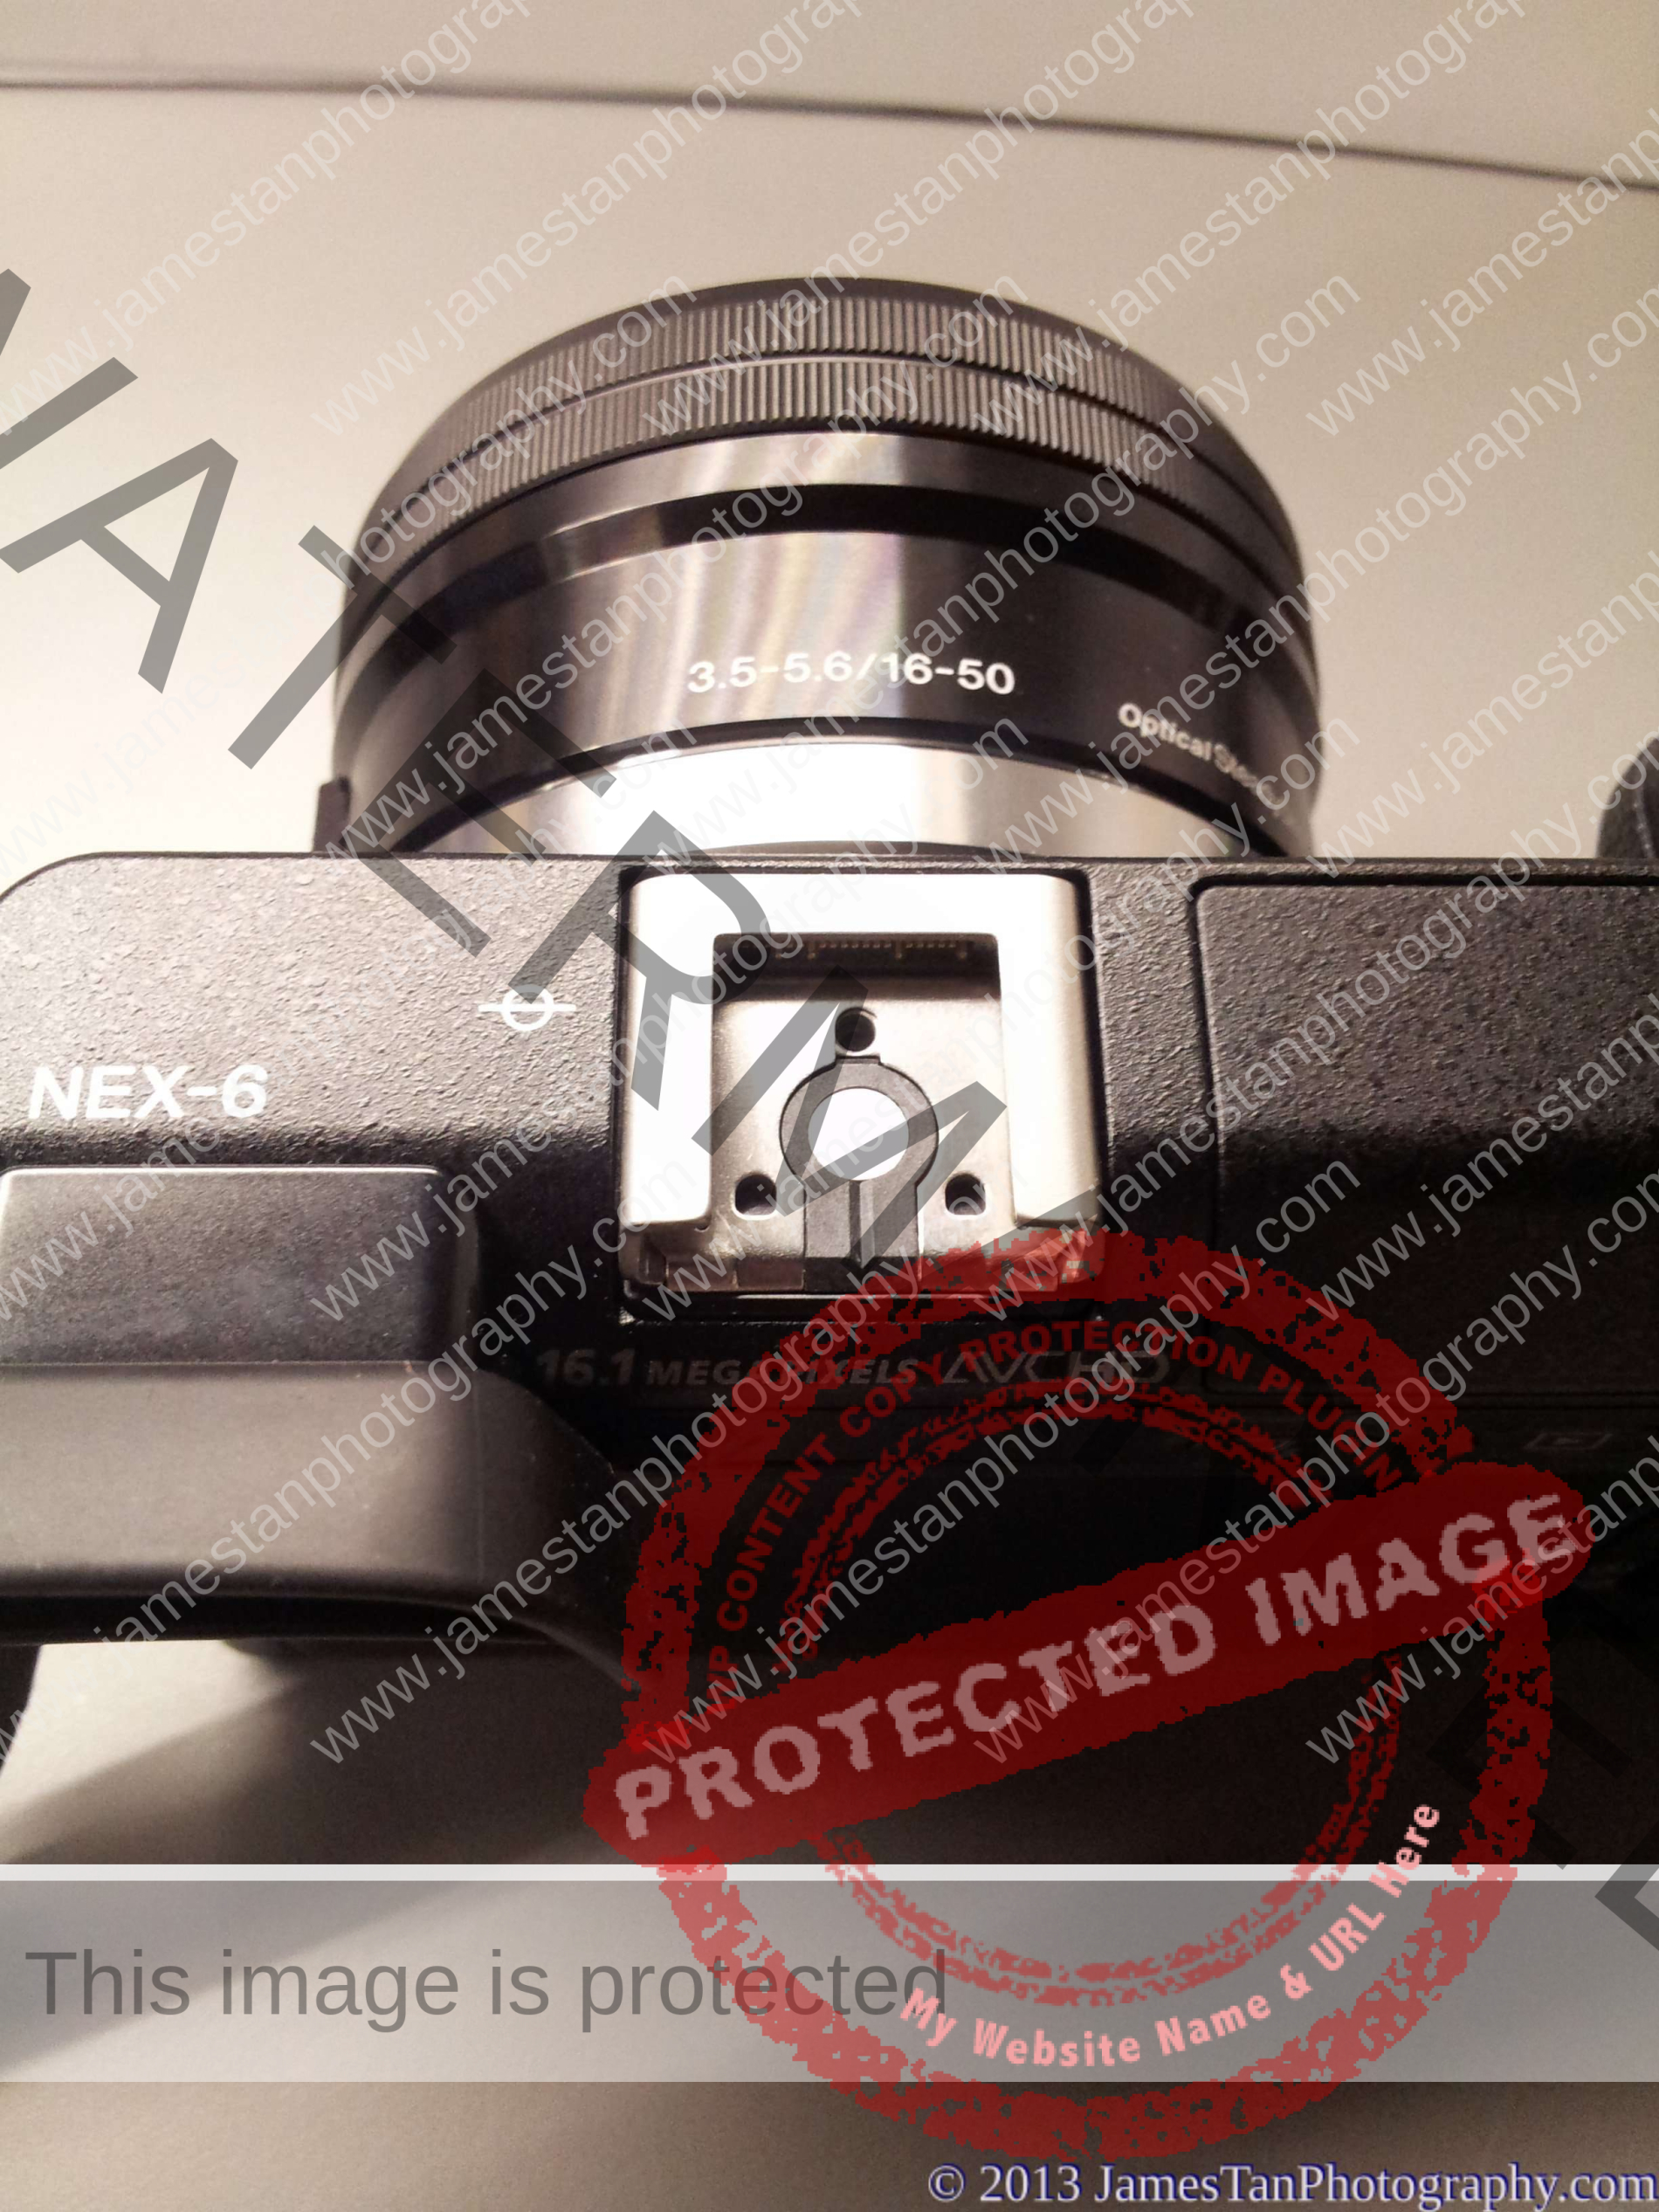
Multi-Interface Hot-shoe
The NEX-6 comes with a Multi-Interface Hot-shoe which is compatible with the standard ISO hot shoe interface. This is good news that we have more options for third-party accessories! The Multi-Interface Hot-shoe extends the flexibility to use all the third-party accessories which use a standard ISO port. Nice!

Interface
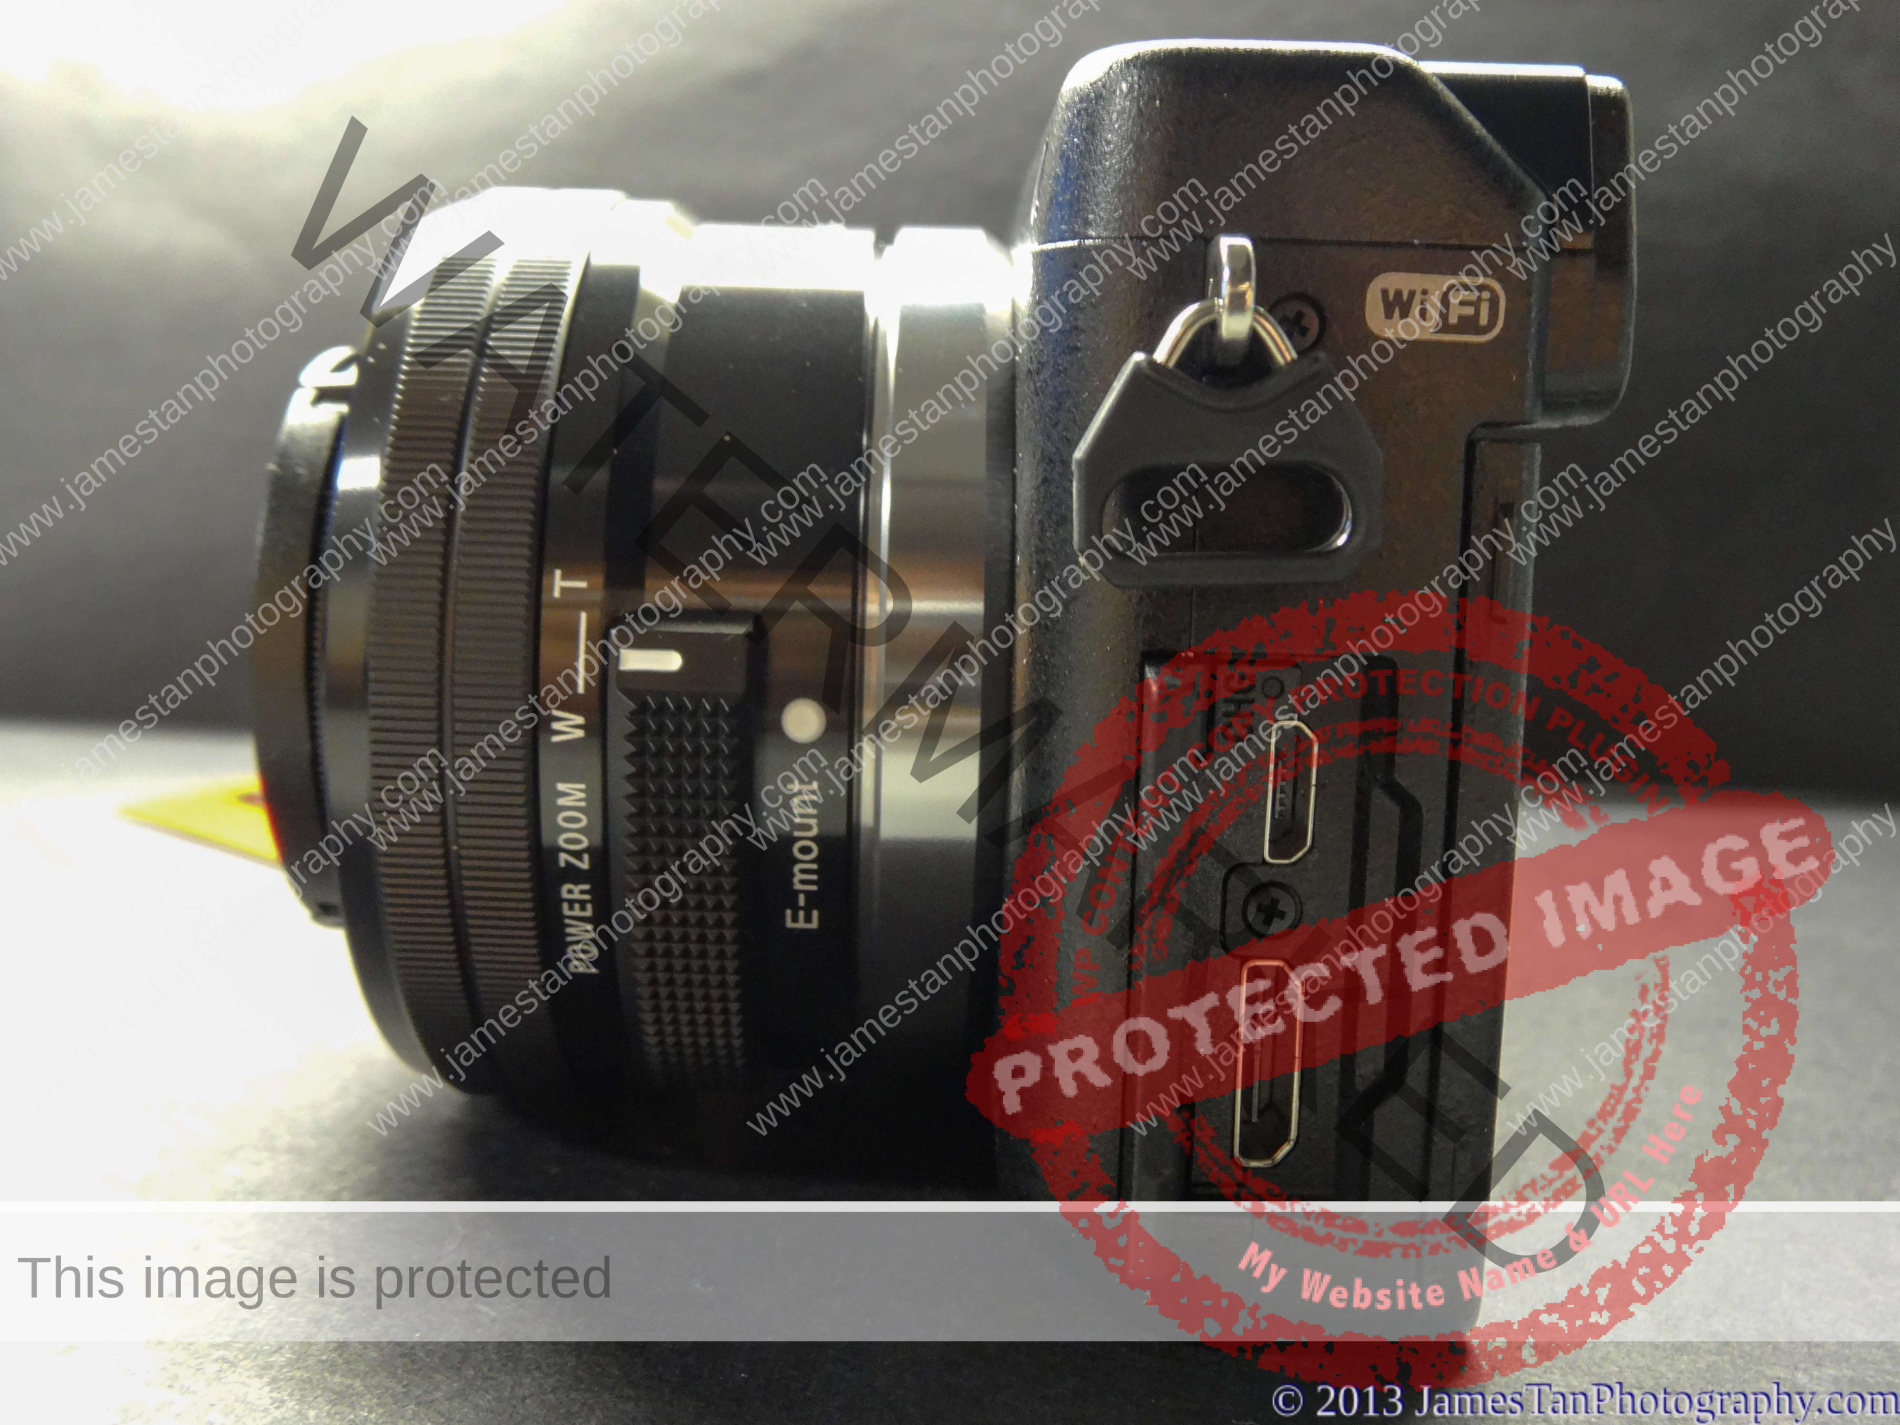
The NEX-6 has a mini HDMI port and a micro USB, located on the left of the NEX-6 body. When we connect Sony NEX-6 through the micro USB port, the camera auto-switch to charging mode, which means you cannot use it for shooting. You have to purchase the mini HDMI converter separately to connect your NEX-6 to a monitor/TV.
Customizable Buttons
Another good news is the NEX-6 offers three programmable buttons, which allow us to have quick access to the most frequently used functions. Do take note that not all the functions are available for quick access). First of all, the Fn button is located beside the On/Off/Shutter button. It allows us to set a maximum of 6 different functions for quick access. The following are the available options for the custom Fn button:
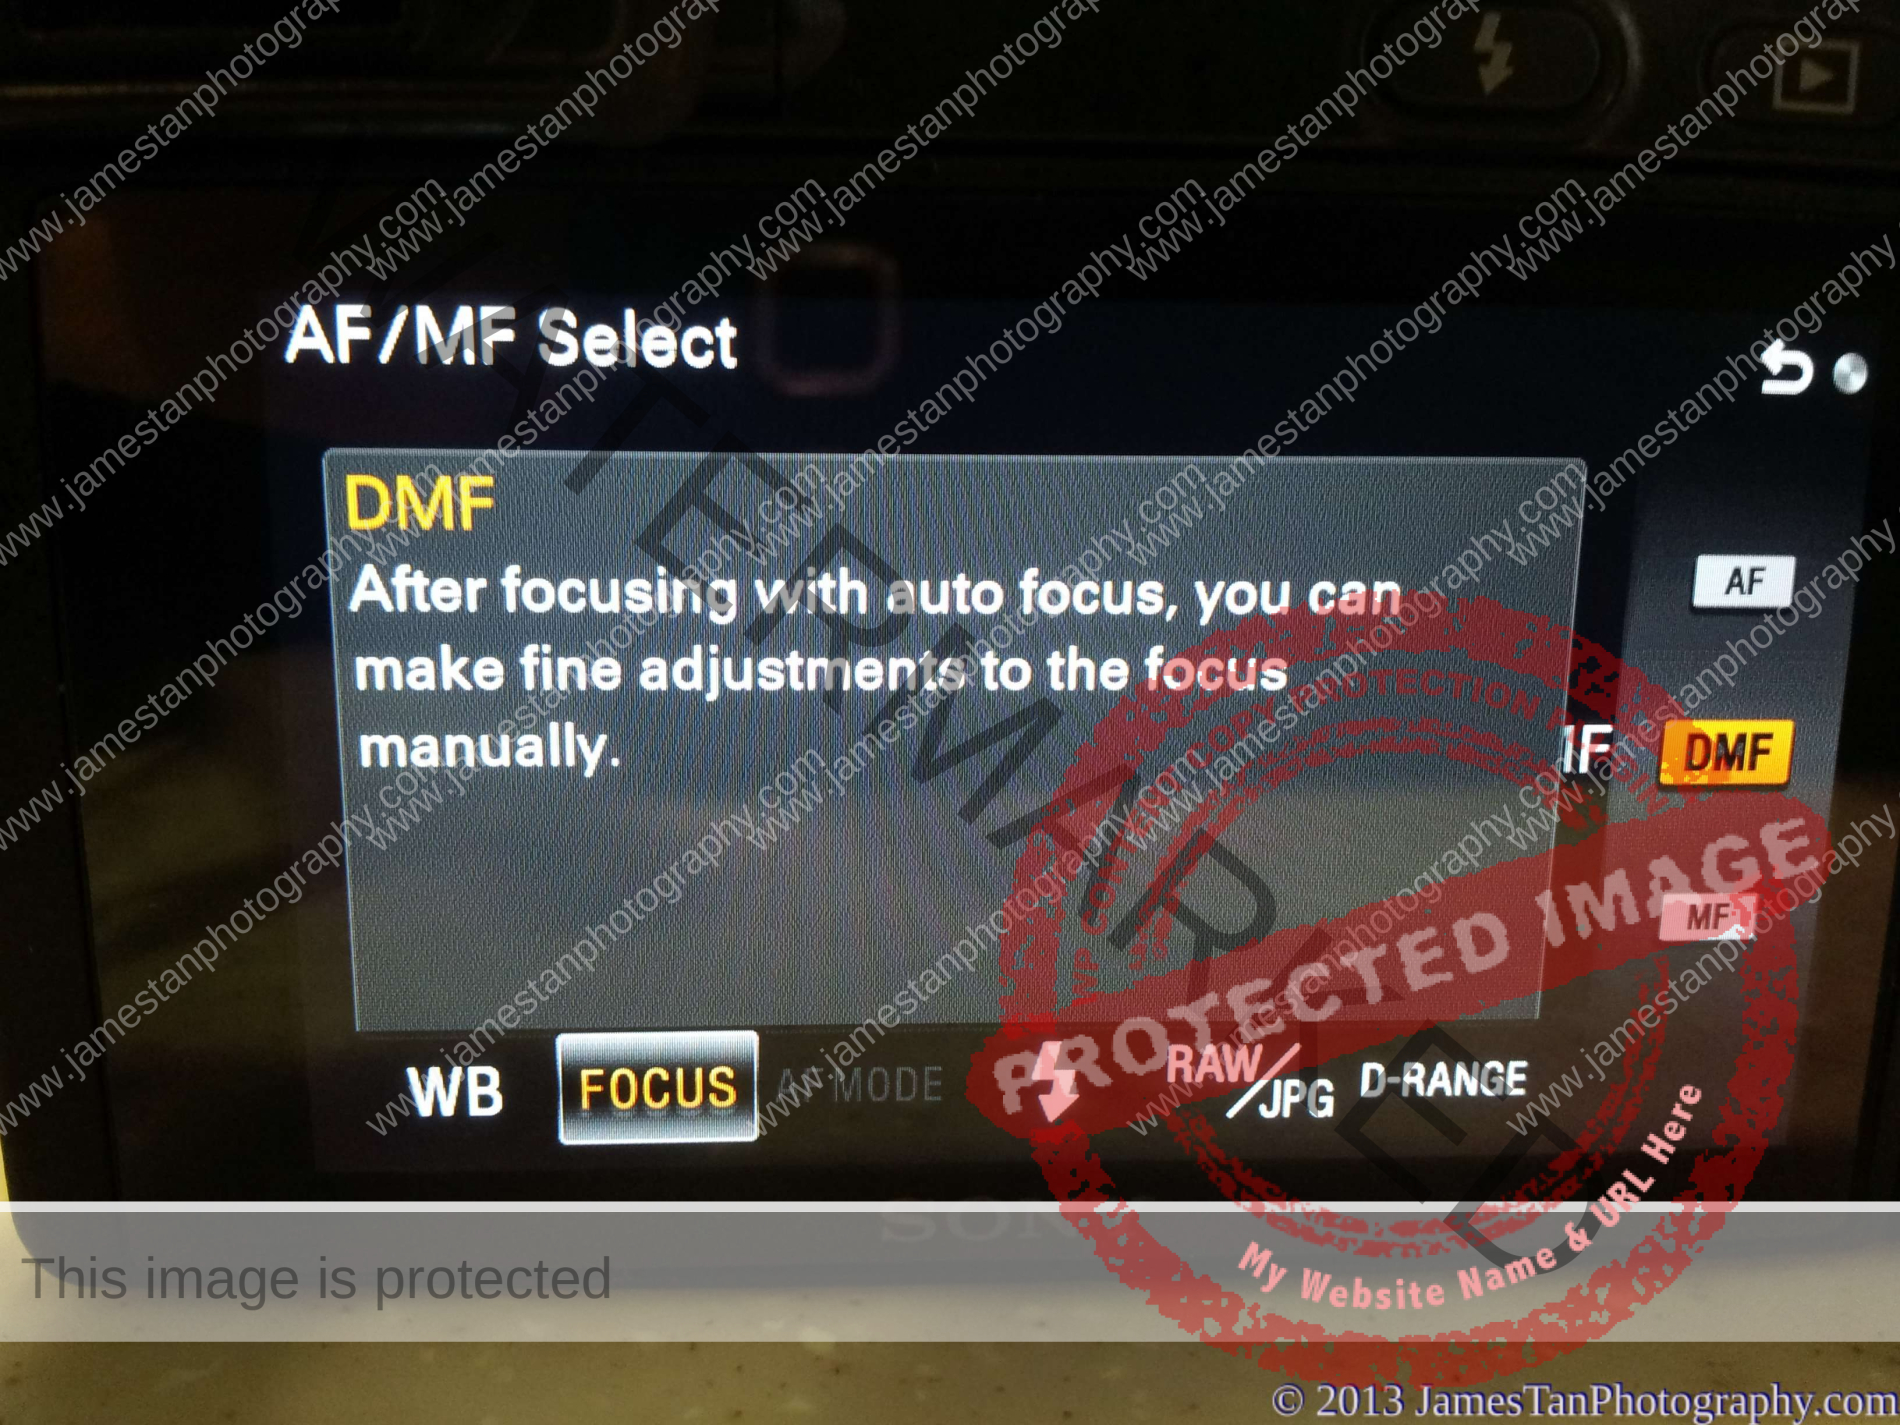
- AF/MF Select
- Autofocus Mode
- Autofocus Area
- Face Detection
- Smile Shutter
- Auto Port. Framing
- Soft Skin Effect
- Quality
- ISO
- White Balance
- Metering Mode
- DRO/Auto HDR
- Picture Effect
- Creative Style
- Flash Mode
- Not set
The second customizable button is the AEL button. It allows the same functions available in the Fn button with the additional functions such as
- AEL hold
- AEL toggle
- Shoot. Tips
- Object Tracking
- Zoom
- Flash Comp
- MF Assist
- View on Smartphone
- Download Application
- Application List
The last customizable button is the soft-key B located at the bottom of the back of NEX-6. It also offers the same functions as the AEL button except for the AEL hold and AEL toggle.
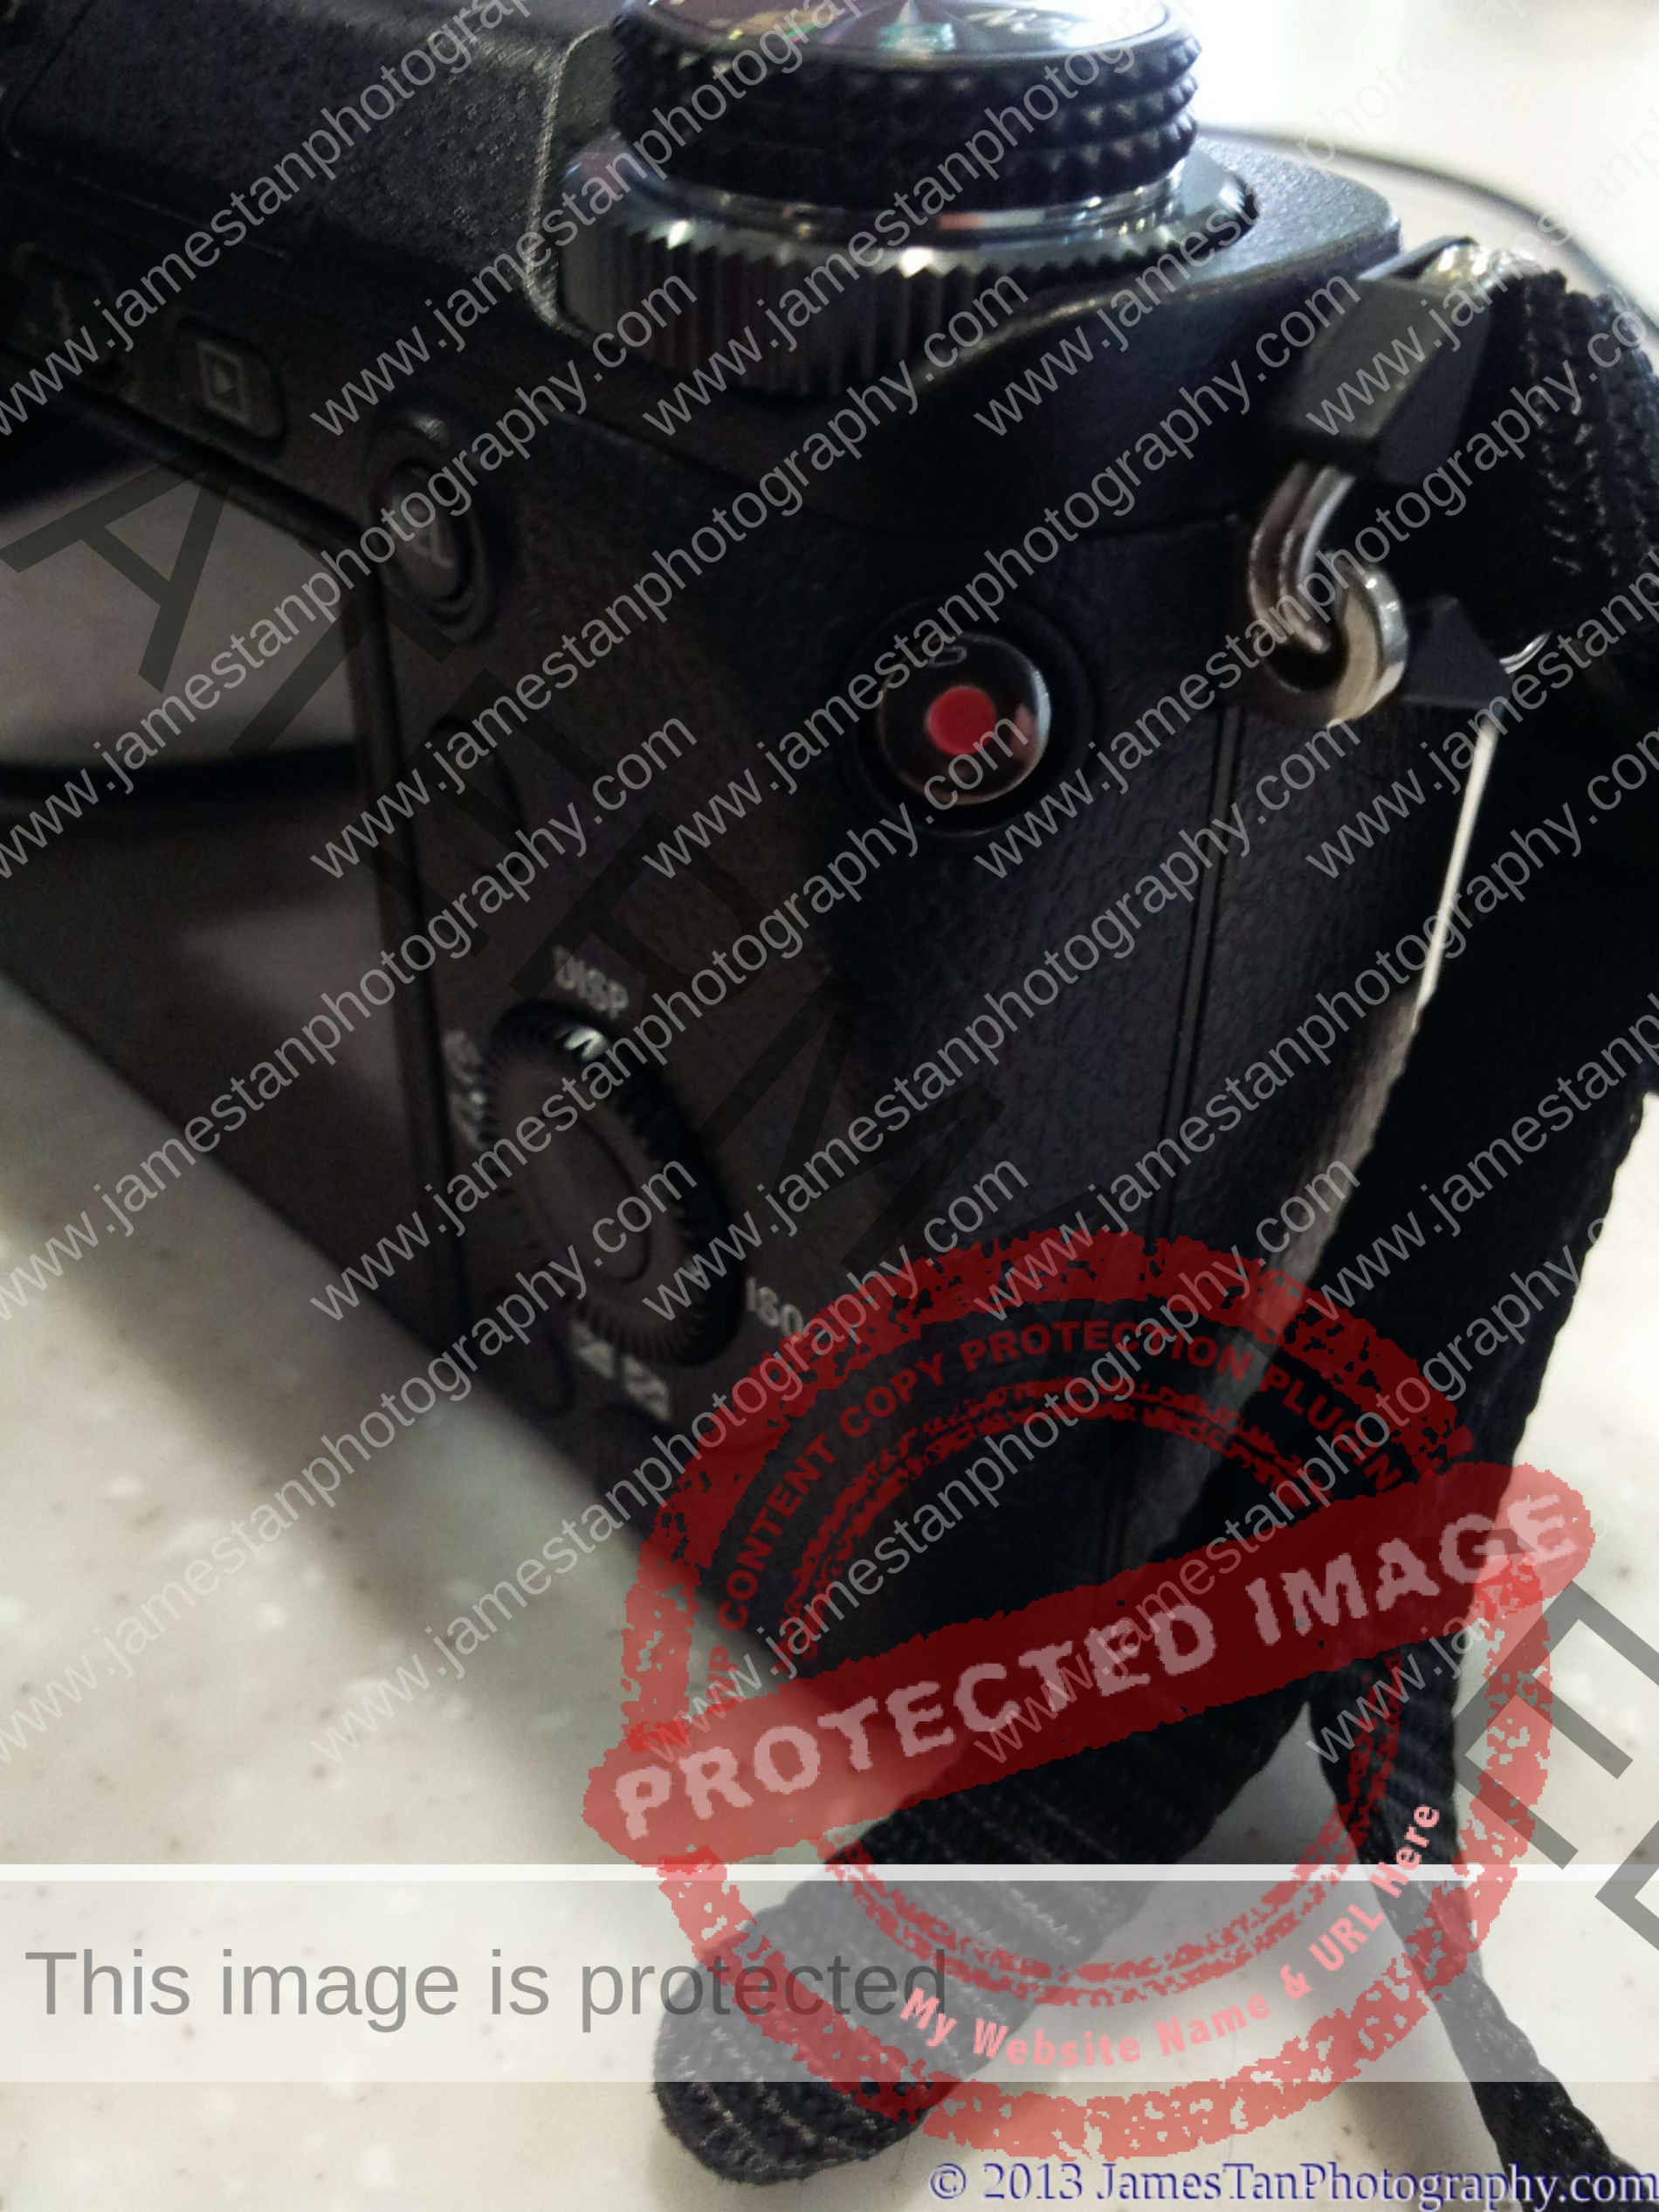
Movie Button
There is a Movie button on the right side of the camera. The location of the movie button is awkward as it is not easily accessible when we are gripping the camera. On the opposite, we will not trigger it accidentally when we are shooting still photos.
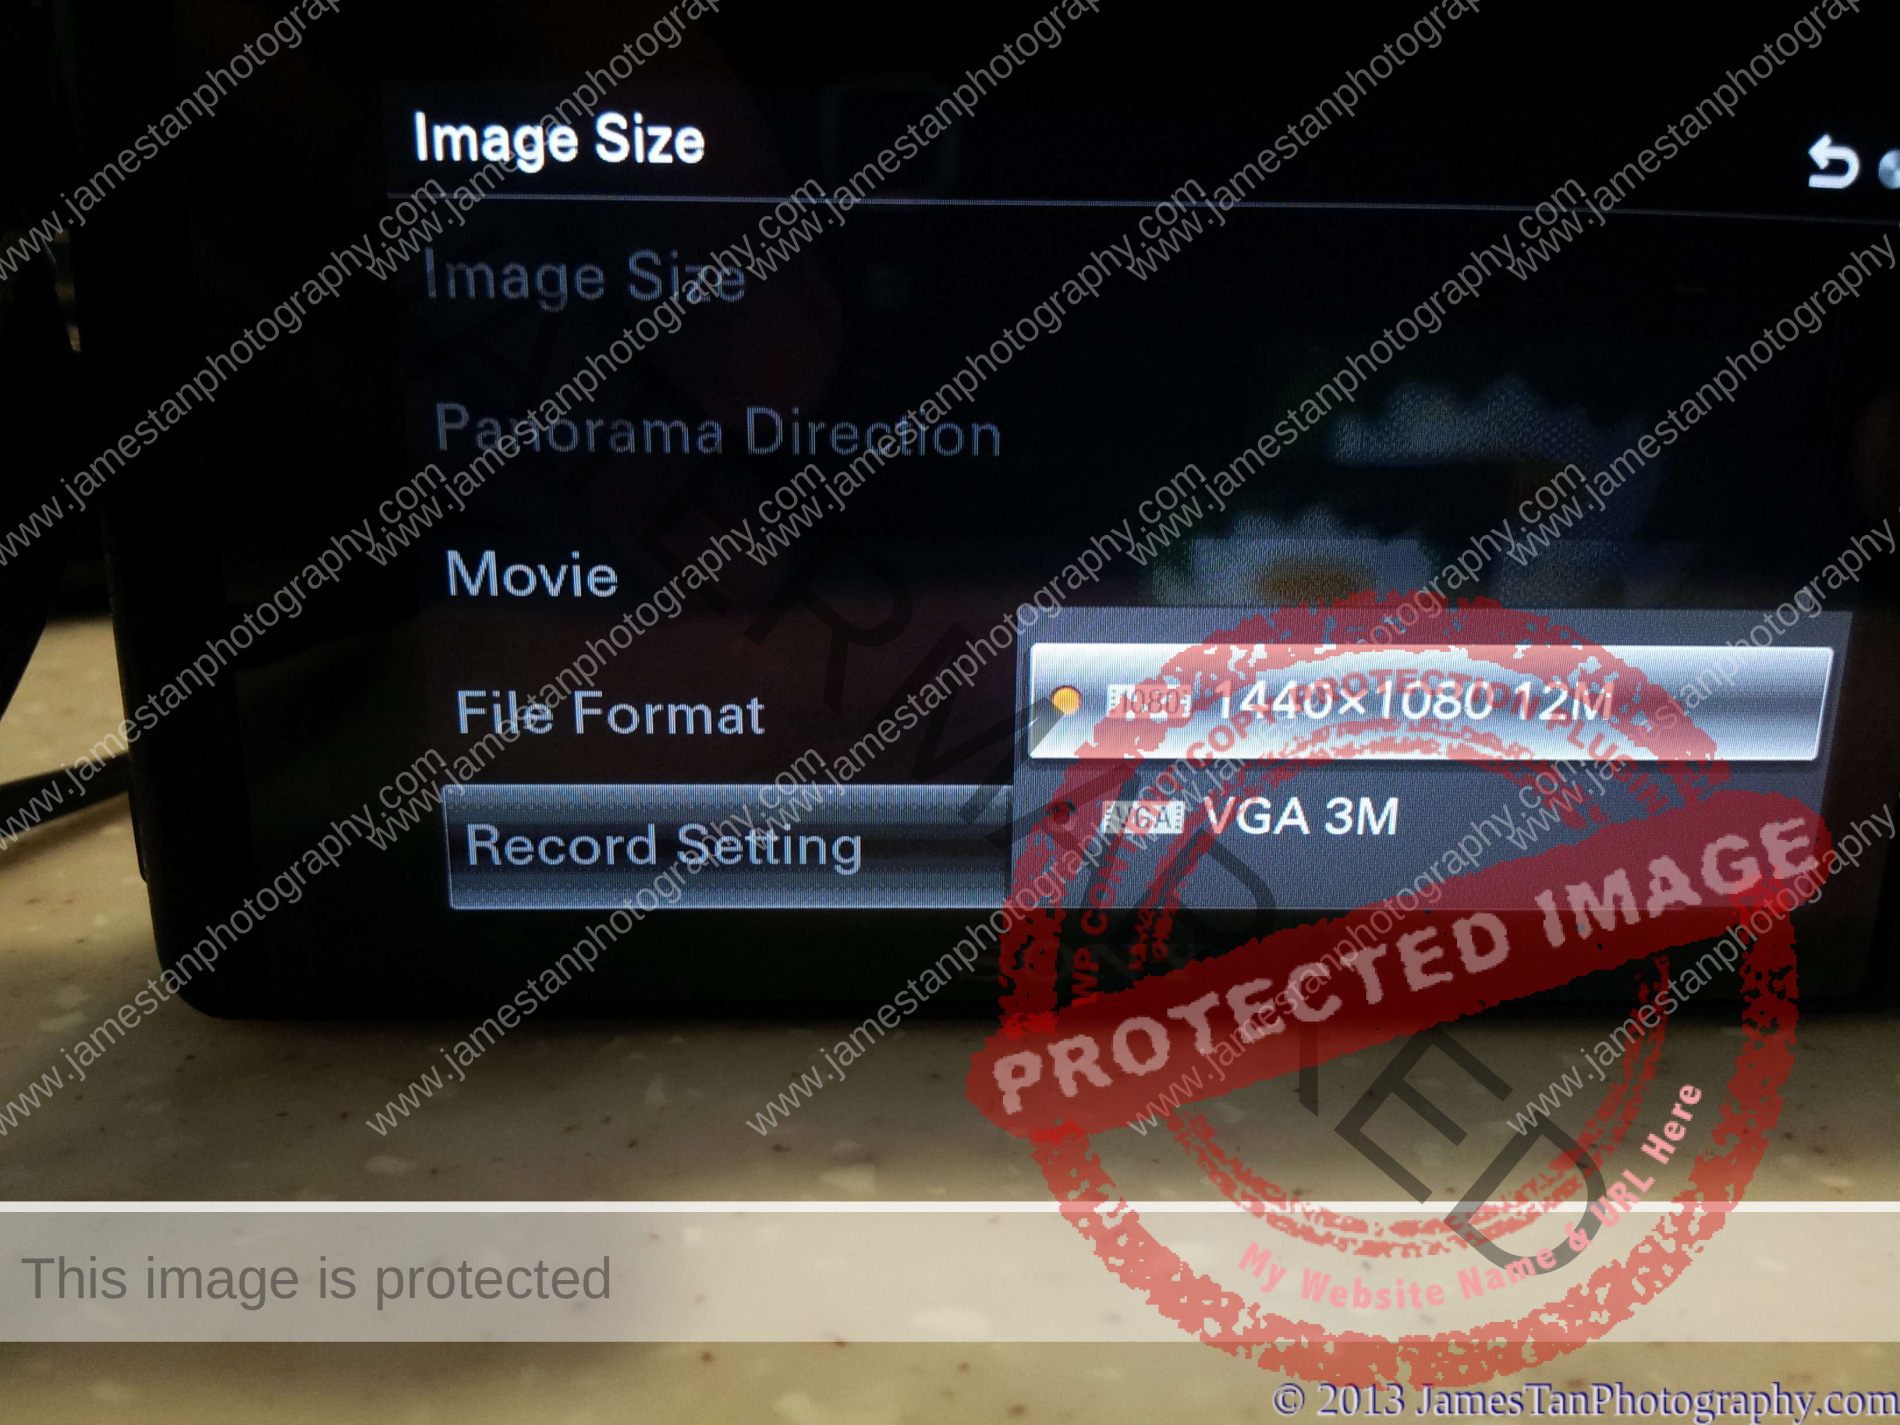
We can record the movie in two formats: AVCHD (1920 x 1080), and MP4 (1440 x 1080 or 640 x 480)

When we select the AVCHD format, we can choose the following formats:

When we select the MP4, we can choose the following formats:
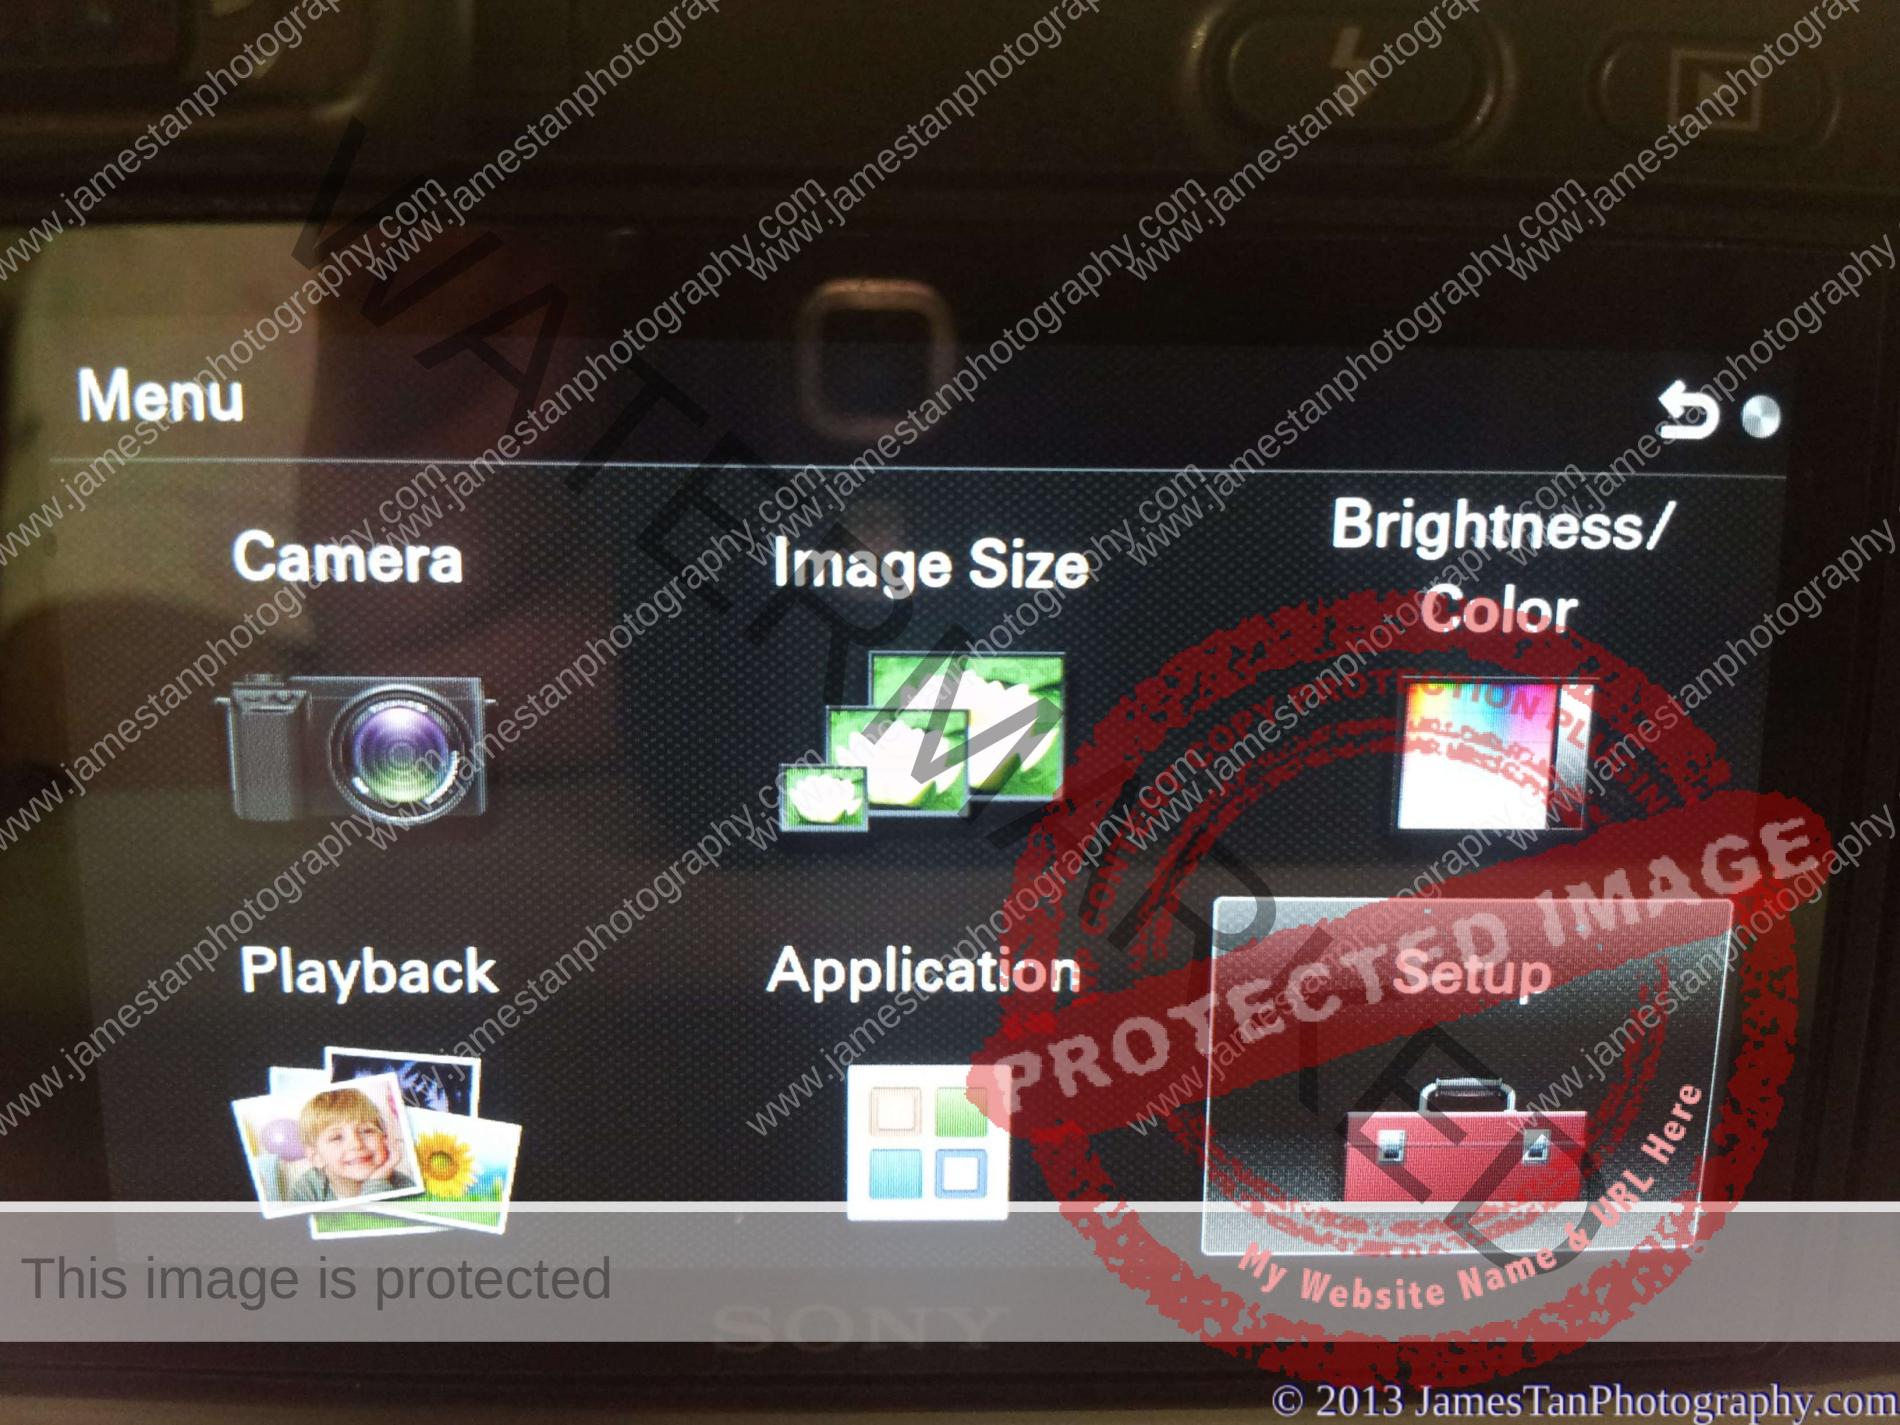
Menu
The menu on the NEX-6 still…. needs more polish and refinement. Honestly, it is not that bad, but it lacks of intuition and consistency here and there. For example, there are only eight options in the Brightness/Color, while more than 60 options are in the Setup tab. Besides, the LCD/viewfinder brightness and the colour space settings appear in the Setup menu instead of the more reasonable Brightness/Color tab. It is so confusing and annoying even after few times of use.

However, proper setup with the three customizable buttons will significantly reduce the need to access the annoying menu system.
Sony NEX-6 introduces a Quick Navi menu system that presents the preset settings in graphical mode for fast adjustment. Press the Fn button to start accessing the menu. You can find it under the Display Mode –> For Viewfinder.

Features
Superior/Intelligent Auto and Scene Mode
The “i” camera icon (with/without the +) triggers the NEX-6 into Superior/Intelligent Auto Mode. The Superior/Intelligent Auto on the NEX-6 performs excellently. It automatically selects the preset scene mode based on the shooting situation and environment. The images produced by these two auto modes are hassle-free and beautiful.
If you want to select the preset scene mode yourself, rotate the Mode dial to the SCN. Once in the Scene Mode, we can use the control dial for fast-changing of the scenes.

In the Anti Motion Blur and the Handheld Twilight Modes, the camera captures a total of 6 images at a fraction of a second and merges them into a cleaner and clearer photo. The photos shot in the Anti Motion Blur mode and the Handheld Twilight mode will only be saved as JPEG format even the camera is set to shoot in RAW format. Using these two modes on the NEX camera might draw more attention due to the louder continuous shutter noise than other Sony compact cameras. The ISO value is quickly cranked up to ISO3200 or ISO6400 when using the scene modes at night or dark scenes. The images have noticeable noise but still highly usable for small size printing.
Auto Portrait Framing
To use the Auto Portrait Framing feature, switch to Superior Auto Mode and turn on the face detection and Auto Portrait Framing function. This function does not work if RAW or RAW + JPEG is selected. The camera will first detect the face in the frame, and once the face is focused (the focus frame turns green), the Auto Portrait Framing will be activated (the icon at the bottom left will turn green, as shown below).

The camera will crop the photo you are framing and place the person in a more attractive position. The result is pretty good but not optimized for all the scenes. Sony NEX-6 saves both the original and cropped photos.
DRO and HDR
Most of us are familiar with the HDR (High Dynamic Range) photo by taking multiple exposure photos (by bracket shooting) and merging in computer post-processing to get an impressive dynamic range photo.
The Sony NEX-6 provides an excellent HDR function under the DRO option. It takes three different exposure photos and merges them in the camera! We do not need a computer to produce an HDR photo, which saves us a lot of time! Sony NEX-6 keeps one original image without any DRO effect and one HDR final image when selecting the HDR mode. The photos below show the result from different HDR levels:

From the comparison above, the results are pretty good except for the colour of HDR 5.0EV and HDR 6.0EV, which are significantly washed out than other HDR images. However, the HDR function is only available when shooting in JPEG mode. How about the RAW shooter? No worry, NEX-6 provides the DRO (D-Range Optimizer) which is similar to the HDR function but only takes one photo instead of three. The sample photos of DRO:

The shots with the DRO effect look good. Surprisingly, the colour of DRO lv 5 looks better than the HDR 5.0 EV and HDR 6.0 EV. The DRO provides five different level options, while the HDR provides six different EV level options. The DRO and HDR levels are set to auto by default, and we can either choose one or completely switch them off.
Sweep Panorama
We can easily switch to the Sweep Panorama shooting mode on the Sony NEX-6. I shoot it handheld in RAW mode (Yes, it works in RAW mode), and I can use the control dial to change the sweeping direction from left to right, from right to left, from top to bottom, and from bottom to top.

The photo is seamless, and the result is pretty good.
Infrared Remote Control
We can use the infrared remote control from Sony (RMT-DSLR2) to remotely release the shutter of the Sony NEX-6. This feature is helpful, especially when shooting in Bulb mode. It prevents any shaking from holding the shutter on the camera body hence producing a blur-free image. To enable this feature, go to the Drive Mode and change it to Remote Cdr.

However, the remote control is sold separately for SGD 39. Alternatively, suppose you have the Sony Entertainment Account, then you can install the free Smart Remote Control in the NEX-6. After that, install the PlayMemories Mobile on your mobile device to remotely control the camera shutter.
Wi-Fi and Apps
The NEX-6 is a Wi-Fi capable camera, and it has 90MB of local memory storage to install some Sony camera apps. There is no on/off option for the Wi-Fi; thus, it might constantly search for the wireless signal and drain the battery faster.

In the menu, there is one Application tab. Some practical applications are available in either free or pay versions. Before installing the available app, you must enter your Sony Entertainment Account to download the app (even the free app). Entering the account details on NEX-6 is a painful experience as you have to use the rear control wheel to scroll through the virtual keyboard letter by letter.
However, not all countries and regions can install the camera Apps, which is a letdown for those camera Apps fans (I’m a bit disappointed too, but I can live without it).
Picture Effect
Sony provides some creative picture effects to its cameras as well as the NEX-6. Change the camera mode into Superior Auto, press the rear control wheel at the position of Exposure adjustment (the exposure adjustment is disabled in the Superior Auto only, and it will trigger the picture effects instead)
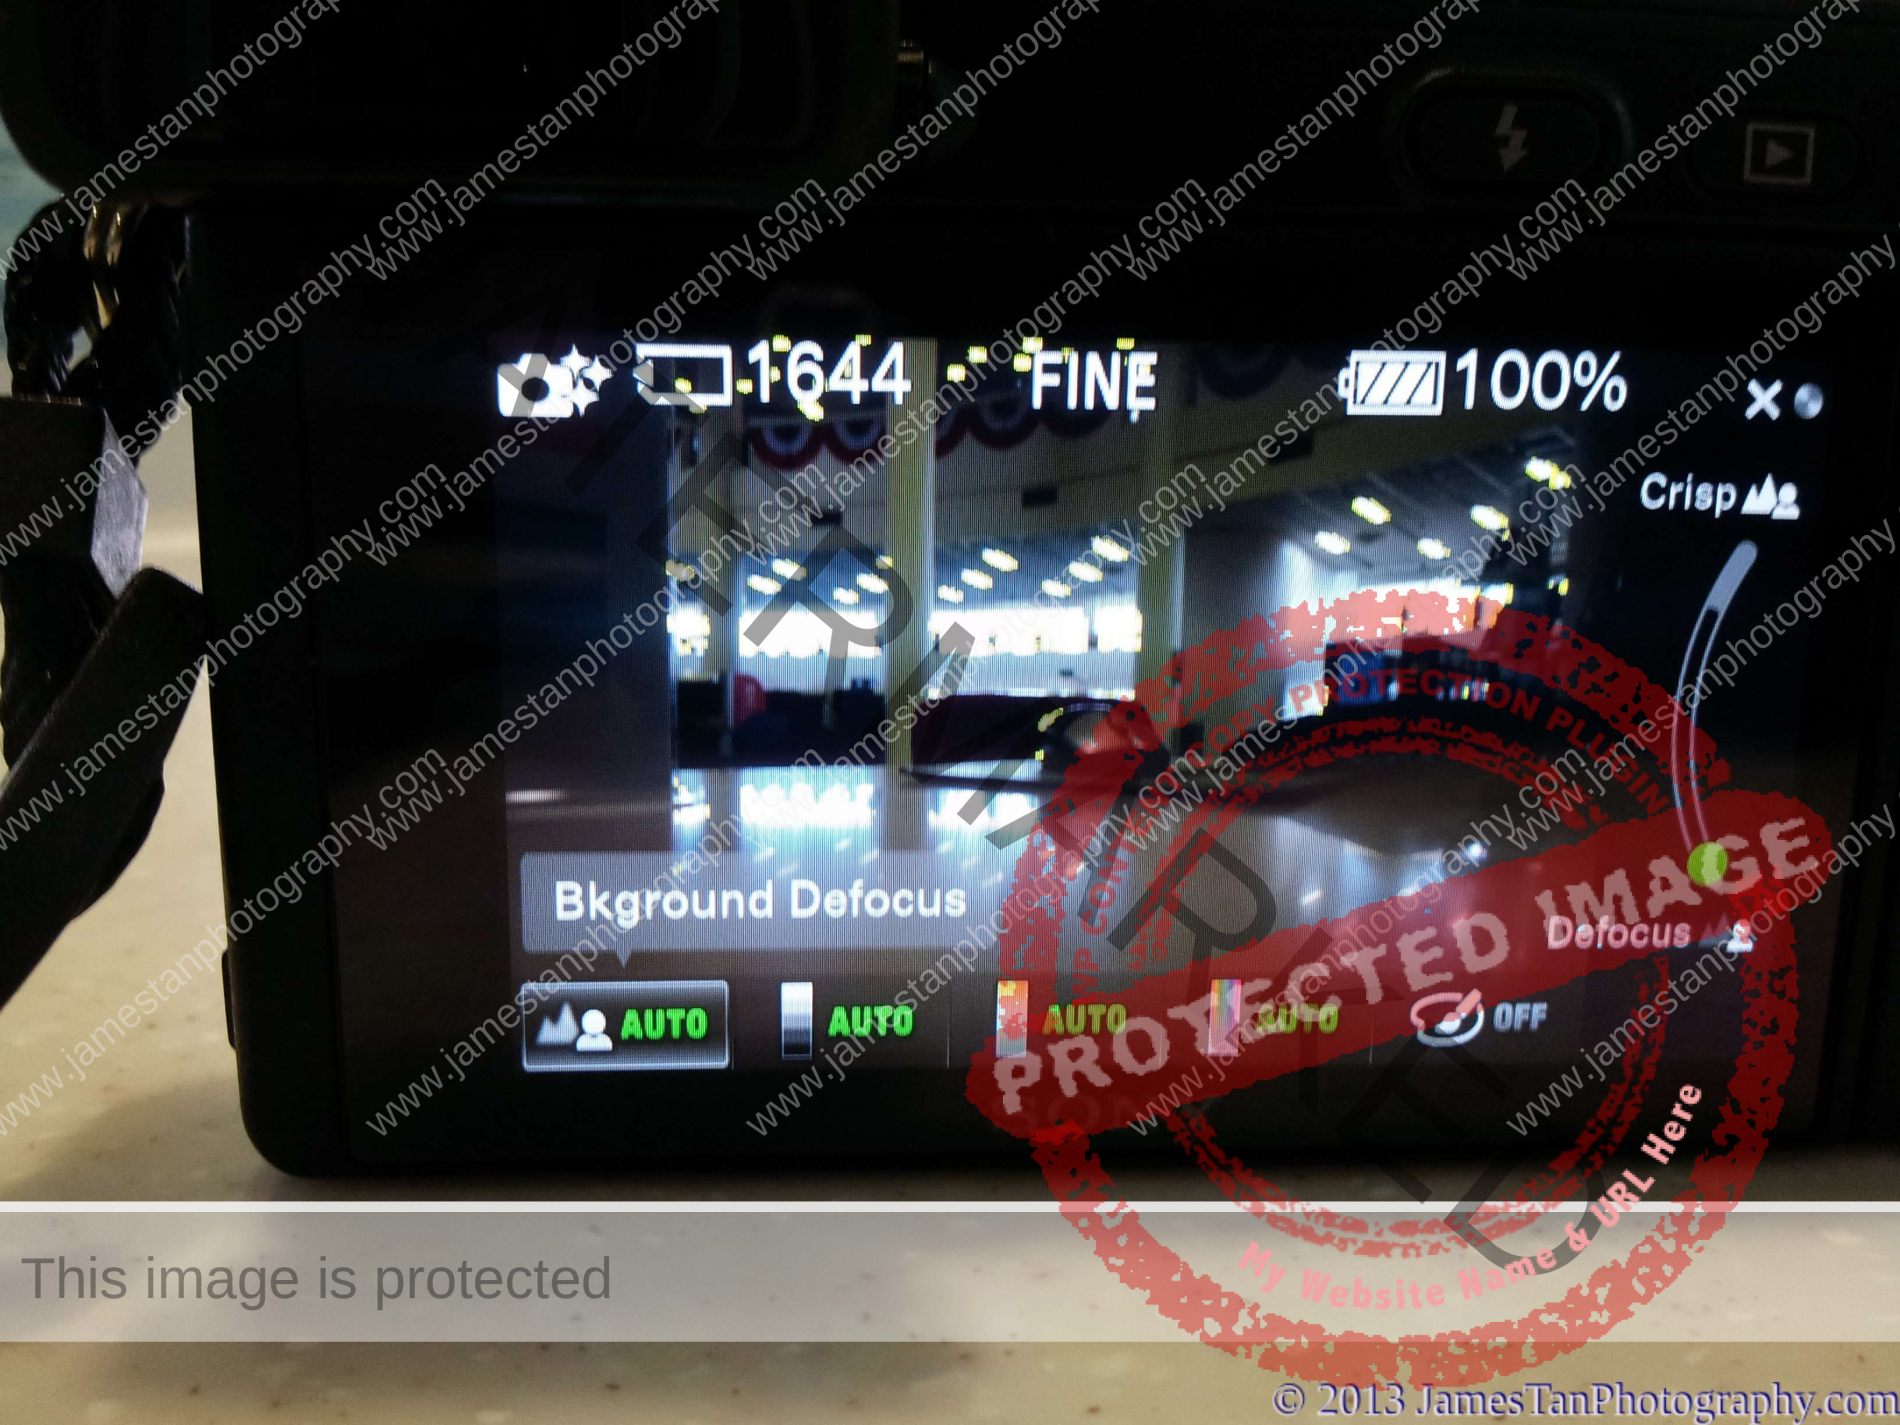
There are five different adjustments: Background Defocus, Brightness, Colour, Vividness, and Picture Effects. The Background Defocus can create some Bokeh feel; the Brightness, Colour, and Vividness do what they mean for; and the Picture Effects provides some creative filter effects. Adjusting the effect is easy. Select the effect and then change it by scrolling the rear control wheel, as shown above.

Performance
Focus System
The NEX-6 provides three focus modes, Auto Focus, Manual Focus, and Direct Manual Focus. Sony NEX-6 implements the latest Hybrid Auto Focus System (99 points Phase Detection and 25 points Contrast Detection), which we have seen in the Sony NEX-5R.
When I got my NEX-6, all the E-mount lenses supported this Hybrid Focus by upgrading the lens firmware. Although the autofocus speed is still not comparable to a DSLR, it is fast enough for most non-critical speed shooting situations. In the AF mode, we can choose between the single AF and continuous AF. Sony NEX-6 uses a built-in AF illuminator to assist fast focusing, but it attracts so much attention thus I usually switch it off.
Continuous Shooting
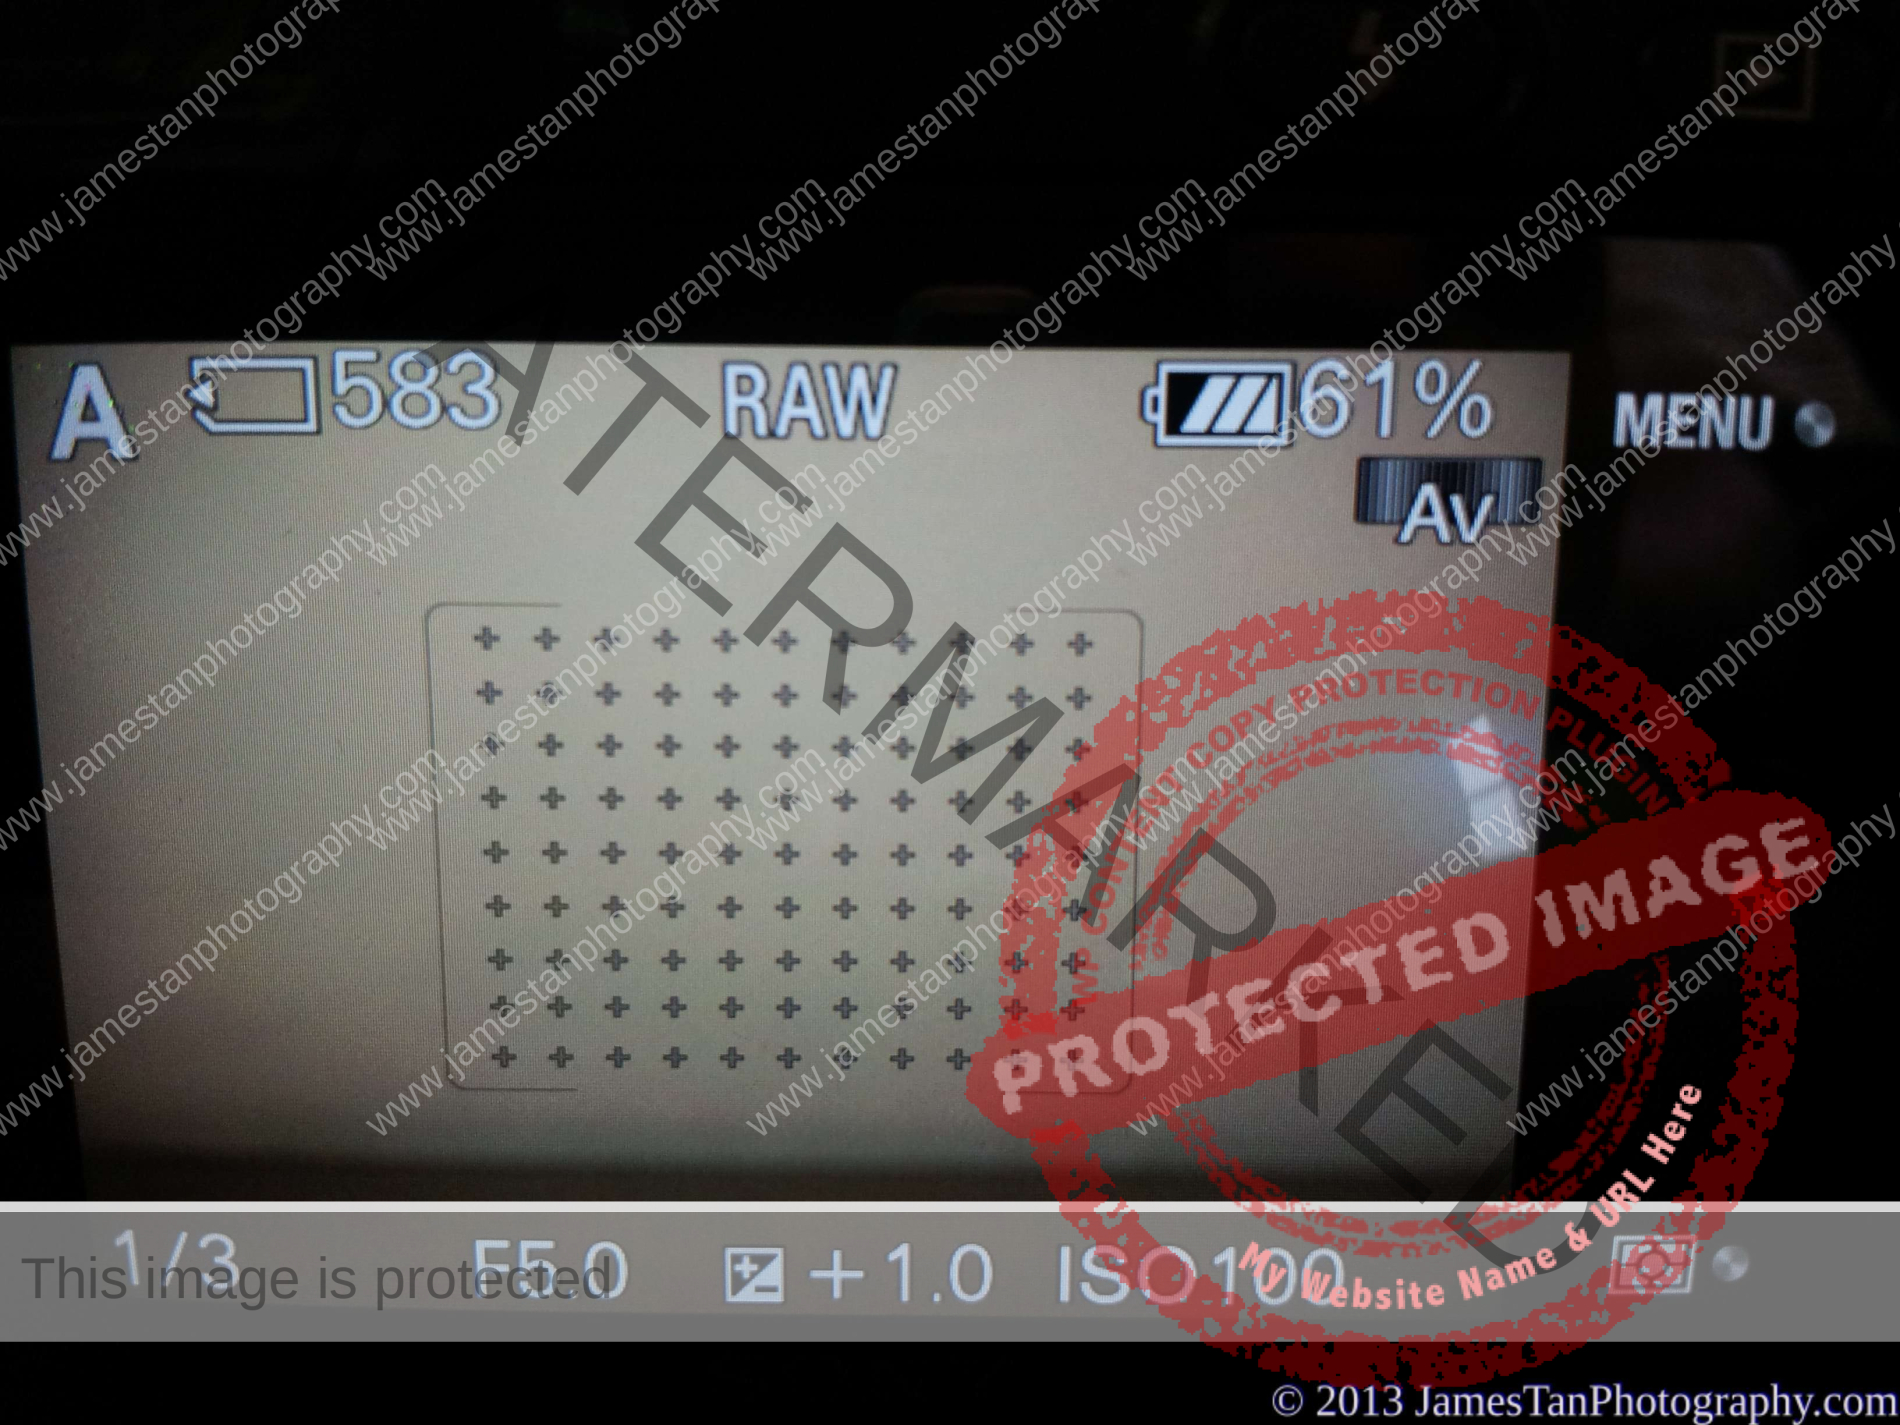
The NEX-6 can continuously shoot at approximately 3fps in the standard continuous shooting mode and about 10fps in the speed priority shooting mode. However, the image quality (RAW, RAW + JPEG, JPEG) and the writing speed of the memory card will affect the continuous shooting speed.
Let’s see how the Hybrid AF system performs. I set my NEX-6 with the Sony SEL35F18 lens on a tripod and selected the Aperture mode at F5.6, continuous AF, and standard continuous shooting mode to shoot the people playing the roller coaster.The following are the 100% crops from the original images.
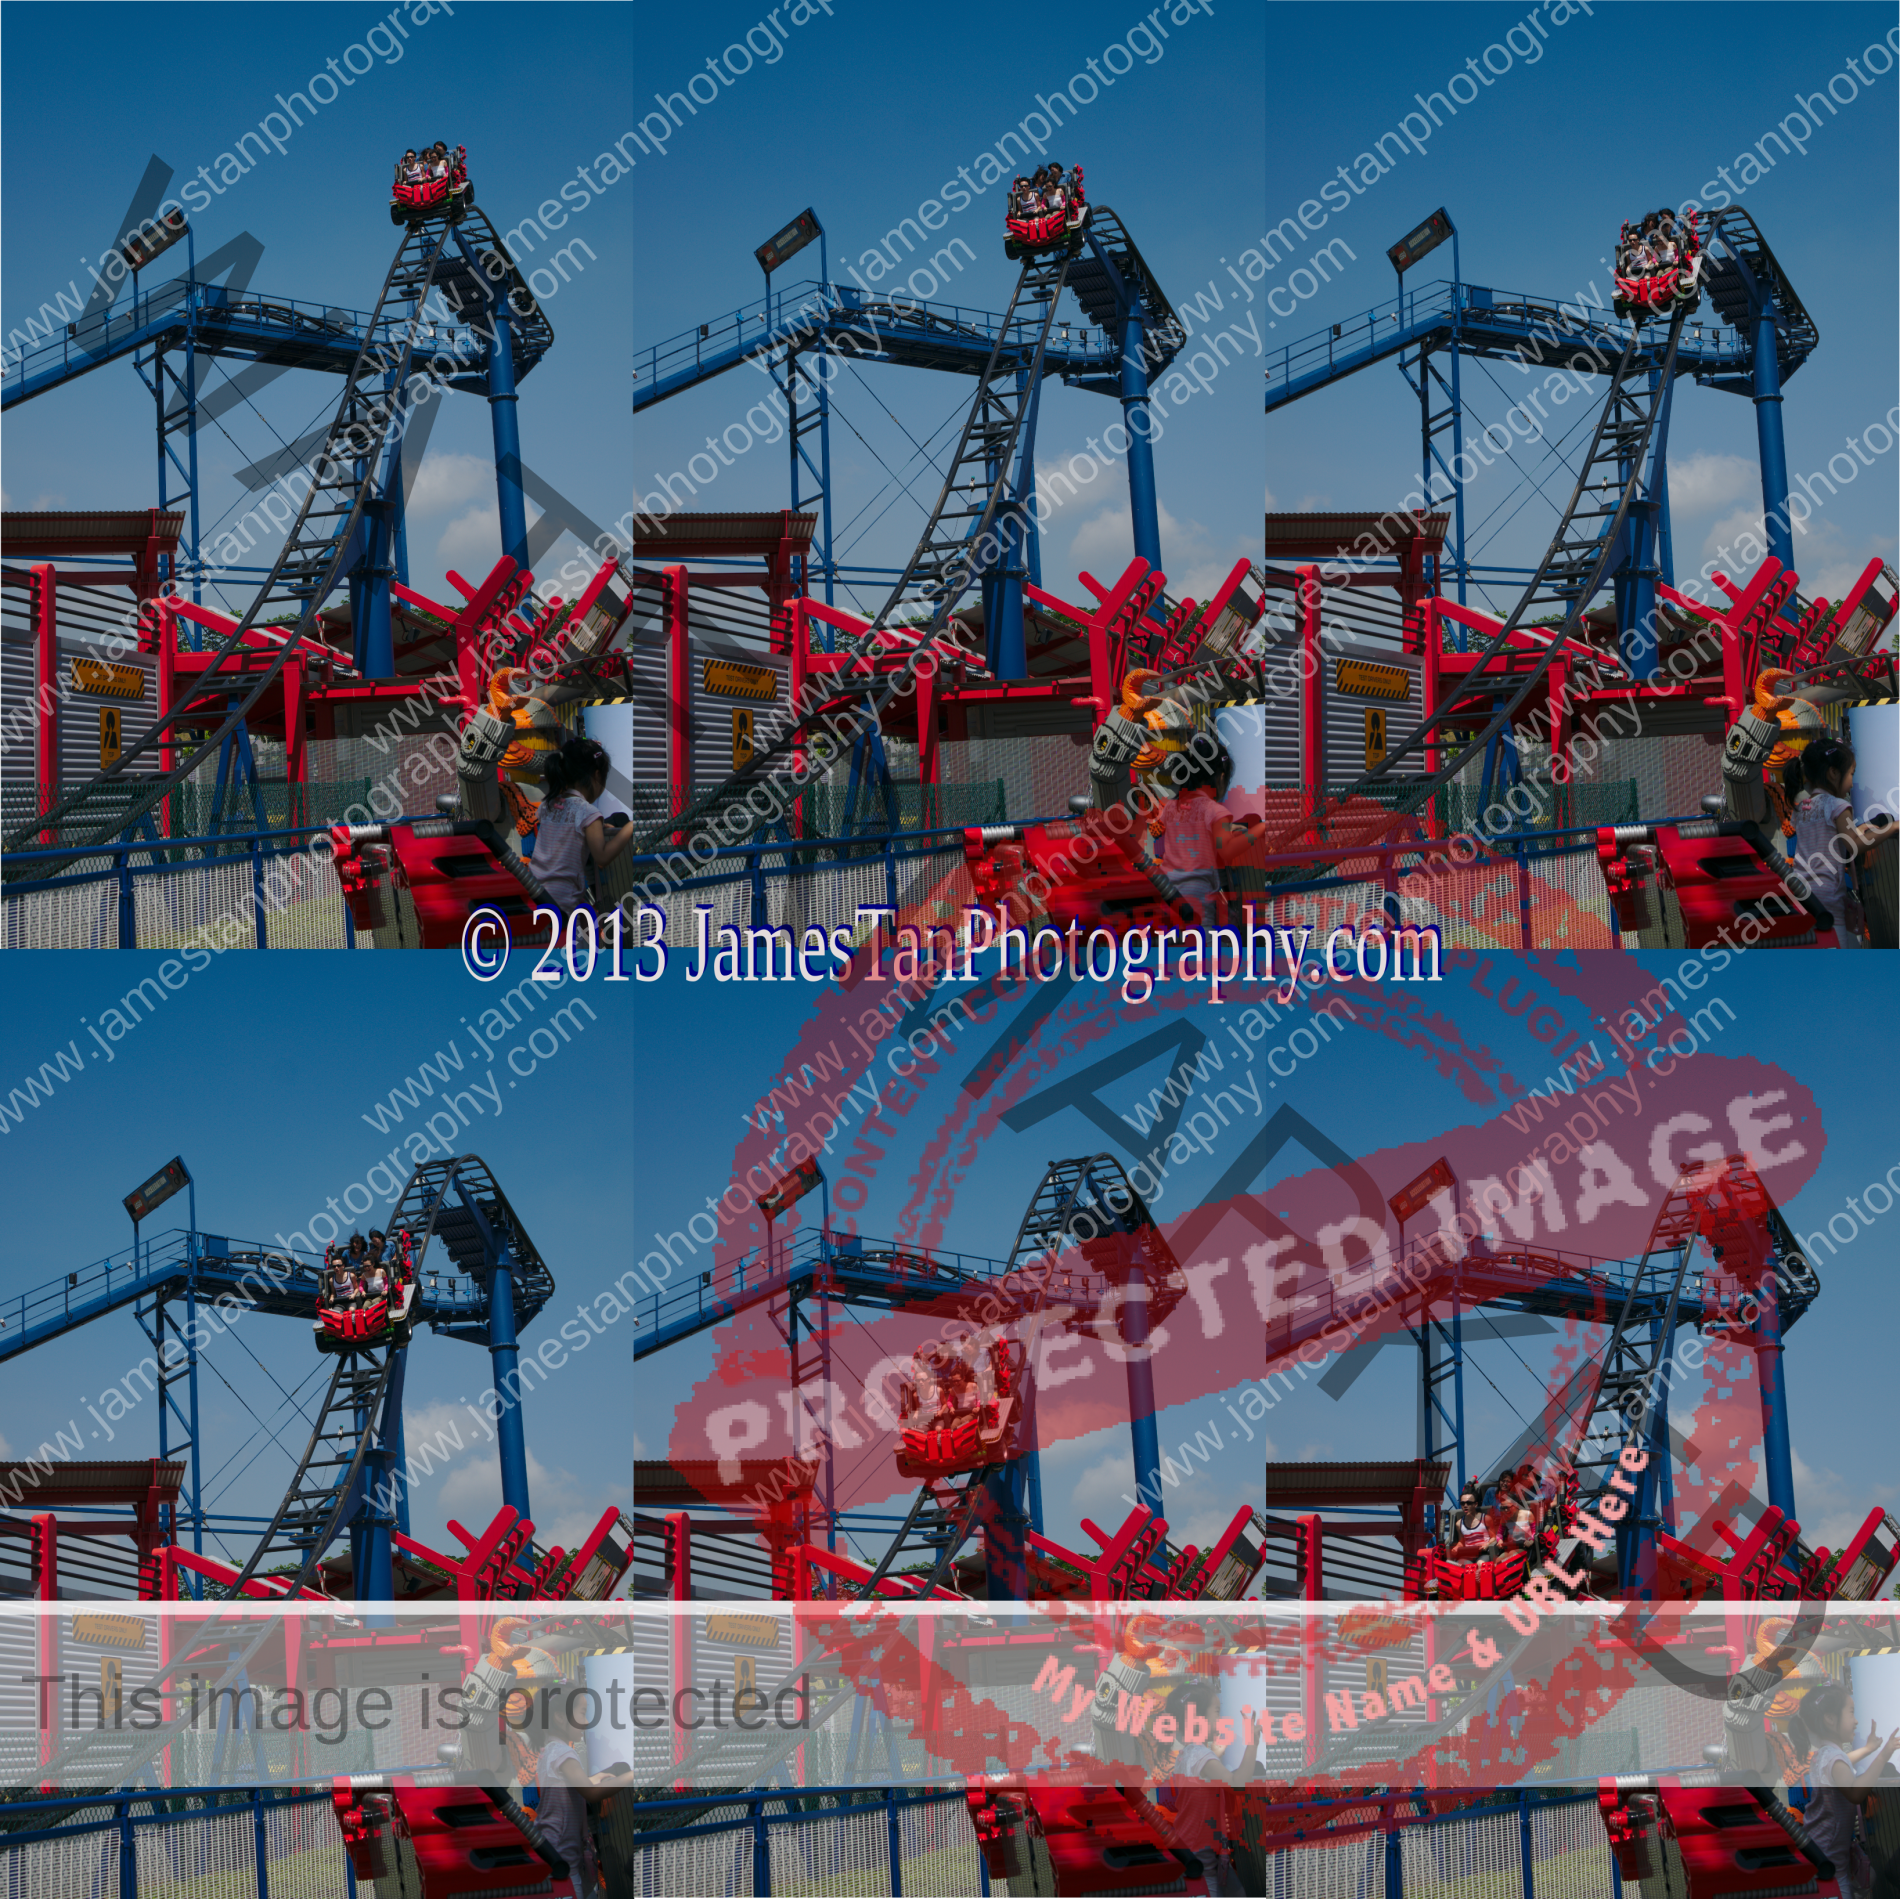

As shown above, the people in the roller coaster (top 3 images and bottom left) are well focused while the other two are slightly miss focused.
Sony Alpha NEX 6 does support the Direct Manual Focus function. The DMF is an excellent combination of AF and MF, which uses AF to focus the object by half-pressing the shutter button, keep half-pressing the shutter button, and then rotate the focus ring to fine focus on the object.

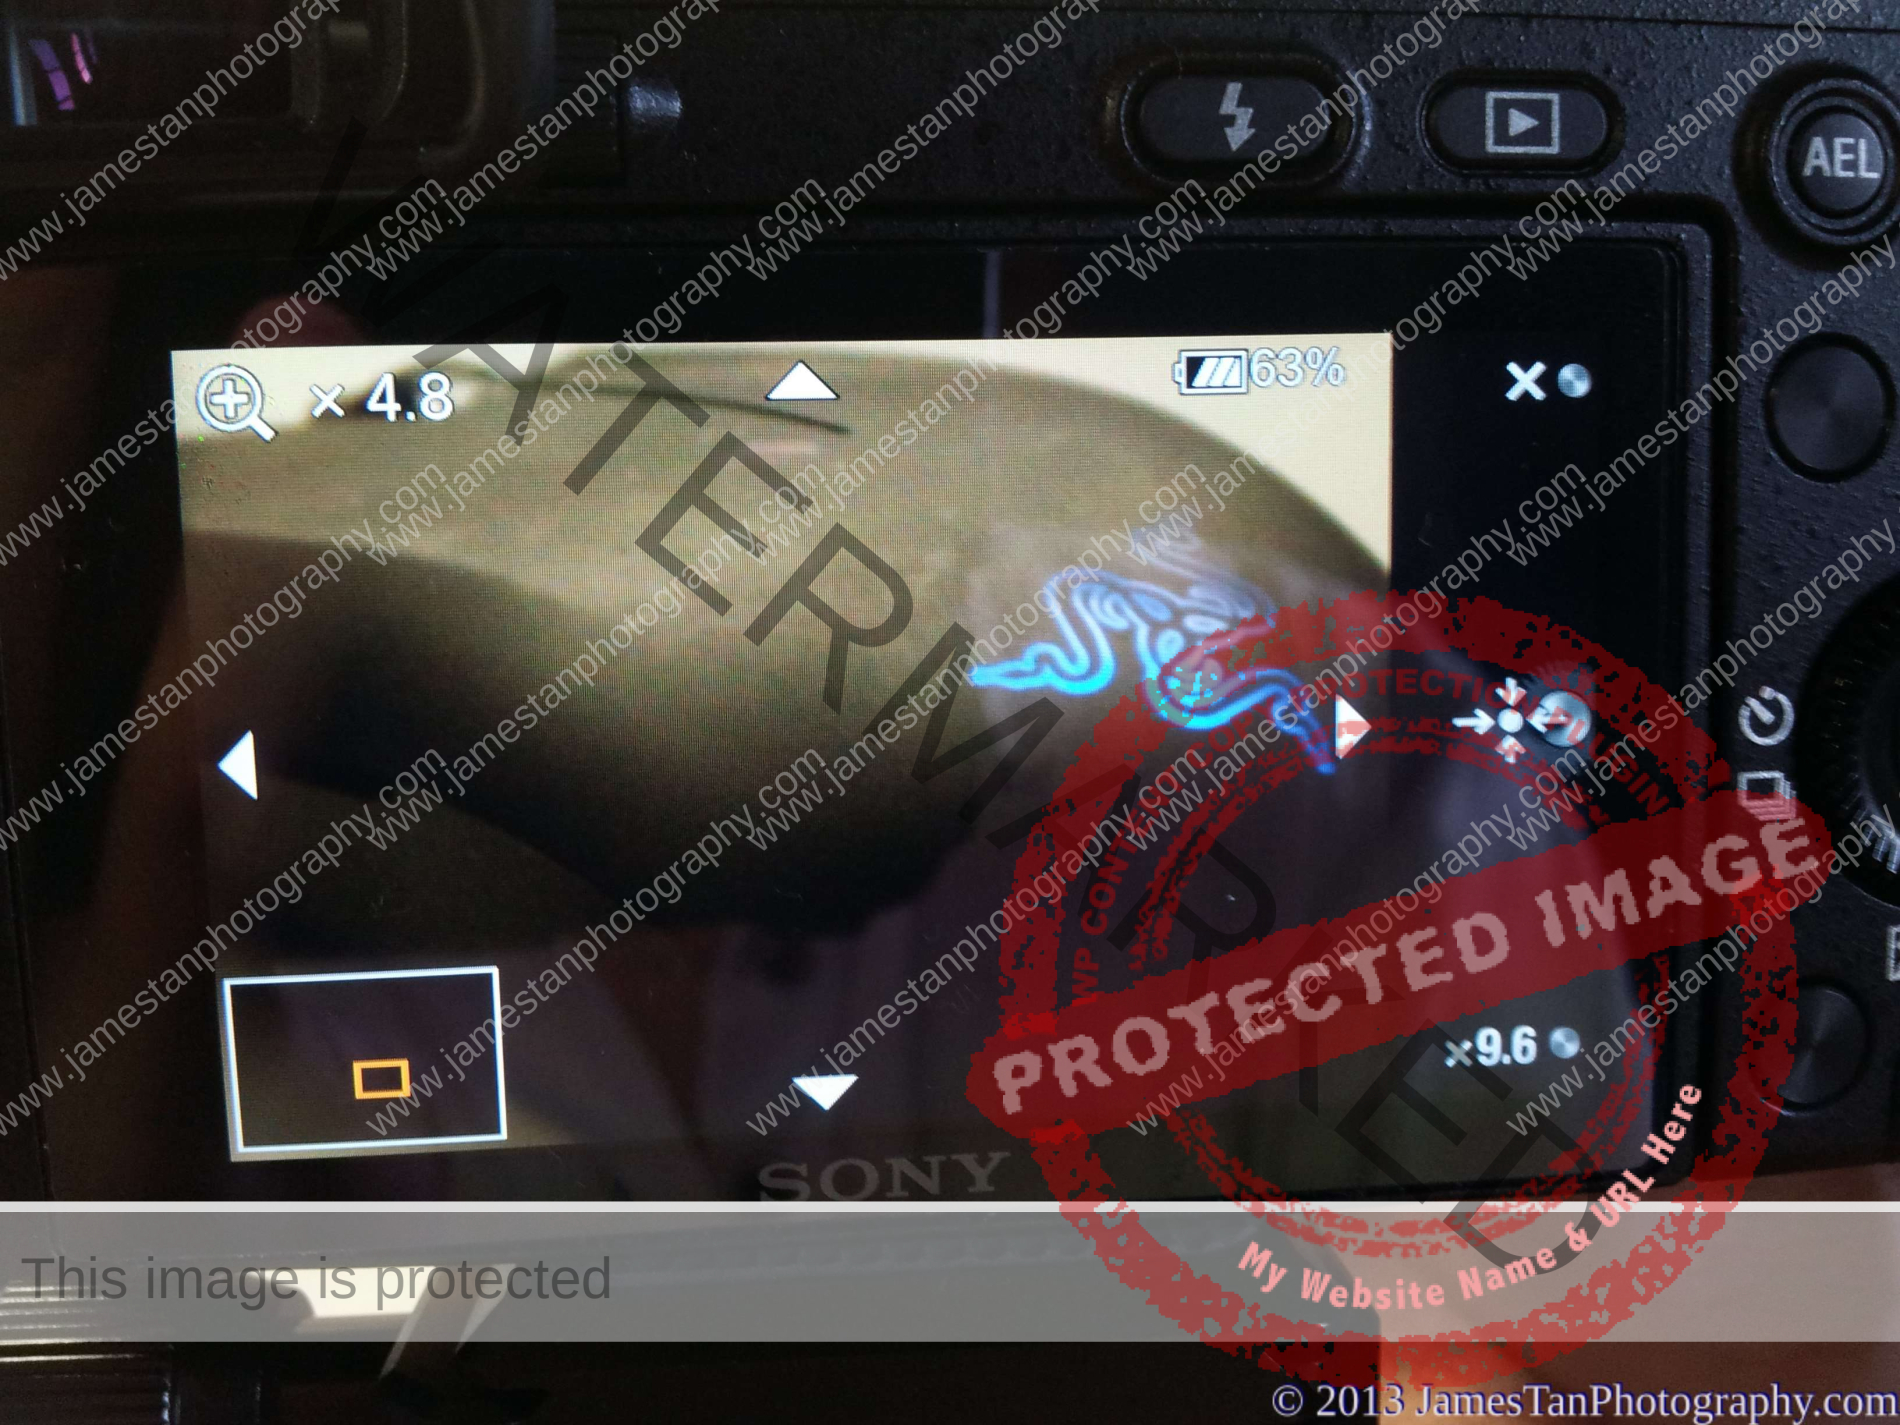
The Peaking Function and MF Assist Function help a lot when manually focusing. The Peaking Function provides high/mid/low/off peaking area and white/yellow/red to highlight the in-focus area (as shown above). The MF Assist Function can enlarge the focusing area to 4.8x or even 9.6x larger for fine-tuning. However, this function is only available in DMF and MF only.
ISO Comparison
The NEX-6 has a wide range of ISO which from ISO 100 up to ISO 25600. The following are the 100% crops from the RAW for each ISO:

The comparison shows that the noise becomes noticeable from ISO 3200 and becomes significant at ISO 12800. Sony NEX-6 retains an acceptable level of details at ISO 25600, but I guess none of us would like to use the ISO higher than ISO 6400.
Battery Life
Sony NEX-6 uses the NP-FW50 battery as well as other NEX. The Sony official specification sheet states that one full charge could last for approx 370 shoots with full use of the LCD screen. It is lesser than its older brother NEX-7 430 shoots but more than the NEX-5R 330 shoots.
In real-life shooting, I mostly use the EVF (at medium brightness) for shooting with a mix of the LCD (at 2nd lowest brightness) for playback and adjust some settings. One full battery charge usually lasts me for at least 230 shots and at most up to 280 shots. If only use the LCD screen for shooting and some settings adjustment/playback, then one full battery charge can last for 350 to 390 shots. The battery is good among the mirrorless cameras, but it is still far from the DSLR, typically 700 to 1000 shots per charge. So do remember to bring an extra battery or two when going for a whole day shooting event.
Bottom Line
I have owned the Sony NEX-6 for two months. I’m happy with it as it is compact and lightweight. The 16.1 MP APS-C sensor is less demanding in lens quality than the NEX-7 24 MP APS-C sensor, resulting in better high ISO shooting capability. Compared to the NEX-5R, the NEX-6 tilt-able LCD screen is more than enough to suit my shooting style as I seldom take a self-portrait.
The NEX-6 provides an approximately 100 % coverage of XGA EVF, which is helpful for outdoor shooting (a bright and clear view). Although the NEX-6 does not feel as solid as the NEX-7, it is not bad. It has a high-quality body build, and I’m able to hold the NEX-6 for a whole day of shooting without any uncomfortable and tiring feel.
If you own a NEX and want to upgrade your NEX, stay claim and wait for the rumor full-frame NEX (probably in September 2013, where the source comes from Sony Alpha Rumor). For those considering starting using the NEX as your first mirrorless camera, find the functionality that fits you the most. You can ignore the quality of the photo taken by all of the 3 NEXs mentioned above as you can’t tell the difference (unless you intend to use it to print a 20 inches poster). All of them are capable of producing incredible shots. So how do you think about your NEX camera?
Thanks for reading, and I hope you enjoy your shooting journey.
Leave a Reply