A new firmware v2 is available a few days after receiving my new Tamron 20-40mm F2.8 in Dec 2022. I am aware that I have to install the Tamron Lens Utility on my M1 Max MacBook Pro to update the lens firmware. So I download the installer from Tamron’s official site and read the DO’s and DON’Ts like “Do not connect a lens to your computer via a USB hub.” blah blah, etc.
I connect the USB cable to the lens and MacBook Pro, but nothing happens! The lens is neither detected by the Tamron Lens Utility nor the Mac Disk Utility. I swap a few USB cables, attach and detach the lens from the camera, and change the camera’s USB connection settings, but nothing works!

I found many Mac users having issues detecting their Tamron lens and updating the firmware, but I didn’t see any solution posted. I have no choice but to go to Tamron’s step-by-step guide, and yes!!! I found out that I missed one driver installation (yea, somehow, my eyes auto-censored it during the first installation).
Therefore, I am writing a simple installation guide and important points here, and I hope it saves some hassles for those with issues with the Tamron Lens Utility and Mac. This guide is based on the latest Mac OS Ventura 13.3.1 (as of 14 APR 2023) on an M1 Max MacBook Pro.
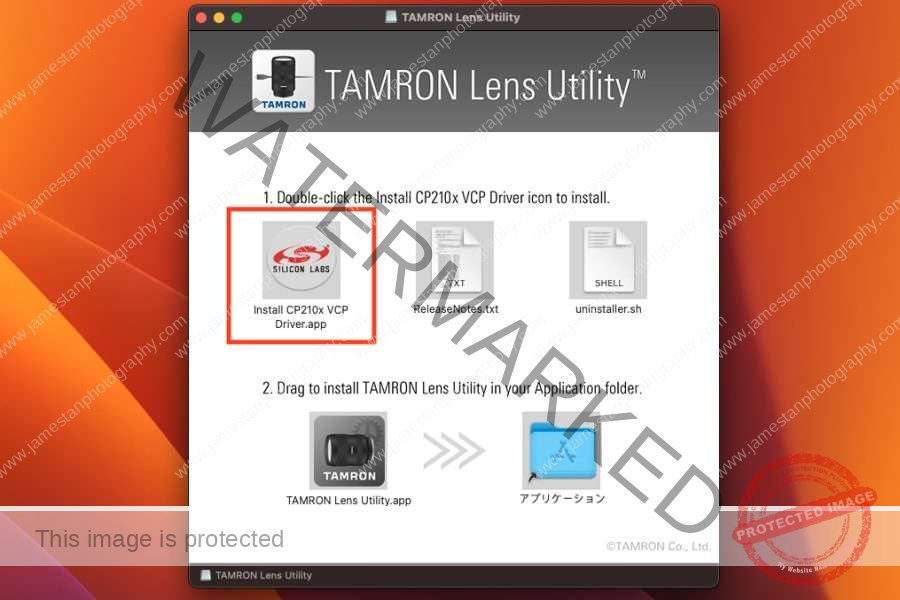
Tamron Lens Utility Installation
1. Download Tamron Lens Utility
Download the installer from Tamron’s official site.
2. Install CP210xVCP Driver
Yea, it is a COMPULSORY installation to make your Mac recognize the Tamron lenses.
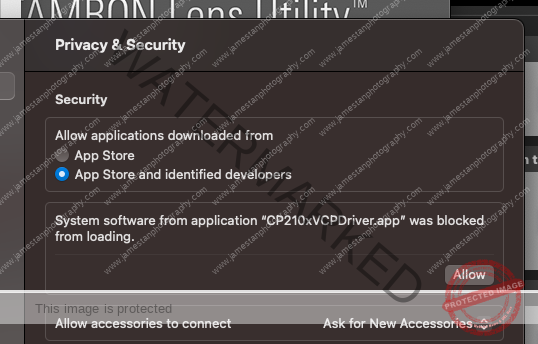
There will be a security prompt at the last few steps of installation. Proceed to “Open System Settings” and allow the “CP210xVCPDriver.app”.
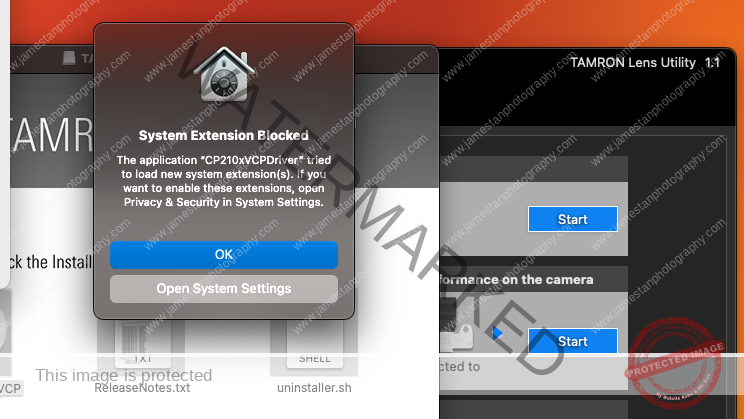
If you missed or didn’t see this prompt, you may go to “System Settings” > “Privacy & Security” and scroll to the bottom, ensuring the “CP210xVCPDriver.app” is not pending any permission.
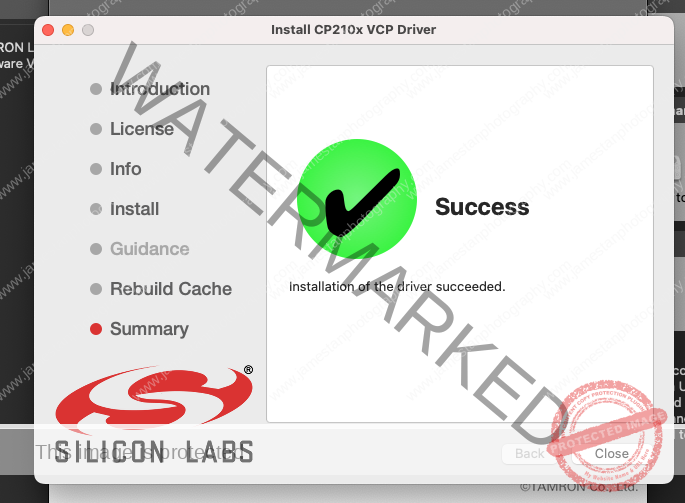
You should see a successfully installed page once the access is granted.
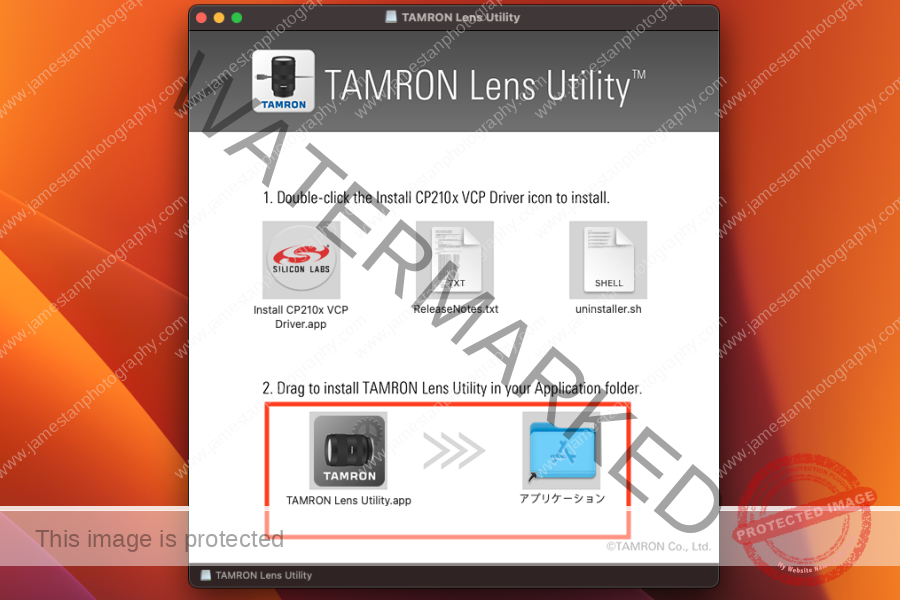
3. Install Tamron Lens Utility
You may skip this step if you installed it earlier. Drag the Icon into the Application folder as indicated.
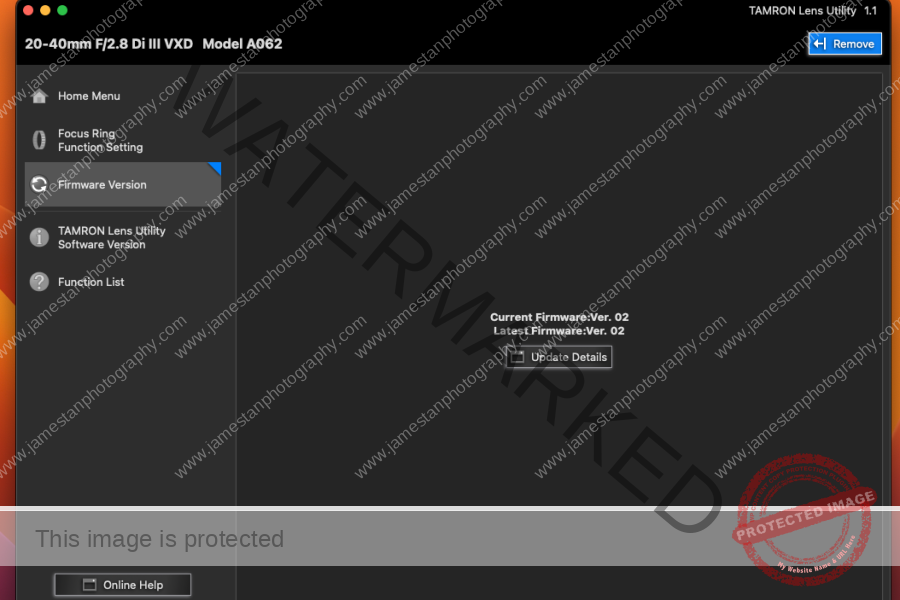
The Tamron Lens Utility should detect the compatible lens and list the firmware info now.
Troubleshooting
1. USB-C Data Cable
If the Tamron Lens Utility still doesn’t recognize your lens after the driver is installed, kindly make sure you use a data cable instead of a charging-only cable.
One way to determine if the cable is a data cable is to connect that cable between your Sony camera and computer. If the camera is not detected on your computer, the cable is likely for charging only. Try other USB-C cables until you get a data cable.
Tips: Use the USB-C cable that comes along with your Sony camera.
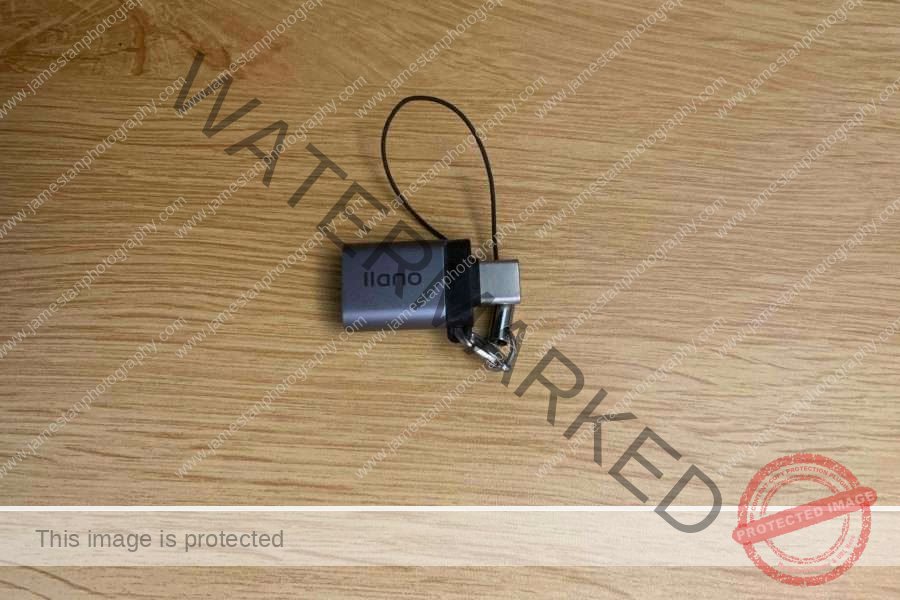
2. USB Hub/Converter
One of the Tamron firmware update instructions is “Do not connect a lens to your computer via a USB hub.” It is frustrating as the newer generations’ MBP only come with USB-C (yea, I know they are ThunderBolt ports, but I just wanted to simplify the terms here), and Tamron does not provide a USB-C to USB-C data cable in the box.
Luckily, a simple USB-A to USB-C converter works fine to update the lens firmware on my Tamron 20-40mm F2.8.
Besides, Tamron Lens Utility recognizes the Tamron lens through the CalDigit TB3 hub and HyperDrive USB-C hub. Unfortunately, I couldn’t roll back the lens firmware to test the firmware update through the hubs.
Final Thoughts
The Tamron lens firmware update process was as simple as Sony native lenses when Tamron introduced the WOW compact 28-75mm F2.8 for Sony E-mount cameras. Just leave the lens on the camera body and connect the camera to the computer through a USB cable, and run the firmware update, done.
The new lens firmware update process is tricky on Mac, as it requires two separate installations. I wonder if Tamron added the driver “CP210xVCPDriver.app” separately after Mac users’ feedback about the lens detection issue. I suggest Tamron merge the driver and lens utility apps to avoid confusion and simplify the installation process.
Feel free to share your Tamron lens firmware update experience in the comments so we can help more people out there. Cheers!

Leave a Reply